When contemplating what to serve with a fresh batch of queso fresco, the options are endless! I love pairing this cheese with warm corn tortillas for delightful tacos filled with roasted veggies. Picture this: a sunny afternoon, sizzling outside as you dive into some homemade guacamole layered on soft tortillas, all topped with crumbled queso fresco.
Throw in a refreshing mango or pineapple salsa, and you’ve got a fiesta on a plate! You can also toss it into a vibrant salad or serve it alongside traditional beans for a complete meal. Trust me, this cheese elevates every dish it’s paired with.

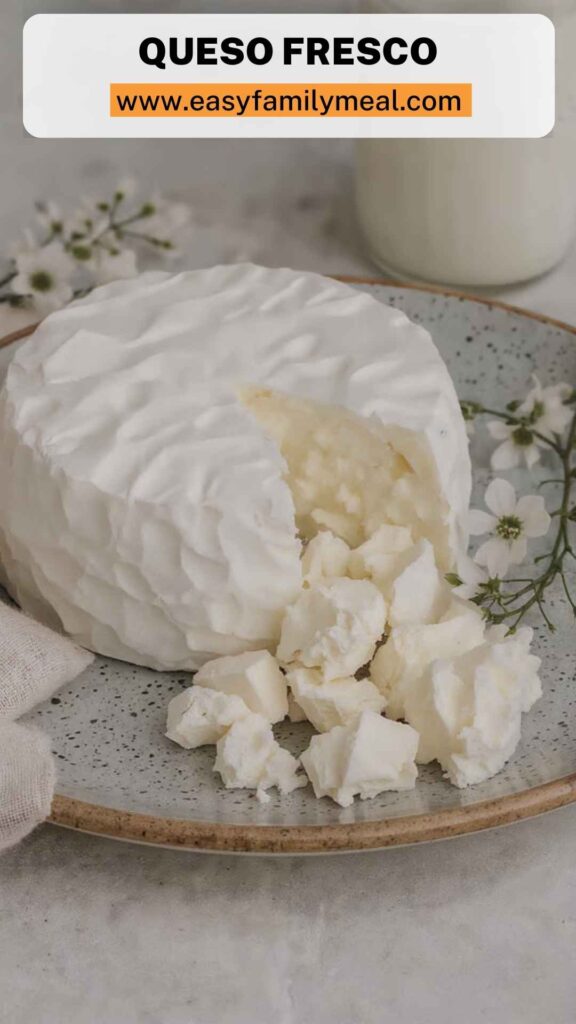
What is Queso Fresco?
Let’s backtrack for a moment. Queso fresco, often referred to as “fresh cheese,” is a staple in Mexican cuisine. Unlike its aged cousins, it has a soft, crumbly texture and is typically made from cow’s milk or a blend of cow and goat milk.
This cheese is not aged, giving it a bright and mild flavor profile. I found that it’s fantastic when used fresh, making it ideal for topping various dishes or serving alongside savory foods.
Why You’ll Love This Queso Fresco Recipe
Let me tell you why this easy queso fresco recipe stands out. First off, it’s incredibly quick. I mean it! You can have this cheese ready in about 30 minutes. Second, it involves just a handful of ingredients and minimal equipment. No fancy gadgets are needed here, just some basic kitchenware.
Moreover, the satisfaction of making something from scratch is unbeatable. Plus, let’s not forget the taste! Once you taste your freshly made queso fresco, you’ll realize there’s no comparison to store-bought versions. It’s creamier, fresher, and downright delightful! If you like to control the ingredients you use, this recipe allows you to do just that. With quality milk and minimal additives, you can create a healthier option for yourself and your loved ones.
The Ingredients You Will Need
So, what do you need to make this queso fresco? Here’s your shopping list:
½ cup distilled white vinegar (or apple cider vinegar for a milder flavor).
8.5 cups full-fat whole milk (2 liters is ideal!).
1 teaspoon lemon zest (optional but adds a nice kick).
¾ teaspoon fine sea salt (adjust this to your taste).
It’s a short list, isn’t it? You likely already have the basics at home. Let’s make some cheese!

Directions to Make Queso Fresco
Now, onto the good stuff! Follow these steps to make your queso fresco.
Step 1: Heat the Milk
Start by pouring the whole milk into a large pot. Using medium heat, bring the milk to a gentle simmer. Stir it occasionally to avoid scorching the bottom. It should take about 10 minutes. You want to see small bubbles forming around the edges; that’s your cue.
Step 2: Add the Acid
Once your milk is simmering, remove it from the heat. Now, it’s time to add your vinegar. Pour in the vinegar and give it a gentle stir to combine. You’ll see the milk start to curdle, which is exactly what you want! After a minute, let this mixture sit for about 5-10 minutes to allow the curds to fully form.
Step 3: Strain the Curds
Grab a fine-mesh sieve or cheesecloth and place it over a bowl. Carefully pour the curdled milk into the sieve, allowing the whey to drain away. What you are left with in the sieve is your cheese!
Step 4: Rinse and Season
Rinse the curds under cold water, which helps remove the vinegar’s taste while also cooling it down. After rinsing, sprinkle in the salt and the lemon zest, if you’re using it. Mix it gently with your hands to ensure even distribution of the flavor.
Step 5: Form the Cheese
At this point, you can shape your queso fresco. Pack the cheese into a container. If you prefer uniform shapes, press it into a tight ball or patty. Cover it with plastic wrap and let it sit at room temperature for about an hour to firm up.
Notes: Tips to Enhance Your Queso Fresco
Here are some handy tips for making your queso fresco even better:
Use Quality Milk: The fresher the milk, the better the flavor. Look for whole milk from a local farm if possible.
Vinegar Varieties: Experiment with different types of vinegar. White wine vinegar adds a unique taste.
Flavor Variations: Incorporate herbs like cilantro or chives for an herbaceous kick.
Experiment with Zest: Try lime or orange zest for different flavor profiles.
Practice Patience: Don’t rush the draining process. Proper whey removal is key for texture.
Storage Tips
Your queso fresco deserves proper care. Here’s how to store it:
Refrigeration: Keep it in an airtight container in the fridge. It should last about one week.
Freezing: You can freeze it for longer storage. Just crumble it into smaller portions and seal them in freezer bags. Thaw in the refrigerator when you’re ready to use it.
Nutrition Information
Here’s a quick glance at the nutrition in your homemade queso fresco (approximate values based on typical servings):
Calories: 80 per ounce
Protein: 6 grams
Fat: 6 grams
Carbohydrates: 1 gram
Calcium: 10% of the daily value
These values can vary based on the milk you select.
Serving Suggestions
Your queso fresco is versatile! Here are five awesome ways to use it:
Tacos: Top tacos with queso fresco. Its creaminess cuts through spiciness, making every bite balanced.
Salads: Crumble it over salads. It adds a salty crunch that complements fresh veggies perfectly.
Soups: Garnish soups like tortilla soup. The addition of cheese enhances the flavor depth and brings warmth.
Chili: Sprinkle atop chili. The cheese nicely contrasts the hearty spices, softening the heat.
Sandwiches: Include in sandwiches or wraps. It pairs beautifully with roasted vegetables for a fulfilling meal.
What Other Substitutes Can I Use in Queso Fresco Recipe?
If you’re in a pinch and can’t find queso fresco, consider these substitutes:
Cotija Cheese: Crumbly and salty, cotija cheese gives a similar texture. It’s great for toppings, although it lacks the same freshness.
Ricotta Cheese: Light and creamy ricotta can work, especially for fillings, and adds a little sweetness.
Feta Cheese: Tangy feta can also substitute, though it’s saltier. Adjust your seasoning if you use it.
Paneer: This Indian cheese has a similar consistency. It’s less tangy but works beautifully in many dishes.
Goat Cheese: Creamy chèvre adds a tangy flavor. It is distinct but works well in salads and toppings.

Conclusion
And there you have it! A straightforward, easy queso fresco cheese recipe that’s not only fun to make but delicious to eat. Whether you’re hosting a gathering or just craving a taste of something fresh, this cheese is a great addition to many dishes. Remember, cooking should be enjoyable, and experimenting in the kitchen opens new doors to flavor and creativity.
So next time you’re in the mood for something delightful, take a leap and try making queso fresco at home. It’s a rewarding culinary journey that gives back more than a store-bought version ever could. Happy cooking!
You’ll also like the following Recipes!

Queso Fresco – Easy Family Meal
Description
It’s a Saturday afternoon. I’m at home, craving something simple yet delicious. Suddenly, I remember queso fresco, the fresh cheese that brightens up just about anything. The best part? It’s surprisingly easy to make right at home! And when I say easy, I mean you can whip it up in no time, even if you’re a kitchen novice.
This cheese has a unique crumbly texture and a light, milky flavor, making it the perfect addition to various dishes. Whether you want to sprinkle it over enchiladas or add it to a salad, queso fresco is your friend. If you’re intrigued, stick around. In this article, I’ll guide you through an easy queso fresco cheese recipe that’s sure to impress friends and family alike.
Ingredients
Instructions
Step 1: Heat the Milk
-
Start by pouring the whole milk into a large pot. Using medium heat, bring the milk to a gentle simmer. Stir it occasionally to avoid scorching the bottom. It should take about 10 minutes. You want to see small bubbles forming around the edges; that’s your cue.
Step 2: Add the Acid
-
Once your milk is simmering, remove it from the heat. Now, it’s time to add your vinegar. Pour in the vinegar and give it a gentle stir to combine. You'll see the milk start to curdle, which is exactly what you want! After a minute, let this mixture sit for about 5-10 minutes to allow the curds to fully form.
Step 3: Strain the Curds
-
Grab a fine-mesh sieve or cheesecloth and place it over a bowl. Carefully pour the curdled milk into the sieve, allowing the whey to drain away. What you are left with in the sieve is your cheese!
Step 4: Rinse and Season
-
Rinse the curds under cold water, which helps remove the vinegar’s taste while also cooling it down. After rinsing, sprinkle in the salt and the lemon zest, if you’re using it. Mix it gently with your hands to ensure even distribution of the flavor.
Step 5: Form the Cheese
-
At this point, you can shape your queso fresco. Pack the cheese into a container. If you prefer uniform shapes, press it into a tight ball or patty. Cover it with plastic wrap and let it sit at room temperature for about an hour to firm up.
Nutrition Facts
Servings 8
- Amount Per Serving
- Calories 80kcal
- % Daily Value *
- Total Fat 6g10%
- Total Carbohydrate 1g1%
- Protein 6g12%
* Percent Daily Values are based on a 2,000 calorie diet. Your daily value may be higher or lower depending on your calorie needs.
Note
- Use Quality Milk: The fresher the milk, the better the flavor. Look for whole milk from a local farm if possible.
- Vinegar Varieties: Experiment with different types of vinegar. White wine vinegar adds a unique taste.
- Flavor Variations: Incorporate herbs like cilantro or chives for an herbaceous kick.
- Experiment with Zest: Try lime or orange zest for different flavor profiles.
- Practice Patience: Don’t rush the draining process. Proper whey removal is key for texture.