
Ingredients
Method
Step 1: Build Your Sauce Foundation
- Grab a medium-sized bowl and combine your tomato sauce, ketchup, Worcestershire sauce, mustard, and brown sugar. Give it a good stir until everything is completely incorporated and the brown sugar dissolves. This is your flavor base—take 30 seconds to make sure it's smooth and unified. The sauce should smell aromatic and slightly complex, not just tomatoey. Set it to the side while you prep your beef and vegetables.

Step 2: Brown the Ground Beef Properly
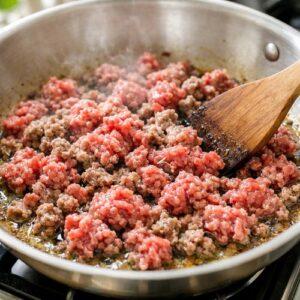
- Place a large skillet or Dutch oven over medium-high heat and add your olive oil. Once the oil is shimmering and hot (about 1 minute), add your pound of ground beef. Don't stir it immediately—let it sit for 2-3 minutes to develop a nice brown crust on the bottom. This creates real flavor through the Maillard reaction, which is something I emphasize constantly with my nutrition clients. After 2-3 minutes, break up the beef with a wooden spoon or spatula, stirring and cooking for another 2-3 minutes until no pink remains and the meat is completely cooked through. If you see a significant amount of excess fat pooling at the bottom, tilt the pan slightly and use a spoon or paper towels to remove it. Season the cooked beef immediately with your salt and pepper, stirring to distribute evenly. The beef should look crumbly and nicely browned, not pale or wet.
Step 3: Add the Vegetables and Build Aroma
- Reduce your heat to medium and stir in your finely chopped onion and diced green bell pepper. Cook these together for about 5 minutes, stirring occasionally. The vegetables will begin to soften and become translucent, and the onions will become fragrant and slightly caramelized at the edges. This is the flavor-building stage that elevates this from basic to genuinely delicious. You'll notice the skillet becomes more aromatic—that's your signal that the vegetables are releasing their natural sugars and flavors. Don't skip this step by rushing it.

Step 4: Bloom the Garlic
- Add your minced fresh garlic directly to the vegetables and beef mixture. Stir constantly for just 30 seconds to 1 minute. This quick cook is essential—you want the garlic fragrant and soft, not burned and bitter. If you cook it too long, it turns harsh and unpleasant. Keep your nose alert; when it smells absolutely amazing, you're done.

Step 5: Bring Everything Together
- Pour your prepared sauce directly into the skillet with the beef and vegetables. Stir everything together thoroughly, making sure no dry bits of beef or vegetables remain at the bottom of the pan. The mixture will look loose and saucy right now—that's exactly right. Bring the entire mixture to a gentle boil over medium-high heat, stirring occasionally. You should see bubbles breaking the surface steadily. Once it reaches a boil, reduce the heat to low immediately.

Step 6: Simmer to Perfection
- Let the sloppy joe mixture simmer uncovered on low heat for 10-15 minutes. During this time, the sauce thickens, flavors deepen and marry together, and any raw tomato flavor mellows into something truly delicious. Stir occasionally to prevent sticking. You'll notice the sauce gradually becoming thicker and the color deepening slightly. After 10 minutes, check the consistency. If you prefer a thicker, less saucy texture, simmer the full 15 minutes. If you like it looser and saucier, stop at 10 minutes or add a splash of water. Taste the mixture and adjust seasonings as needed. Want it tangier? Add a squeeze of fresh lime juice or apple cider vinegar. Want it sweeter? Add another ½ teaspoon of brown sugar. This is your moment to personalize it to your family's exact preferences.

Step 7: Toast the Buns and Assemble
- While your sauce simmers, warm your hamburger buns. I prefer toasting them lightly in a skillet with just a touch of butter or in a toaster oven at 350°F for 2-3 minutes. Toasted buns hold up beautifully to the sauce and add a subtle richness that untoasted buns simply don't provide. Once everything is ready, place each warm bun on a plate, spoon generous amounts of the sloppy joe mixture onto the bottom half, and top with the bun lid. Serve immediately with napkins—lots of them!

Notes
- Make it your own with vegetable swaps - Not a fan of green peppers? Use finely diced red bell pepper, shredded carrots, or even diced mushrooms. The cooking time remains the same, and each variation tastes fantastic.
- Toast those buns - This single step transforms the entire eating experience. Toasted buns have a subtle crunch, better structure, and they don't immediately turn to mush under the sauce.
- Taste as you go - Brown sugar and seasonings vary slightly by brand. Rather than following measurements blindly, taste and adjust. This teaches your family to develop real palate awareness and it ensures the flavor is exactly right.
- Use fresh minced garlic, not jarred - I know jarred feels convenient, but fresh garlic creates a noticeably cleaner, brighter flavor. Mince it fresh right before cooking—it takes 30 seconds with a sharp knife.
- Don't skip the vegetable sautéing stage - I've watched countless home cooks dump vegetables into the sauce without cooking them first. Those uncooked vegetables create a watery, less-developed flavor. The 5-minute vegetable sauté is non-negotiable.
- Break up the meat thoroughly while browning - Larger chunks of beef create an uneven texture. Use your spoon or spatula to break everything into small, uniform pieces so the sauce coats evenly.