
Ingredients
Method
Step 1: Mix Your Dry Ingredients and Create the Base Dough
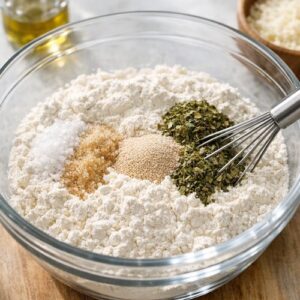
- Grab a large mixing bowl—don't grease it—and whisk together your bread flour, instant yeast, coarse salt, sugar or honey, dried oregano, dried basil, garlic powder, and crushed red pepper flakes if using. Whisking these dry ingredients together ensures the yeast is evenly distributed and your herbs are spread throughout rather than clumping up. Now here's the key: use a silicone spatula or wooden spoon to fold in your chopped pepperoni, sun-dried tomatoes or olives, and shredded mozzarella cheese. Make sure everything is mixed evenly so you get these delicious bits in every slice. Pour in your room-temperature water. Using your spatula, gently mix everything together. The dough will look shaggy and dry at first—this is completely normal! Keep stirring and folding the dough over itself for about two minutes. You'll notice the flour gradually absorbing the water. If some flour still clings to the sides of the bowl, wet your hands slightly and gently work the dough by hand until all the flour is moistened and you have one sticky, cohesive mass. Shape it roughly into a ball in the bowl. It doesn't need to be perfect. Trust the process.
Step 2: First Rise at Room Temperature
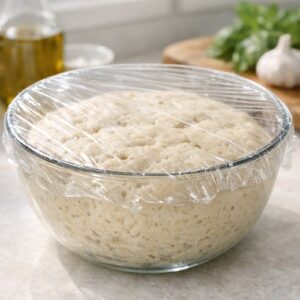
- Cover your mixing bowl tightly with plastic wrap or aluminum foil. Leave it on your counter at room temperature. Allow this to rise for exactly 3 hours. During this time, the yeast activates and the dough will roughly double in size. You'll see lots of air bubbles forming on the surface, and the dough will stick to the sides of the bowl. This is gorgeous and exactly what we want. I usually set a phone reminder for this step because I've definitely lost track of time before! After three hours, your dough should look puffy, bubbly, and alive.
Step 3: Cold Fermentation (The Secret Ingredient)
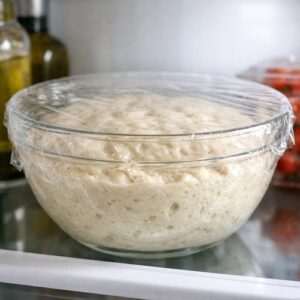
- This is where the magic truly happens. Once your dough has completed its three-hour room-temperature rise, cover the bowl (still with plastic wrap or foil) and place the entire thing into your refrigerator. Refrigerate for at least 12 hours and up to 3 days. During this cold fermentation, the dough develops incredible flavor complexity. The yeast continues working slowly in the cold, and the gluten network strengthens naturally. The longer you can wait—up to three days—the more developed the flavor becomes. I usually make my dough on a Sunday night and bake it Wednesday or Thursday, which gives me maximum flexibility and incredible results. Don't panic if the dough begins to deflate after two days. This is completely normal and doesn't mean anything went wrong. The yeast has simply continued fermenting slowly.
Step 4: Shape and Pre-Bake Rest
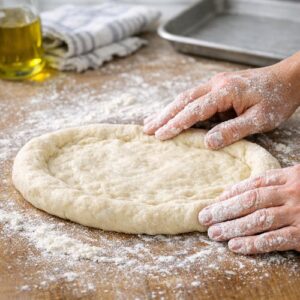
- Remove your dough from the refrigerator and turn it out onto a lightly floured work surface. Your hands should be generously floured because this dough is sticky—that stickiness is what creates an open, airy crumb in the final bread. Gently shape the dough into a ball as best you can. It doesn't need to be perfect or symmetrical. Transfer this ball onto a large piece of parchment paper that's safe for high heat. I use heavy-duty parchment and have never had any issues, but make sure it's large enough to fit inside your Dutch oven. Place the ball of dough and parchment inside a medium-size mixing bowl. This bowl acts as a guide so the dough doesn't spread out too much while it rests. Cover the bowl loosely with plastic wrap or a kitchen towel. Let it rest for 30 minutes. During this time, the dough warms up to room temperature and puffs slightly.
Step 5: Preheat Your Dutch Oven to Screaming Hot
- While your shaped dough is resting, preheat your oven to 450°F (232°C). Yes, very hot! Place your 6-quart or larger Dutch oven with its lid inside the oven. Let it preheat for 30 minutes. You want this pot absolutely scorching hot before the dough touches it—this creates that beautiful, crispy crust you see in bakery bread. A Dutch oven traps steam around the dough as it bakes, which keeps the crust from drying out too quickly and allows it to expand fully. This is the secret to that restaurant-quality appearance.
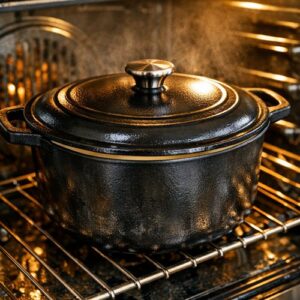
Step 6: Score and Bake with the Lid
- After your 30-minute rest, remove the Dutch oven from the oven carefully—it's extremely hot. Using a very sharp knife, bread lame, or even clean kitchen shears, score the top of your dough with an X pattern, cutting about ½ inch deep. This controlled cut allows the dough to expand gracefully and gives you that beautiful presentation. Now carefully lift your dough and parchment together and place them directly inside the screaming-hot Dutch oven. Yes, the parchment paper goes in too. Cover the pot with its lid. Bake for 25 minutes with the lid on. You'll hear steam hissing inside as the bread bakes. This is perfect. After 25 minutes, carefully remove the lid using an oven mitt or kitchen towel. The steam will rush out—watch your face! You'll see your bread has puffed up beautifully. Continue baking uncovered for 10 to 15 minutes more until the crust is golden brown. The exact time depends on your oven, so start checking around 10 minutes.

Step 7: Test for Doneness and Cool
- To test if your bread is fully baked, give it a gentle tap on the bottom. If it sounds hollow, it's done! For a more precise test, use an instant-read thermometer inserted into the center of the loaf—it should read 195°F (90°C). Remove the pot from the oven and carefully lift the bread out using the parchment paper. Transfer it to a cooling rack. Let it cool for at least 20 minutes before slicing. I know this is hard when it smells this incredible, but this resting time lets the interior set up properly. If you slice too early, the interior might seem slightly gummy. Because of the pepperoni, cheese, and other add-ins, this bread will be flatter than a traditional boule. Don't worry! This just means you get a higher ratio of crispy crust to tender interior in every slice—honestly, that's a win in my book.

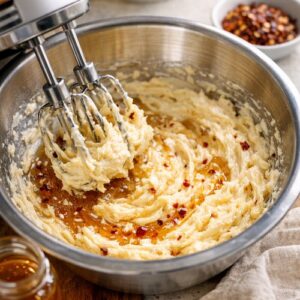
Step 8: Make Your Hot Honey Butter
- While your bread cools, let's make the honey butter that takes this bread from great to unforgettable. In a large bowl, use a handheld mixer or stand mixer fitted with a paddle attachment and beat your softened unsalted butter on medium speed until completely smooth and creamy, about 1 minute. Add the honey and confectioners' sugar. Starting with only ⅛ teaspoon of flaky sea salt and a small pinch of red pepper flakes, beat everything together on medium-high speed until completely smooth and combined, about 1 minute. Scrape down the sides of the bowl with a silicone spatula and beat again as needed. Taste your butter. This is important! Add more salt and crushed red pepper flakes if you want more heat and complexity. I usually add the full ¼ teaspoon of salt because it really makes the honey shine. Slice your cooled bread and brush or spread this hot honey butter over the warm slices. The butter will melt into all the crevices, and the honey will caramelize slightly from the residual heat. This is pure joy on bread.
Notes
- Room-temperature water matters - Water that's too cold slows fermentation, and water that's too hot can kill the yeast. Aim for about 70°F. If you're unsure, use a quick-read thermometer.
- Don't skip the long cold fermentation - I know it's tempting to bake this sooner, but those 12 to 72 hours in the fridge are where flavor development happens. The cold fermentation creates a more complex, deeper taste that's worth the wait.
- Use a Dutch oven for best results - This is non-negotiable for that bakery-quality crust. If you don't have one, a covered baking dish or even an upside-down roasting pan with a baking sheet on top works in a pinch, but the Dutch oven truly is superior.
- Parchment paper prevents sticking - This dough is sticky, and parchment is your best friend. It makes transferring your shaped dough simple and ensures nothing sticks to the bottom of your pot.
- Keep pepperoni and cheese evenly distributed - Mix these in thoroughly during the initial mixing step. If they clump together, some slices will have too much and others too little.
- Trust the visual cues - A loaf thermometer is helpful, but learning to recognize a hollow tap and observing that golden-brown color are equally reliable signs of doneness.