
Ingredients
Method
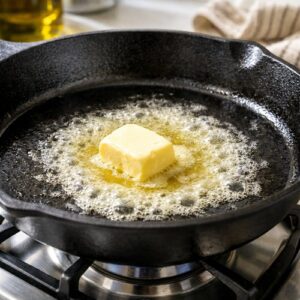
Step 1: Melt Your Butter Over Medium Heat
- Place your skillet on the stove and let the butter melt slowly over medium heat. Don't rush this or use high heat—you want a gentle melt that takes about two minutes. Watch for the foam to subside slightly. This slow melting ensures the butter integrates smoothly with the flour, preventing any scorching that would create bitter flavors. I use medium heat exclusively because it gives you maximum control and prevents the gravy from developing brown spots.
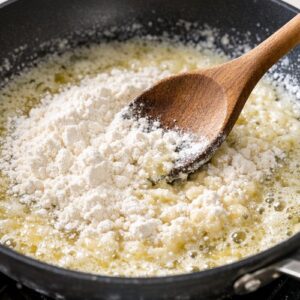
Step 2: Create Your Roux Base
- Once the butter is fully melted, sprinkle your flour directly into the pan while stirring constantly with a wooden spoon. Stir until every speck of flour is coated in butter and no dry flour remains visible. Press the back of your spoon against the flour clumps to break them down as you go. This is the critical step where most home cooks fail—they rush past the lumpy stage without smoothing it out. Take 30 seconds here and your gravy will be silky instead of grainy. The flour and butter mixture is called a roux, and it's the thickening agent for your entire sauce.
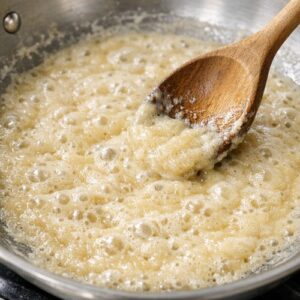
Step 3: Cook the Roux Until Raw Flour Taste Is Gone
- Continue cooking this flour-butter mixture for 3-4 minutes over medium heat, stirring frequently. You'll notice the mixture will bubble slightly and smell toasty rather than raw. This step is non-negotiable if you want to avoid that unpleasant raw flour taste that many homemade gravies have. I use a small whisk here because it prevents lumps better than a spoon. The roux will darken slightly—from pale to light golden—which indicates the starch in the flour is cooking and your thickening power is activated.
Step 4: Begin Adding Milk Slowly While Whisking
- This is where beginners panic, but you'll avoid lumps by adding milk slowly and whisking constantly. Pour about half a cup of milk into the pan while whisking vigorously. Don't add all the milk at once—that's how you get a lumpy mess. Keep whisking until that first addition is completely smooth and incorporated, which takes about 30 seconds. The mixture will look thin and strange at this point. That's normal.

Step 5: Whisk in Remaining Milk Gradually
- Now add the remaining milk slowly while continuing to whisk. You're looking for a steady stream, not a pour. Keep your whisk moving in figure-eight patterns to catch any potential lumps. If you do spot a small lump, stop and whisk aggressively in that spot until it dissolves. By the time you've added all the milk, your sauce should look smooth and pourable. Don't stop whisking—this is your insurance against a grainy texture.

Step 6: Season and Simmer Until Thickened
- Once all the milk is incorporated, stir in your salt, black pepper, garlic powder, and onion powder. Increase the heat to medium-high and bring the mixture to a gentle simmer. You'll see small bubbles breaking the surface. Let it simmer for 8-10 minutes, stirring every minute or so. This simmering time is when the sauce reaches its final silky consistency. The heat and time allow the starch in the flour to fully absorb the liquid and thicken the sauce properly. After 10 minutes, the gravy should coat the back of a spoon—dip a spoon in and run your finger across the back. If it leaves a trail, you're done. If it's still thin, simmer another 2 minutes.

Step 7: Transfer to Storage Containers
- Remove the pan from heat and let the gravy cool for about five minutes. While it's still warm, carefully pour it into your glass storage containers. Warm gravy pours more easily than cold gravy, and warm containers are less likely to crack. Leave about half an inch of space at the top for expansion as it cools. Let the containers sit on the counter for 20 minutes before transferring to the refrigerator. This cool-down period prevents condensation from forming inside the lids.