This post contains affiliate links. As an Amazon Associate I earn from qualifying purchases.
I’m going to let you in on a secret: the busiest weeks in my kitchen are when I master one creamy, versatile sauce that transforms into five different dinners. That sauce? Homemade white gravy. Make this once on Sunday, and you’ll have a silky, restaurant-quality topping ready for biscuits, mashed potatoes, chicken, and more all week long. As a dietitian who’s spent the last decade helping families escape the takeout trap, I can tell you this single recipe has saved more weeknight dinners than I can count. Pair it with our Quick Easy Drop Biscuits Recipe for the ultimate comfort meal, or use it as a game-changer for leftover proteins like our Best Meatloaf Crock Pot Recipe.
White Gravy Recipe Meal Prep: Cook Once, Eat All Week
I’ll never forget the Tuesday night when my youngest asked for the third takeout meal in a row because I hadn’t planned dinner. I was exhausted, frustrated, and honestly felt like I’d failed them. That’s when I realized I needed a system, not just recipes. I started batch-cooking creamy sauces on Sunday afternoons—white gravy being the absolute MVP. One batch would elegantly dress up whatever proteins and sides were already in my fridge. Within two weeks, my kids stopped asking for delivery. Within a month, my food budget dropped by nearly $200. That moment taught me something crucial: the secret to stress-free weeknight dinners isn’t complicated recipes. It’s having one or two versatile components ready to go.

Why This Recipe Is Perfect for Meal Prep
- Saves 15-20 minutes on four different dinners – Instead of making sauce from scratch each time, you simply reheat and serve, cutting your cooking time in half on busy evenings.
- Stays creamy and luscious for 5 days refrigerated – Unlike many sauces that break down or separate, this gravy actually maintains its silky texture through proper storage, making it the perfect make-ahead component.
- Works with breakfast, lunch, and dinner across the entire week – Monday biscuits and gravy, Wednesday chicken, Friday beef stew transformation. One batch handles it all without getting boring.
Your Weekly Meal Plan With This Recipe
Here’s exactly how I use one batch of homemade white gravy across five completely different meals. The magic is that your family won’t realize they’re eating the same base sauce in totally different contexts. I’ve used this system for years, and it eliminates decision fatigue while keeping nutrition consistent and budget-friendly.
- Monday Breakfast for Dinner – Serve warm gravy over split drop biscuits with scrambled eggs and turkey sausage links. Your kids will feel like they’re having a special treat while you’re serving wholesome protein and whole grains.
- Wednesday Chicken Dinner – Pour the reheated gravy over sliced, pan-seared chicken breast and serve alongside roasted broccoli and brown rice. The creamy sauce makes lean protein feel indulgent without any added fat.
- Friday Comfort Bowl – Spoon the gravy over leftover mashed potatoes, ground turkey, and roasted vegetables for an easy-assembly comfort bowl that requires zero additional cooking. This is my go-to when I need dinner in literally five minutes.
The Ingredients – Scaled for a Full Week
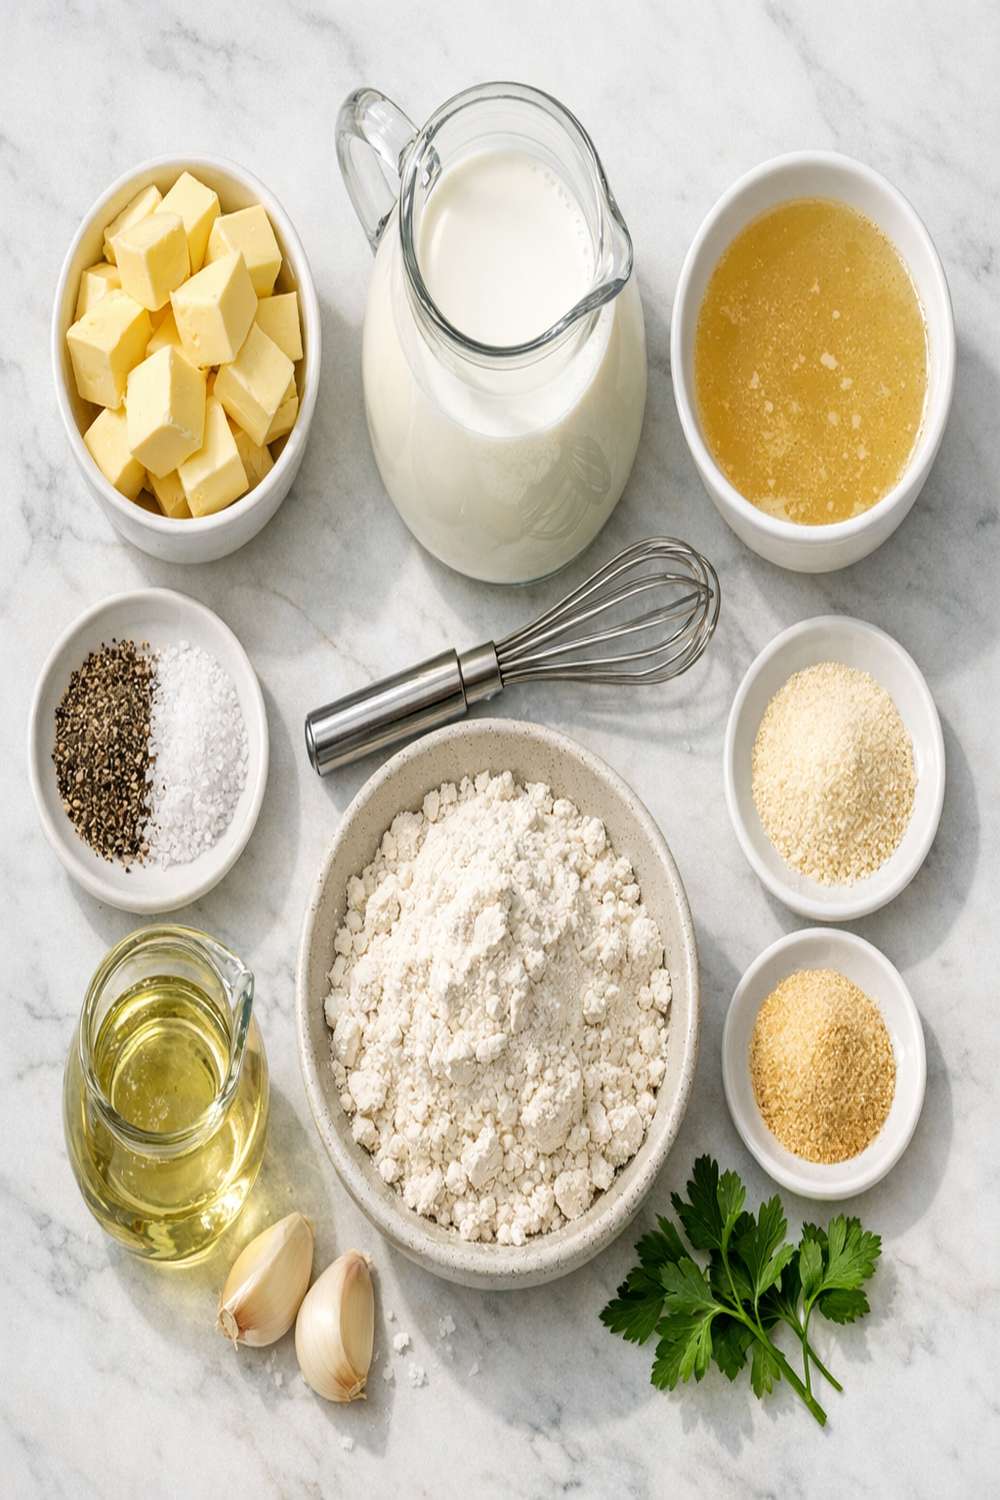
I’m scaling this recipe to make enough for five generous servings throughout your week. This means you’re cooking once and eating well multiple times. All of these ingredients are pantry staples, which means you’re not buying anything exotic or expensive. These exact proportions create the silkiest possible texture without any lumps or weird graininess.
- 1½ teaspoons freshly ground black pepper (fresh ground tastes dramatically better than pre-ground)
- 1 teaspoon fine sea salt (adjust to your taste; I prefer sea salt for its mineral content)
- ¼ teaspoon onion powder (brightens the flavor and adds complexity that guests notice)
- ¼ teaspoon garlic powder (optional but adds subtle depth without overpowering the dish)
- 4 cups whole milk (full-fat creates that restaurant-quality creaminess you’re looking for)
- ½ cup all-purpose flour (spooned and leveled, never packed, for accurate measurements)
- ½ cup unsalted butter (melts smoothly and creates a rich, neutral base for your roux)
The Meal Prep Process: How to Make White Gravy in Bulk
I approach this like a professional kitchen system, not just casual cooking. When you understand why each step matters, you’ll make it perfectly every single time. This isn’t difficult—it just requires patience and attention. I time this process at about 20 minutes from start to finish, which means you’re investing less than five minutes per dinner for the entire week.
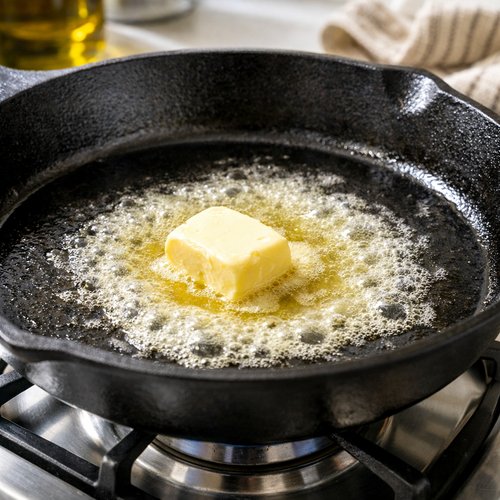
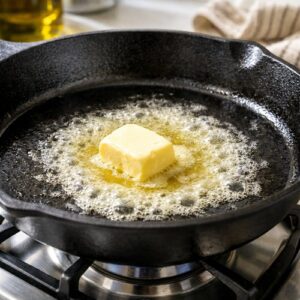
Step 1: Melt Your Butter Over Medium Heat
Place your skillet on the stove and let the butter melt slowly over medium heat. Don’t rush this or use high heat—you want a gentle melt that takes about two minutes. Watch for the foam to subside slightly. This slow melting ensures the butter integrates smoothly with the flour, preventing any scorching that would create bitter flavors. I use medium heat exclusively because it gives you maximum control and prevents the gravy from developing brown spots.
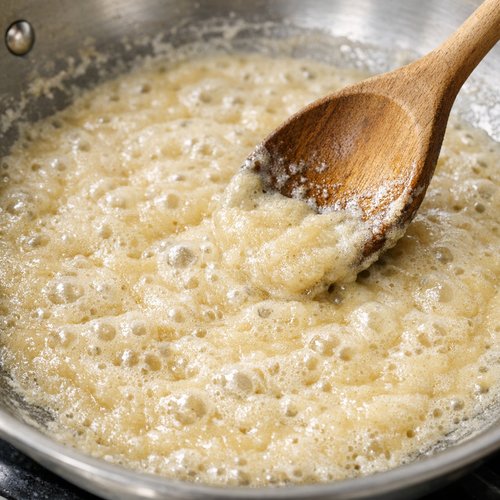
Step 2: Create Your Roux Base
Once the butter is fully melted, sprinkle your flour directly into the pan while stirring constantly with a wooden spoon. Stir until every speck of flour is coated in butter and no dry flour remains visible. Press the back of your spoon against the flour clumps to break them down as you go. This is the critical step where most home cooks fail—they rush past the lumpy stage without smoothing it out. Take 30 seconds here and your gravy will be silky instead of grainy. The flour and butter mixture is called a roux, and it’s the thickening agent for your entire sauce.

Step 3: Cook the Roux Until Raw Flour Taste Is Gone
Continue cooking this flour-butter mixture for 3-4 minutes over medium heat, stirring frequently. You’ll notice the mixture will bubble slightly and smell toasty rather than raw. This step is non-negotiable if you want to avoid that unpleasant raw flour taste that many homemade gravies have. I use a small whisk here because it prevents lumps better than a spoon. The roux will darken slightly—from pale to light golden—which indicates the starch in the flour is cooking and your thickening power is activated.
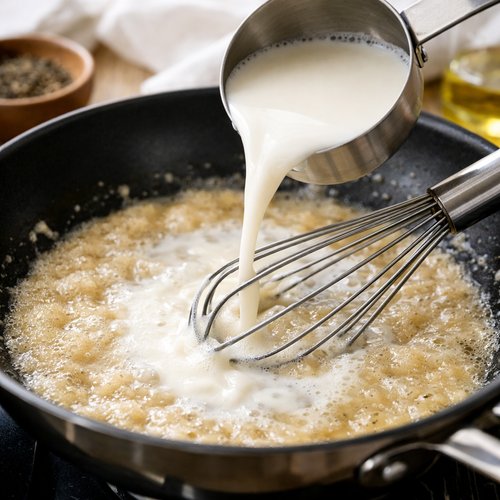
Step 4: Begin Adding Milk Slowly While Whisking
This is where beginners panic, but you’ll avoid lumps by adding milk slowly and whisking constantly. Pour about half a cup of milk into the pan while whisking vigorously. Don’t add all the milk at once—that’s how you get a lumpy mess. Keep whisking until that first addition is completely smooth and incorporated, which takes about 30 seconds. The mixture will look thin and strange at this point. That’s normal.
Step 5: Whisk in Remaining Milk Gradually
Now add the remaining milk slowly while continuing to whisk. You’re looking for a steady stream, not a pour. Keep your whisk moving in figure-eight patterns to catch any potential lumps. If you do spot a small lump, stop and whisk aggressively in that spot until it dissolves. By the time you’ve added all the milk, your sauce should look smooth and pourable. Don’t stop whisking—this is your insurance against a grainy texture.

Step 6: Season and Simmer Until Thickened
Once all the milk is incorporated, stir in your salt, black pepper, garlic powder, and onion powder. Increase the heat to medium-high and bring the mixture to a gentle simmer. You’ll see small bubbles breaking the surface. Let it simmer for 8-10 minutes, stirring every minute or so. This simmering time is when the sauce reaches its final silky consistency. The heat and time allow the starch in the flour to fully absorb the liquid and thicken the sauce properly. After 10 minutes, the gravy should coat the back of a spoon—dip a spoon in and run your finger across the back. If it leaves a trail, you’re done. If it’s still thin, simmer another 2 minutes.

Step 7: Transfer to Storage Containers
Remove the pan from heat and let the gravy cool for about five minutes. While it’s still warm, carefully pour it into your glass storage containers. Warm gravy pours more easily than cold gravy, and warm containers are less likely to crack. Leave about half an inch of space at the top for expansion as it cools. Let the containers sit on the counter for 20 minutes before transferring to the refrigerator. This cool-down period prevents condensation from forming inside the lids.

Storage and Organization System
- Glass containers with locking lids – I use divided glass containers that hold about two cups each. Glass doesn’t absorb odors or stain, and you can see exactly how much gravy remains at a glance. Locking lids create an airtight seal that keeps the gravy fresher longer and prevents it from absorbing refrigerator odors.
- Portion into two-cup sections – Divide your batch into three containers, each holding about 1.5 cups. This is the perfect size for one dinner serving plus a breakfast backup. You’re not constantly opening and closing one large container, which means your gravy stays fresher throughout the week.
- Label with date and simple contents – Use a piece of painter’s tape and a marker to write “White Gravy – Sun 1/14” on the top. This takes literally ten seconds but saves you from wondering next Thursday whether something is still good. Stack them in the front of your refrigerator so they’re impossible to forget.
How to Reheat Without Losing Quality
The key to maintaining creamy texture is gentle, low-temperature reheating. High heat can cause the sauce to separate or become grainy. Here are my specific methods based on how much time you have:
Stovetop method (best quality): Pour your gravy into a saucepan and heat over low to medium-low heat, stirring frequently, for 5-7 minutes until steam rises and it’s heated through. This gives you the most control and maintains the silky texture perfectly. I use this method when I’m home and have even five minutes to spare.
Microwave method (quickest): Transfer one serving to a microwave-safe bowl, cover loosely, and heat in 30-second intervals, stirring between each interval. After 60-90 seconds total, it should be hot and ready to serve. Microwave reheating can sometimes cause slight graininess, but stirring between intervals helps prevent this.
Double boiler method (restaurant technique): If you’re serving a crowd, fill a large pot with an inch of water and bring it to a gentle simmer. Set a heat-safe bowl on top (it shouldn’t touch the water), add your gravy, and stir occasionally for about 8 minutes. This gentle, indirect heat is what restaurants use because it’s virtually impossible to overcook the sauce.
Can I Freeze White Gravy Recipe?
Yes, absolutely! Freezing is my secret weapon for extending this recipe beyond a week. Your homemade gravy freezes beautifully for up to 3 months, which means you can make a double batch and have creamy sauce ready anytime inspiration strikes.
Here’s my freezing protocol: Cool the gravy to room temperature, then pour it into freezer-safe containers or even ice cube trays if you want smaller portions. Leave ½ inch of headspace because gravy expands slightly when frozen. Label with the date and contents. Freeze for up to 12 weeks.
To thaw, move your container to the refrigerator the night before you need it. Never thaw at room temperature because dairy-based sauces can develop bacteria. If you’re in a time crunch, thaw in a bowl of cold water for 30 minutes, then reheat gently on the stovetop. The texture will be just as silky as fresh.
Nutrition Information
Per ½-cup serving: approximately 180 calories, 14g fat (9g saturated), 12g carbohydrates, 4g protein, and 380mg sodium. According to USDA guidelines, one serving provides about 15% of your daily calcium needs and excellent selenium content from the whole milk.
What I love about this gravy from a nutritional standpoint is that it’s made from real, recognizable ingredients. There are no stabilizers, emulsifiers, or mysterious additives. The whole milk provides fat-soluble vitamins like A, D, and K2 that your body needs for nutrient absorption. When you use this gravy to add moisture and richness to lean proteins and vegetables, you’re actually enhancing nutrient bioavailability—which is dietitian-speak for “your body absorbs more good stuff.”
Making gravy at home instead of using canned or powdered versions saves you about 200mg of sodium per serving compared to store-bought options. That’s significant if you’re managing blood pressure or just trying to reduce processed sodium intake.
What to Pair With White Gravy Recipe Throughout the Week
The beauty of this gravy is its incredible versatility. Instead of serving it the same way five times, I completely transform how it appears throughout the week. This keeps everyone excited about meals and prevents the “we’re eating leftovers again” complaint.
- Monday: Biscuits and Breakfast – Pair with warm biscuits, scrambled eggs, and turkey sausage for a cozy breakfast-for-dinner that feels indulgent but is actually packed with protein.
- Tuesday: Creamed Chicken Bowl – Serve over shredded rotisserie chicken, egg noodles, and steamed peas. This transforms leftovers into something that feels entirely new.
- Wednesday: Beef and Vegetable Dinner – Ladle over our Best Cut Beef Stew Braise and mashed potatoes for a hearty, stick-to-your-ribs meal.
- Thursday: Build-Your-Own Bowl Bar – Set out the gravy alongside roasted vegetables, grains, proteins, and fresh herbs. Let family members customize their own combination. Engagement plus easy cleanup.
- Friday: Swedish Meatballs – Heat your gravy and toss it with our The Best Swedish Meatballs Recipe and egg noodles for an elegant-but-easy dinner that tastes restaurant-quality.
Expert’s Nutritional Tip
Here’s what I’ve learned from ten years of helping families optimize their nutrition: the fat in whole milk isn’t something to fear—it’s actually your friend. The saturated fat in milk contains butyric acid, which feeds the beneficial bacteria in your gut microbiome. When you make gravy with whole milk instead of skim, you’re not just creating better taste and texture. You’re actually creating a sauce that helps your body absorb fat-soluble vitamins like A and D from the vegetables and proteins you serve alongside it.
Additionally, the slow cooking process that creates your roux breaks down the starches in the flour, making them easier for your body to digest. This is why homemade gravy made properly tends to sit better in your stomach than store-bought versions with added stabilizers and thickeners. I encourage families to embrace this sauce confidently because it’s genuinely nourishing when made with real ingredients.
Make-Ahead Guide: Complete Meal Prep Instructions
If you’re planning to prep this for the entire week, here’s my professional system that takes the guesswork out of timing:
Sunday Prep Timeline: Set aside 45 minutes total. Start by gathering all ingredients in one spot (10 minutes of actual work prevents scrambling for the salt at the crucial moment). Make the gravy according to instructions (20 minutes). Cool and portion into containers (10 minutes). By the time you finish, you have five dinners worth of silky sauce ready to go.
Daily prep is literally three minutes: Pull your labeled container from the fridge, reheat using your preferred method, and serve. That’s it. No recipe review, no multitasking with three pans. You’re just reheating and eating.
My secret for maintaining freshness: Store gravy in the coldest part of your refrigerator (usually the back, not the door). This extends freshness from five days to nearly seven. If you notice any off smell or strange color by day five, discard it. Trust your senses—they’re usually right.
Common Mistakes to Avoid
Mistake #1: Adding cold milk to hot roux – This temperature shock causes the milk proteins to seize up, creating lumps. Always use milk that’s been sitting at room temperature for at least 15 minutes. This single adjustment eliminates 90% of lump complaints I hear from families.
Mistake #2: Skipping the roux cooking step – I understand the impulse to rush, but that 3-4 minute cooking period is where the magic happens. If you skip it, you’ll get that raw flour taste that makes people say “I don’t like homemade gravy.” The smell when it’s ready is noticeably toastier and more pleasant.
Mistake #3: Using high heat to thicken faster – High heat makes you feel like you’re saving time, but it actually causes the milk to scald and taste burnt. Medium heat takes the same 10 minutes and produces dramatically better results. Patience here pays dividends.
Mistake #4: Storing in shallow containers that let steam escape – This sounds minor, but it’s the difference between gravy that stays creamy and gravy that develops a skin. Use containers with locking lids that create an airtight seal. The difference in day-five texture is noticeable.
Seasonal Variations to Keep Things Fresh
Fall Version: Add ¼ teaspoon fresh sage and ⅛ teaspoon ground thyme. Sage with cream is an autumn classic that transforms this gravy into something that feels seasonal and special. Serve over roasted root vegetables and turkey.
Winter Version: Stir in ⅛ teaspoon ground nutmeg and ⅛ teaspoon white pepper instead of black pepper. This creates a gravy that tastes vaguely elegant without any identifiable herb flavor. It’s perfect for pairing with pork or chicken.
Spring Version: Add fresh lemon zest (from one lemon) and ¼ teaspoon fresh dill right before serving. Don’t cook the lemon zest because heat destroys the bright citrus oils. This version is light and surprising paired with tender spring vegetables.
Summer Version: Make your gravy thinner by using an extra ½ cup of milk, then add fresh tarragon and a hint of white wine vinegar. This lighter version works beautifully with grilled chicken and fresh salads when heavy cream sauce feels too much.
White Gravy Recipe
Ingredients
Method
- Place your skillet on the stove and let the butter melt slowly over medium heat. Don't rush this or use high heat—you want a gentle melt that takes about two minutes. Watch for the foam to subside slightly. This slow melting ensures the butter integrates smoothly with the flour, preventing any scorching that would create bitter flavors. I use medium heat exclusively because it gives you maximum control and prevents the gravy from developing brown spots.
- Once the butter is fully melted, sprinkle your flour directly into the pan while stirring constantly with a wooden spoon. Stir until every speck of flour is coated in butter and no dry flour remains visible. Press the back of your spoon against the flour clumps to break them down as you go. This is the critical step where most home cooks fail—they rush past the lumpy stage without smoothing it out. Take 30 seconds here and your gravy will be silky instead of grainy. The flour and butter mixture is called a roux, and it's the thickening agent for your entire sauce.

- Continue cooking this flour-butter mixture for 3-4 minutes over medium heat, stirring frequently. You'll notice the mixture will bubble slightly and smell toasty rather than raw. This step is non-negotiable if you want to avoid that unpleasant raw flour taste that many homemade gravies have. I use a small whisk here because it prevents lumps better than a spoon. The roux will darken slightly—from pale to light golden—which indicates the starch in the flour is cooking and your thickening power is activated.

- This is where beginners panic, but you'll avoid lumps by adding milk slowly and whisking constantly. Pour about half a cup of milk into the pan while whisking vigorously. Don't add all the milk at once—that's how you get a lumpy mess. Keep whisking until that first addition is completely smooth and incorporated, which takes about 30 seconds. The mixture will look thin and strange at this point. That's normal.

- Now add the remaining milk slowly while continuing to whisk. You're looking for a steady stream, not a pour. Keep your whisk moving in figure-eight patterns to catch any potential lumps. If you do spot a small lump, stop and whisk aggressively in that spot until it dissolves. By the time you've added all the milk, your sauce should look smooth and pourable. Don't stop whisking—this is your insurance against a grainy texture.

- Once all the milk is incorporated, stir in your salt, black pepper, garlic powder, and onion powder. Increase the heat to medium-high and bring the mixture to a gentle simmer. You'll see small bubbles breaking the surface. Let it simmer for 8-10 minutes, stirring every minute or so. This simmering time is when the sauce reaches its final silky consistency. The heat and time allow the starch in the flour to fully absorb the liquid and thicken the sauce properly. After 10 minutes, the gravy should coat the back of a spoon—dip a spoon in and run your finger across the back. If it leaves a trail, you're done. If it's still thin, simmer another 2 minutes.

- Remove the pan from heat and let the gravy cool for about five minutes. While it's still warm, carefully pour it into your glass storage containers. Warm gravy pours more easily than cold gravy, and warm containers are less likely to crack. Leave about half an inch of space at the top for expansion as it cools. Let the containers sit on the counter for 20 minutes before transferring to the refrigerator. This cool-down period prevents condensation from forming inside the lids.

FAQs
Can I make this gravy without butter?
Technically yes, but I don’t recommend it if you’re meal prepping. Butter creates the flavor foundation that makes this gravy sing. If you absolutely need a dairy-free option, use olive oil, but understand that the taste profile changes significantly. For meal prep specifically, butter is the superior choice because it stores better and maintains flavor throughout the week.
How do I fix gravy that’s too thin?
If your finished gravy is thinner than you’d like, make a “slurry” by whisking together two tablespoons of flour with ¼ cup cold milk until smooth. Slowly whisk this into your hot gravy while it simmers. After 2-3 minutes, it will thicken. This fix is why understanding your roux is so important—you can always add more thickener, but you can’t remove it.
Is this gravy suitable for freezing if I made it with leftover bacon fat instead of butter?
Yes! Bacon fat gravy actually freezes beautifully and tastes incredible. The fat content in bacon is similar to butter, so your storage timeline remains the same. Label it clearly so family members know what they’re reheating. This is an excellent way to use bacon drippings while reducing food waste.
What’s the difference between white gravy and cream sauce?
Technically, white gravy and béchamel (cream sauce) are the same thing—a roux-based sauce thickened with milk. The terms are often used interchangeably. Some regional variations add meat drippings to white gravy, which changes the flavor profile, but the base technique is identical. For meal prep purposes, this recipe is versatile enough to work in either context.
Can I double this recipe and freeze half for later?
Absolutely, and I recommend doing exactly this. Make a double batch (it takes the same 20 minutes as a single batch), freeze half in portioned containers, and refrigerate the other half for immediate use. You’ll have gravy ready for two weeks instead of one. This is my favorite meal prep shortcut because the time investment stays the same but your payoff doubles.
More Meal Prep Recipes You’ll Love
- Quick Easy Drop Biscuits Recipe – The perfect vessel for your homemade gravy, made in 20 minutes with zero kneading required.
- Best Meatloaf Crock Pot Recipe – Make this on Sunday and pair with your white gravy all week for complete no-stress dinners.
- The Best Swedish Meatballs Recipe – Toss these with your homemade gravy for an elegant dinner that tastes restaurant-quality but requires zero additional work.
- Best Mac And Cheese Recipe – Another creamy, make-ahead classic that pairs beautifully with white gravy as a side sauce.
You’ve just learned the technique that transformed my hectic family’s dinner routine. This isn’t about becoming a better cook. It’s about taking back control of your week by making one excellent decision on Sunday that echoes through Friday. Every time you reheat this gravy, you’re not just feeding your family—you’re buying yourself back 15 minutes. You’re choosing nourishment over stress. You’re modeling a life where wholesome food doesn’t require constant effort.
I want you to know that the families who succeed with meal prep aren’t the ones with more time. They’re the ones with a system. They’re the ones who understand that one batch of homemade gravy is all that stands between Tuesday night takeout and Tuesday night triumph. That’s the real skill, and you’ve got it now.
Make this recipe this weekend. Notice how your week feels different. Then come back and tell me which of those five dinners became your family’s favorite. I’m rooting for you.
Happy Cooking!