This post contains affiliate links. As an Amazon Associate I earn from qualifying purchases.
When I first moved to Chicago from Cincinnati, I missed that distinctive chili my grandmother made every fall. It wasn’t like the thick, bean-heavy versions I found here—it was aromatic, slightly sweet, and had this mysterious depth that nobody could quite explain. Years later, as a registered dietitian, I finally cracked the code: unsweetened chocolate is the secret weapon. Now I’m sharing this Cincinnati chili recipe with you because it’s become my family’s go-to weeknight dinner, and it pairs beautifully with sides like Bacon Smokies Recipe for a complete meal experience.
The Magic Behind Cincinnati’s Most Iconic Chili
I’ll never forget the first time my daughter tasted this chili. She was skeptical—mostly because it looked different from what her friends’ families made. But one spoonful changed everything. She asked, “Why does it taste like there’s chocolate in it, Mom?” That’s when I knew this recipe was special.
Cincinnati chili is deeply personal to me because it represents more than just a meal. It’s a bridge between where I come from and where I am now, served over spaghetti in that distinctive way that made me smile when I first learned about it. Making this for my own kids feels like sharing a piece of my heart.
What is Cincinnati Chili?
Cincinnati chili is a unique American regional specialty that dates back to the 1920s, created by Macedonian immigrants who blended Mediterranean spice traditions with ground beef. Unlike thick, bean-heavy versions, Cincinnati chili is thinner, more sauce-like, and deeply spiced with warm aromatics like cinnamon, allspice, and cloves.
What truly sets it apart is the combination of unsweetened chocolate with Worcestershire sauce, vinegar, and tomato paste. These ingredients create a complex, almost savory-sweet profile that’s nothing like traditional American chili. The chocolate doesn’t make it sweet—it adds depth and richness that makes people say, “What is that amazing flavor?”
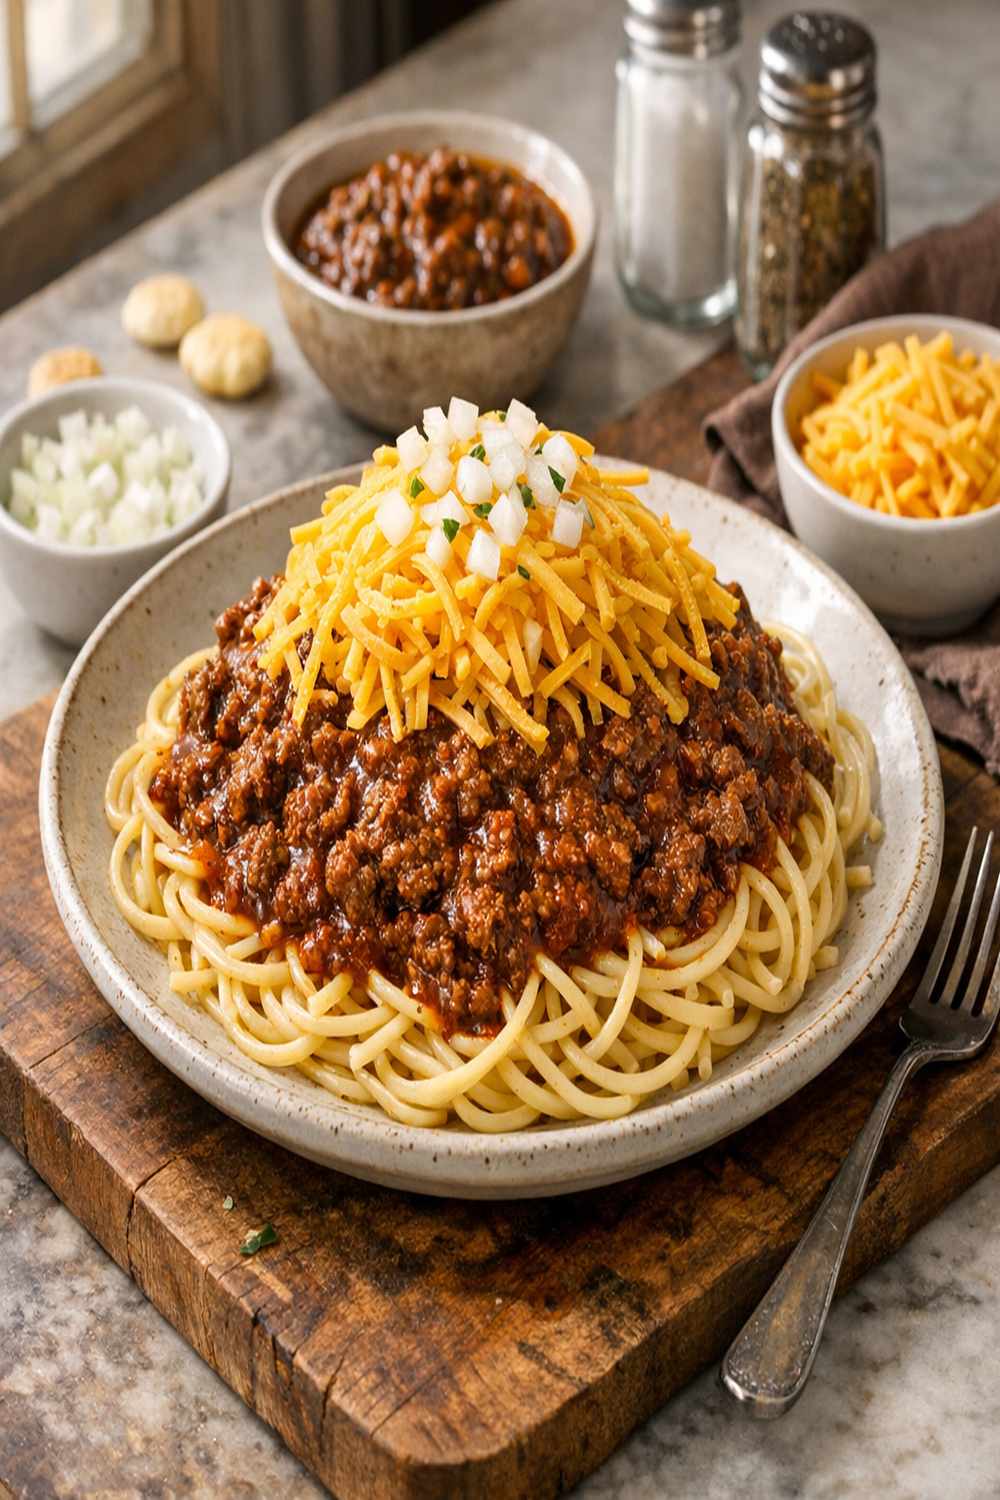
The traditional Cincinnati serving style is called “3-way” (chili, spaghetti, cheese), “4-way” (add onions), or “5-way” (add beans). I serve mine as a 4-way because my family loves the sharp bite of fresh onions on top.
Why You’ll Love This Cincinnati Chili Recipe
- It comes together in under 45 minutes – From pantry to table, this is faster than ordering takeout, which means weeknight wins for busy families like mine.
- The flavor is restaurant-quality but completely home-cooked – Your family will ask if you went to a restaurant. It’s that good, and yes, you made it.
- It’s budget-friendly and stretches to feed a crowd – Ground beef is affordable, and this recipe feeds six people easily with leftovers for lunch the next day.
- Kids actually enjoy eating it – The warm spices appeal to young palates without being spicy or overwhelming. My daughter’s friends ask for seconds.
- It’s naturally nutrient-dense – Tomatoes provide lycopene, lean beef offers iron and protein, and those warm spices bring anti-inflammatory benefits to the table.
- Zero complicated techniques required – This is a one-pot wonder. No searing, no simmering for hours, no fussy steps. Just honest, straightforward cooking.
The Ingredients
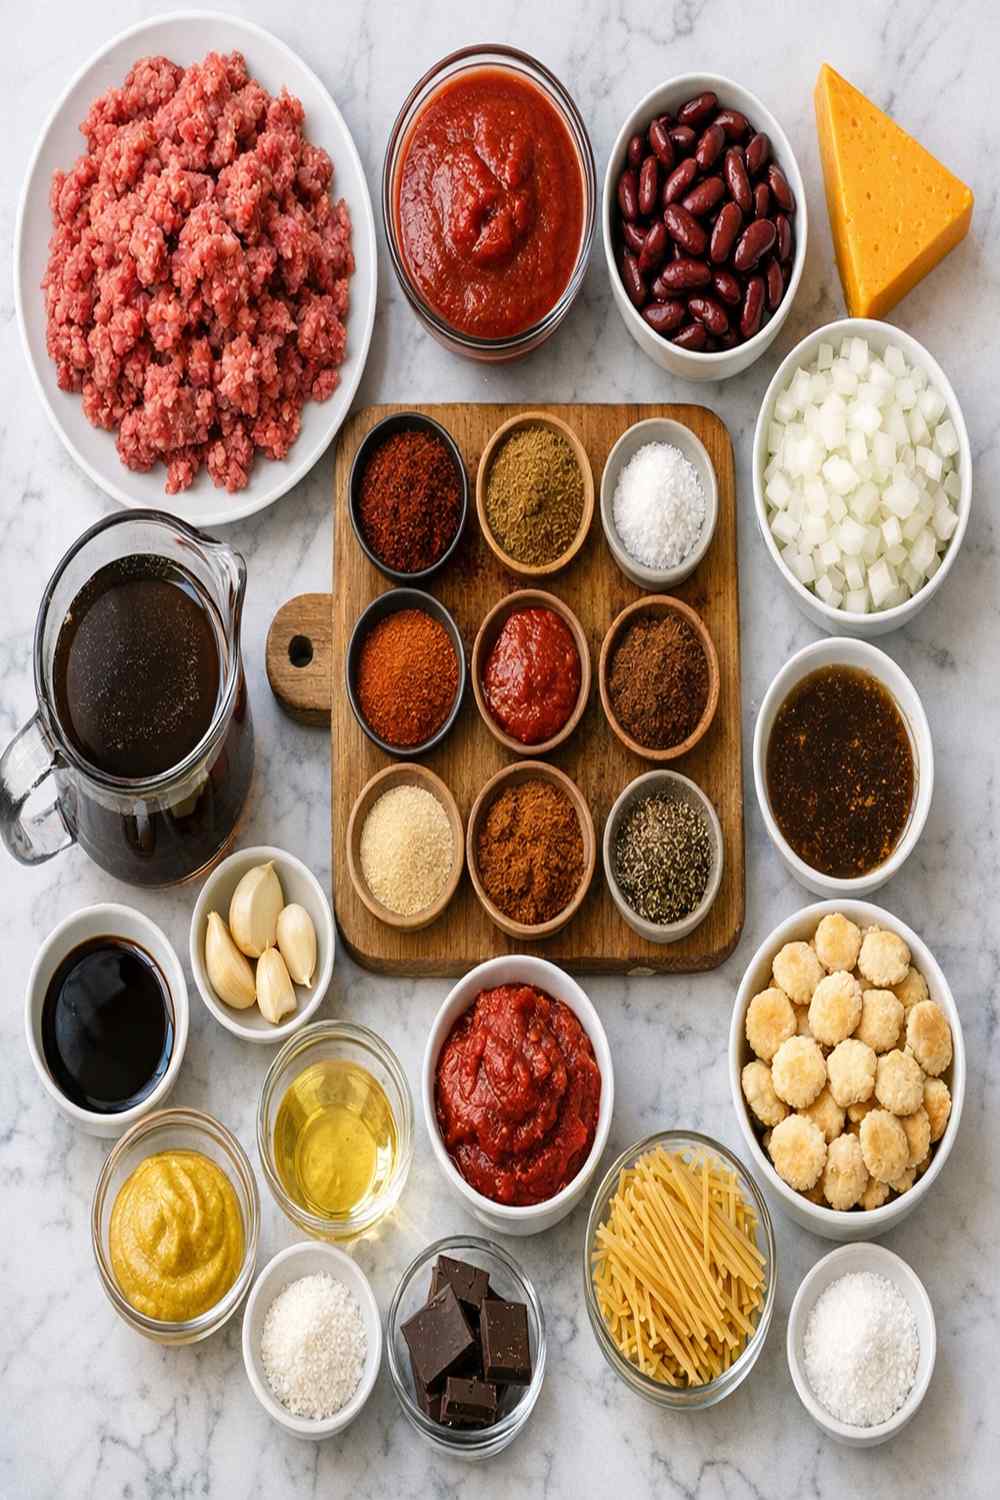
I’ve organized these ingredients by function so you can see how each one contributes to that signature Cincinnati flavor. Most of these are pantry staples you probably already have at home, which is why this recipe works so well for spontaneous weeknight dinners.
- 2 teaspoons Worcestershire sauce (umami and savory depth)
- 1 tablespoon dried oregano (adds Mediterranean depth)
- ¾ teaspoon ground allspice (warm and slightly sweet)
- 2 tablespoons tomato paste (concentrated tomato flavor)
- 1 tablespoon extra-virgin olive oil (for browning the base)
- ½ teaspoon ground cloves (just enough for complexity, not overpowering)
- 3 cloves garlic (minced fresh, not jarred)
- 16 ounces tomato sauce (no added sugar, read labels carefully)
- 2 cups low-sodium beef broth (or chicken broth works fine)
- 1 pound dried spaghetti (for serving, any brand works)
- 2 pounds ground beef (preferably 85/15 blend for balanced fat content)
- 1½ teaspoons ground cinnamon (the surprising ingredient people ask about)
- 2 tablespoons chili powder (the foundation of warm spice)
- 2 teaspoons packed brown sugar (balances the vinegar’s acidity)
- ¼ teaspoon red pepper flakes (optional, if your family likes heat)
- 2 medium yellow onions (finely chopped, plus extra for topping)
- 2 tablespoons apple cider vinegar (brightens all the warm spices)
- 1½ cups shredded sharp cheddar cheese (for topping, or use white cheddar)
- 1 ounce unsweetened baking chocolate (this is non-negotiable for authentic flavor)
- Salt and freshly ground black pepper (to taste, usually ½ teaspoon each)
Recipe yield: Serves 6 people with generous portions, plus leftovers
How to Make Cincinnati Chili?
I’ve broken this down into five manageable steps. The beauty of this recipe is that everything happens in one pot, and your kitchen will smell absolutely incredible the entire time. Before you start, get your spaghetti water boiling in a separate pot—timing is everything when you want dinner on the table fast.
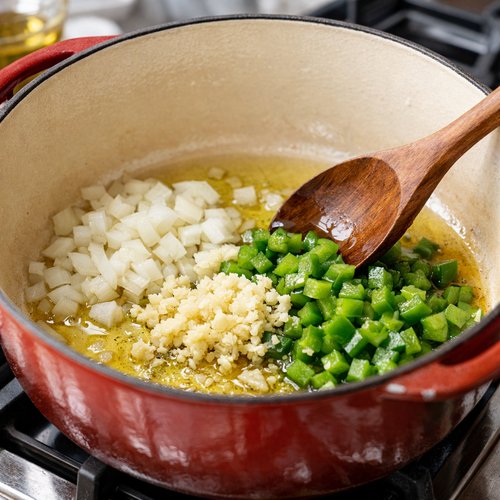
Step 1: Build Your Flavor Base With Aromatics
Heat your olive oil in a large Dutch oven or heavy-bottomed pot over medium-high heat. When the oil shimmers and moves easily around the pan (about 1 minute), add your chopped onions. Stir them frequently and let them cook for 5 to 6 minutes until they’re soft, translucent, and beginning to release their natural sweetness. You’ll see them turn from opaque white to soft golden at the edges.
This step isn’t just about softening onions—you’re drawing out their sugars and creating a sweet foundation that balances all those warm spices coming next. Don’t skip this or rush it. Your patience here pays off in flavor.
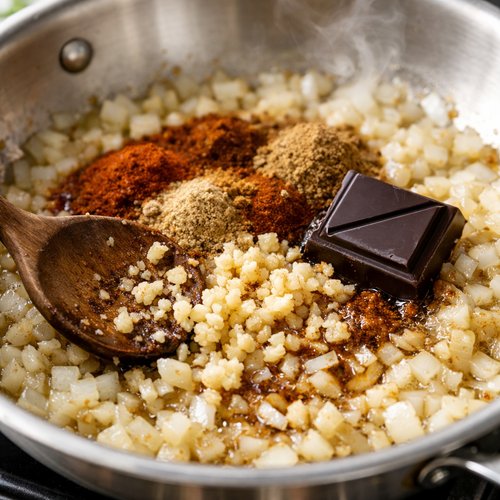
Step 2: Bloom Your Spices and Add the Chocolate
Add your minced garlic to the softened onions and stir constantly for just 30 seconds. You want to wake up the garlic without burning it. Now here’s where the magic happens: add your chili powder, oregano, cinnamon, allspice, and cloves all at once, along with that crucial unsweetened chocolate.
Stir everything together and let it cook for 45 seconds to 1 minute. You’ll smell the spices transform—that’s called blooming, and it releases essential oils and deepens their flavor. The chocolate will start to melt slightly into the oil and spices. This is one of my favorite moments in the kitchen because that aroma tells you something special is happening.
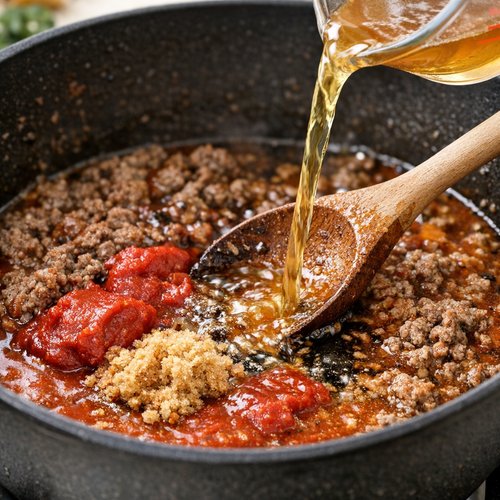
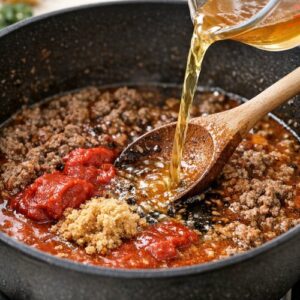
Step 3: Add Your Liquid Base and Aromatics
Pour in your beef broth, tomato sauce, tomato paste, apple cider vinegar, Worcestershire sauce, and brown sugar. Stir really well to break up any clumps of tomato paste and ensure the chocolate is fully incorporated. The mixture will look loose and sauce-like—that’s exactly what you want.
Scrape the bottom of the pot with your wooden spoon to release any browned bits stuck there. Those bits are pure flavor, and we’re not leaving them behind. Keep stirring until everything is combined smoothly, about 1 to 2 minutes.
Step 4: Brown and Add Your Meat
Crumble your ground beef directly into the pot with the simmering sauce. Use a wooden spoon or potato masher to break it into small, fine pieces as it cooks. You want pieces about the size of peas, not large chunks. Let everything come to a gentle boil, stirring occasionally, for about 3 to 4 minutes as the beef browns.
This recipe doesn’t require you to brown the meat separately first—that’s the beauty of cooking it in the sauce. The beef will brown gradually as it cooks in the liquid, and it stays incredibly tender because it’s simmering rather than searing.

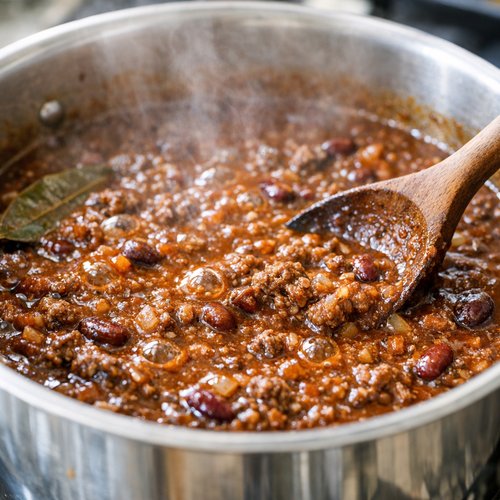
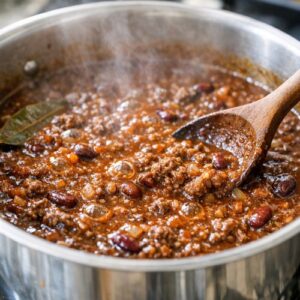
Step 5: Simmer Until Thickened and Flavors Marry
Once your chili reaches a gentle boil, reduce the heat to low or medium-low. Let it simmer uncovered for 20 to 25 minutes, stirring occasionally. You want it to reduce slightly and become a bit thicker—it should coat the back of a spoon but still be pourable. The sauce will darken slightly as it reduces, and the flavors will deepen and meld together.
Taste it around the 20-minute mark. Add salt and freshly ground black pepper—I typically use ½ teaspoon salt and ¼ teaspoon pepper, but adjust to your family’s preference. Remember, you can always add more salt, but you can’t take it out.
If your family likes heat, this is when you’d add a pinch of red pepper flakes. Stir well and let it cook for another minute so the heat distributes evenly.
Tips and Tricks
- Use freshly ground black pepper, not pre-ground – The difference is noticeable. Fresh peppercorns ground right before cooking taste brighter and more complex than stale pre-ground pepper that’s been sitting in your cabinet.
- Don’t skip the chocolate—use unsweetened baking chocolate, not cocoa powder – Cocoa powder is too intense and bitter. Baking chocolate melts smoothly and adds richness without cocoa’s harshness.
- Make it the day before for even better flavor – The spices continue to deepen overnight. Reheat gently on the stovetop over low heat, stirring frequently, before serving.
- Cook your spaghetti separately and toss it with a tiny bit of butter – This prevents it from clumping together on the plate. The traditional Cincinnati way is to serve it as a bed under the chili, not mixed together.
- Read your tomato sauce label carefully – Some brands add sugar, which throws off the balance. Look for plain tomato sauce with just tomatoes and salt in the ingredient list.
- Toast your dried oregano in the pan for 5 seconds before adding other spices – This optional step intensifies its flavor even more. It’s a trick I learned from my grandmother.
Expert’s Nutritional Insight
As a registered dietitian, I want to highlight something about this recipe that makes me genuinely excited: the combination of lycopene-rich tomatoes with warming spices creates a dish with significant anti-inflammatory potential. Lycopene, the red pigment in tomatoes, is better absorbed by your body when it’s cooked and combined with healthy fat—exactly what happens in this chili with the olive oil and beef fat.
The cinnamon, cloves, and allspice aren’t just flavor—they’re functional foods. Research shows these spices may help regulate blood sugar and support metabolic health. When you’re serving your family real, whole-food ingredients prepared from scratch, you’re giving them nutrition that actually works, not just calories.
Make-Ahead Guide
This is where Cincinnati chili truly shines for busy families. Here’s how I meal prep with this recipe:
Make the chili up to 3 days ahead: Complete the entire recipe through Step 5. Let it cool to room temperature, then store in an airtight container in the refrigerator. The flavors actually improve as the spices continue to meld together. When you’re ready to serve, reheat gently over low heat on the stovetop, stirring frequently and adding a splash of broth if it’s gotten too thick. Never use a microwave—it heats unevenly and can make the meat tough.
Freeze for up to 3 months: Let the chili cool completely, then transfer to a freezer-safe container, leaving about an inch of space at the top (chili expands slightly when frozen). Label it with the date. Thaw overnight in the refrigerator, then reheat slowly on the stovetop. The texture and flavor remain excellent.
Prep your components ahead: Chop your onions and mince your garlic the morning of, storing them in separate containers. Measure all your dried spices into a small bowl before cooking begins. This “mise en place” approach means you’re literally just following the steps—no hunting for ingredients mid-cook.
Common Mistakes to Avoid
- Overcooking the garlic – Add it at the last second before blooming your spices. Burned garlic tastes bitter and ruins the whole pot. If you accidentally burn it, start over—it’s worth it.
- Using ground cocoa powder instead of baking chocolate – This was my first mistake when I tried making Cincinnati chili. Cocoa powder creates a dusty, overly bitter flavor that nobody enjoys. Unsweetened baking chocolate is the only way.
- Letting it boil rapidly instead of simmer gently – Fast boiling makes the meat tough and causes flavors to scatter rather than blend. Medium-low heat gives you tender meat and a unified, complex sauce.
- Forgetting to taste and adjust seasoning at the end – Every pot of chili is slightly different based on your tomato sauce brand, beef moisture content, and cooking time. Always taste and adjust salt and pepper in the final minute.
Seasonal Variations
Fall and Winter: Add ½ teaspoon of ground ginger and 2 tablespoons of raisins during the simmering phase. The ginger adds warmth, and the raisins echo the brown sugar notes beautifully.
Spring and Summer: Finish the chili with fresh cilantro and a squeeze of lime juice just before serving. Add diced fresh jalapeño on top for brightness. Serve with cool toppings like sour cream and fresh onions instead of cheese.
Year-round variation: If your family loves beans, add one can of kidney beans (drained and rinsed) during the simmering phase. This makes it heartier and adds fiber—though Cincinnati traditionalists would say that makes it a “Skyline-style” rather than authentic Cincinnati.
Can I Store Cincinnati Chili?
Absolutely, and I’ve found this recipe actually improves with storage. Here’s exactly how I manage it in my kitchen:
Refrigerator: Store in an airtight container for up to 3 days. The flavors continue to develop and deepen during storage. Reheat gently on the stovetop over low to medium-low heat, stirring frequently. Add a splash of beef broth if it thickens too much—chili naturally thickens as it sits because the meat and spices absorb liquid.
Freezer: Freeze in airtight containers or freezer bags for up to 3 months. I like using flat freezer bags because they stack easily and thaw faster than rigid containers. Leave about an inch of headspace because chili expands slightly when frozen. Label everything with the date—trust me, future-you will appreciate it.
Thawing: Thaw overnight in the refrigerator, then reheat on the stovetop. Never thaw at room temperature, and never microwave. Low and slow is the only way to maintain texture and flavor.
The spaghetti: Store noodles separately from the sauce. Cooked spaghetti keeps for 3 to 4 days in a separate airtight container. When you’re ready to serve, either cook fresh noodles or warm the stored noodles by tossing them with a bit of butter in a pan.
Nutrition Information
Based on USDA nutritional database standards, one serving of this Cincinnati chili (approximately 1½ cups chili plus ½ cup cooked spaghetti and 2 tablespoons cheese) contains approximately 480 calories, 28g protein, 32g carbohydrates, 22g fat, and 6g fiber. The sodium content is approximately 780mg per serving before toppings.
From a nutritional standpoint, this meal delivers excellent protein from the beef and spaghetti, complex carbohydrates from the whole-grain spaghetti option (if you choose that), and significant amounts of vitamin C and potassium from the tomatoes. The beef provides highly absorbable iron and B vitamins. This isn’t a light meal—it’s a complete, satisfying dinner that fuels active families.
If you’re watching sodium, reduce added salt slightly and use low-sodium broth. If you’re prioritizing fiber, use whole wheat spaghetti instead of regular. The recipe is flexible enough to adapt to different dietary needs without losing its essential character.
What Can I Serve With Cincinnati Chili?
Cincinnati chili is beautiful on its own, but here’s how I serve it to make it feel like a restaurant-quality meal at home. The traditional sides complement those warm spices perfectly, and honestly, some of them pair amazingly with other proteins too—like Tender Beef Barbacoa Chipotle Tacos or Baked Ziti Sausage.
- Fresh diced white onion – Sharp and bright, it cuts through the richness. This is my family’s favorite topping.
- Shredded sharp cheddar or white cheddar cheese – Creamy and tangy. The sharpness balances the chili’s sweetness perfectly.
- Oyster crackers or saltine crackers – For texture and to break up the richness. My kids insist on these.
- Kidney beans or black beans – Mixed in or on top, adds heartiness and fiber. This is the “5-way” Cincinnati style.
- A simple green salad with vinaigrette – The acidity and fresh greens balance the heavy chili beautifully. I use lemon juice and olive oil.
- Cornbread or garlic bread – Perfect for soaking up every last bit of sauce. Warm cornbread is especially good.
- Sour cream or Greek yogurt as a topping – A cooling element that softens the spice slightly. This is particularly nice if you added red pepper flakes.
Substitutes
- Ground turkey or ground chicken instead of beef – Use the same amount, though note that poultry is leaner, so the sauce might not develop as much richness. Add an extra tablespoon of olive oil to compensate. The flavor will be lighter but still delicious, and you’ll reduce calories by about 100 per serving.
- Unsweetened cocoa powder if you can’t find baking chocolate – Use ½ ounce (about 2 tablespoons) cocoa powder mixed with 1 teaspoon of coconut oil or butter to create a paste, then add it with your spices. It won’t be quite the same, but it works in a pinch.
- Tamari or soy sauce instead of Worcestershire sauce – Use about 1 teaspoon. You’ll lose some complexity, but you’ll keep the umami depth that makes this chili special.
- Red wine vinegar instead of apple cider vinegar – This will make it slightly sharper and less fruity. Use the same amount. Red wine vinegar is closer in acidity to apple cider, so the balance won’t be thrown off.
- Any fresh pasta instead of spaghetti – Pappardelle, fettuccine, or even egg noodles work beautifully. The sauce clings nicely to wider noodles.
- Nutritional yeast sprinkled on top instead of cheese – This adds a cheesy, umami flavor if you’re avoiding dairy. Use about 2 tablespoons per serving for best results.
Cincinnati Chili Recipe
Ingredients
Method
- Heat your olive oil in a large Dutch oven or heavy-bottomed pot over medium-high heat. When the oil shimmers and moves easily around the pan (about 1 minute), add your chopped onions. Stir them frequently and let them cook for 5 to 6 minutes until they're soft, translucent, and beginning to release their natural sweetness. You'll see them turn from opaque white to soft golden at the edges. This step isn't just about softening onions—you're drawing out their sugars and creating a sweet foundation that balances all those warm spices coming next. Don't skip this or rush it. Your patience here pays off in flavor.

- Add your minced garlic to the softened onions and stir constantly for just 30 seconds. You want to wake up the garlic without burning it. Now here's where the magic happens: add your chili powder, oregano, cinnamon, allspice, and cloves all at once, along with that crucial unsweetened chocolate. Stir everything together and let it cook for 45 seconds to 1 minute. You'll smell the spices transform—that's called blooming, and it releases essential oils and deepens their flavor. The chocolate will start to melt slightly into the oil and spices. This is one of my favorite moments in the kitchen because that aroma tells you something special is happening.

- Pour in your beef broth, tomato sauce, tomato paste, apple cider vinegar, Worcestershire sauce, and brown sugar. Stir really well to break up any clumps of tomato paste and ensure the chocolate is fully incorporated. The mixture will look loose and sauce-like—that's exactly what you want. Scrape the bottom of the pot with your wooden spoon to release any browned bits stuck there. Those bits are pure flavor, and we're not leaving them behind. Keep stirring until everything is combined smoothly, about 1 to 2 minutes.
- Crumble your ground beef directly into the pot with the simmering sauce. Use a wooden spoon or potato masher to break it into small, fine pieces as it cooks. You want pieces about the size of peas, not large chunks. Let everything come to a gentle boil, stirring occasionally, for about 3 to 4 minutes as the beef browns. This recipe doesn't require you to brown the meat separately first—that's the beauty of cooking it in the sauce. The beef will brown gradually as it cooks in the liquid, and it stays incredibly tender because it's simmering rather than searing.

- Once your chili reaches a gentle boil, reduce the heat to low or medium-low. Let it simmer uncovered for 20 to 25 minutes, stirring occasionally. You want it to reduce slightly and become a bit thicker—it should coat the back of a spoon but still be pourable. The sauce will darken slightly as it reduces, and the flavors will deepen and meld together. Taste it around the 20-minute mark. Add salt and freshly ground black pepper—I typically use ½ teaspoon salt and ¼ teaspoon pepper, but adjust to your family's preference. Remember, you can always add more salt, but you can't take it out. If your family likes heat, this is when you'd add a pinch of red pepper flakes. Stir well and let it cook for another minute so the heat distributes evenly.
Notes
FAQs
Why do people call it “3-way” and “5-way” chili?
This is a Cincinnati tradition! A “3-way” consists of chili, spaghetti, and cheese. A “4-way” adds onions, and a “5-way” adds beans. Some places have even created “6-ways” and beyond with jalapeños and other toppings. You serve it however appeals to your family—there’s no wrong answer, only delicious ones.
Is this chili actually spicy?
Not at all. The cinnamon, cloves, and allspice are warming spices, not hot spices. There’s no cayenne or ghost pepper here. The depth comes from complexity and the chocolate’s richness, not from heat. If your family loves spice, you can add ¼ to ½ teaspoon of cayenne pepper or red pepper flakes in the final minute of cooking.
Can I make this in a slow cooker?
Yes, but I don’t recommend it for this particular recipe. Slow cooking draws out the delicate flavors from the spices and can make them taste muted or one-dimensional. The quick simmer method keeps everything bright and balanced. If you absolutely must use a slow cooker, bloom your spices on the stovetop first for 1 minute, then transfer everything to the slow cooker and cook on low for 3 to 4 hours. It won’t be quite as good, but it will still be edible.
What if I don’t like anchovies in Worcestershire sauce?
Most people don’t realize Worcestershire contains anchovies, but you won’t taste fish in this chili—the anchovies are just one ingredient in a complex fermented sauce that adds savory depth. If this truly bothers you ethically or you’re allergic, substitute with tamari or soy sauce (use 1 teaspoon instead of 2 teaspoons) for that umami depth. You’ll lose some complexity, but the chili will still taste great.
Why is my chili watery after storing it?
This is actually normal! As the chili sits in the refrigerator, the meat and spices release liquid back into the sauce. Just reheat it uncovered on the stovetop over medium heat for a few minutes—the excess liquid will evaporate. Never add more cornstarch or flour to thicken it; gentle simmering will restore the proper consistency naturally.
Can I use fresh garlic paste from a jar instead of mincing it fresh?
You can, but I don’t recommend it. Jarred garlic paste often contains added sodium and preservatives that can throw off the flavor balance. Plus, the garlic flavor is less bright and fresh. I understand that mincing fresh garlic takes an extra 30 seconds, but that’s 30 seconds that makes a real difference in your final dish. It’s worth it every time.
More Recipes You’ll Love
- my go-to banana bread – Uses similar warming spices (nutmeg, cinnamon) that echo Cincinnati chili’s flavor profile beautifully for a contrasting dessert
- Tender Beef Barbacoa Chipotle Tacos Recipe – Another slow-cooked beef recipe with complex spicing that families adore
- New York Style Pizza Sauce – Uses tomato sauce as a base like Cincinnati chili; great for those nights when you want Italian flavors instead
- Queso Fresco – A fresh cheese that pairs beautifully as a topping alternative to cheddar
- This Cozy Homemade Soup – Worth adding to your recipe collection.
Making Cincinnati chili for my family has become more than just cooking dinner—it’s my way of carrying my heritage forward and creating new memories with my kids. Every time we gather around the table with steaming bowls and all the toppings spread out, I’m reminded that the best meals are the ones made with love and shared with people who matter most.
This recipe proves that you don’t need fancy techniques or complicated ingredients to make something truly special. You just need good ingredients, a little knowledge about how flavors work together, and the willingness to slow down long enough to let those flavors do their magic.
Your family is going to love this. I promise. And when they ask what that mysterious, incredible flavor is, you can smile and tell them it’s love, patience, and just a touch of unsweetened chocolate. Happy Cooking!