
This post contains affiliate links. As an Amazon Associate I earn from qualifying purchases.
This Chinese pork stir fry doesn’t just taste incredible—it stops people in their tracks. The moment you slide those emerald peppers and caramelized pork into a bowl, you’ve created something that looks as good as it tastes. I’ve spent the last decade helping families transform ordinary weeknights into moments worth celebrating, and this recipe is pure magic for that exact purpose. It’s my go-to when I need to impress without the stress, and I’m thrilled to share it with you.
The Most Beautiful Chinese Pork Stir Fry Recipe You’ll Ever Make (And It’s Easier Than It Looks)
I’ll never forget the Tuesday night when my oldest came home from soccer practice absolutely starving. I had maybe thirty minutes before bedtime routines kicked in, and I needed something that would feel special. I pulled out my wok, grabbed what I had in the fridge, and thirty minutes later, we were gathered around the table with steaming bowls of this stir fry. But here’s what surprised me most: my daughter put her fork down and said, “This looks like a restaurant dish.” That’s when it clicked for me. The most nourishing meals are the ones that feed both your eyes and your soul simultaneously. This recipe does exactly that.
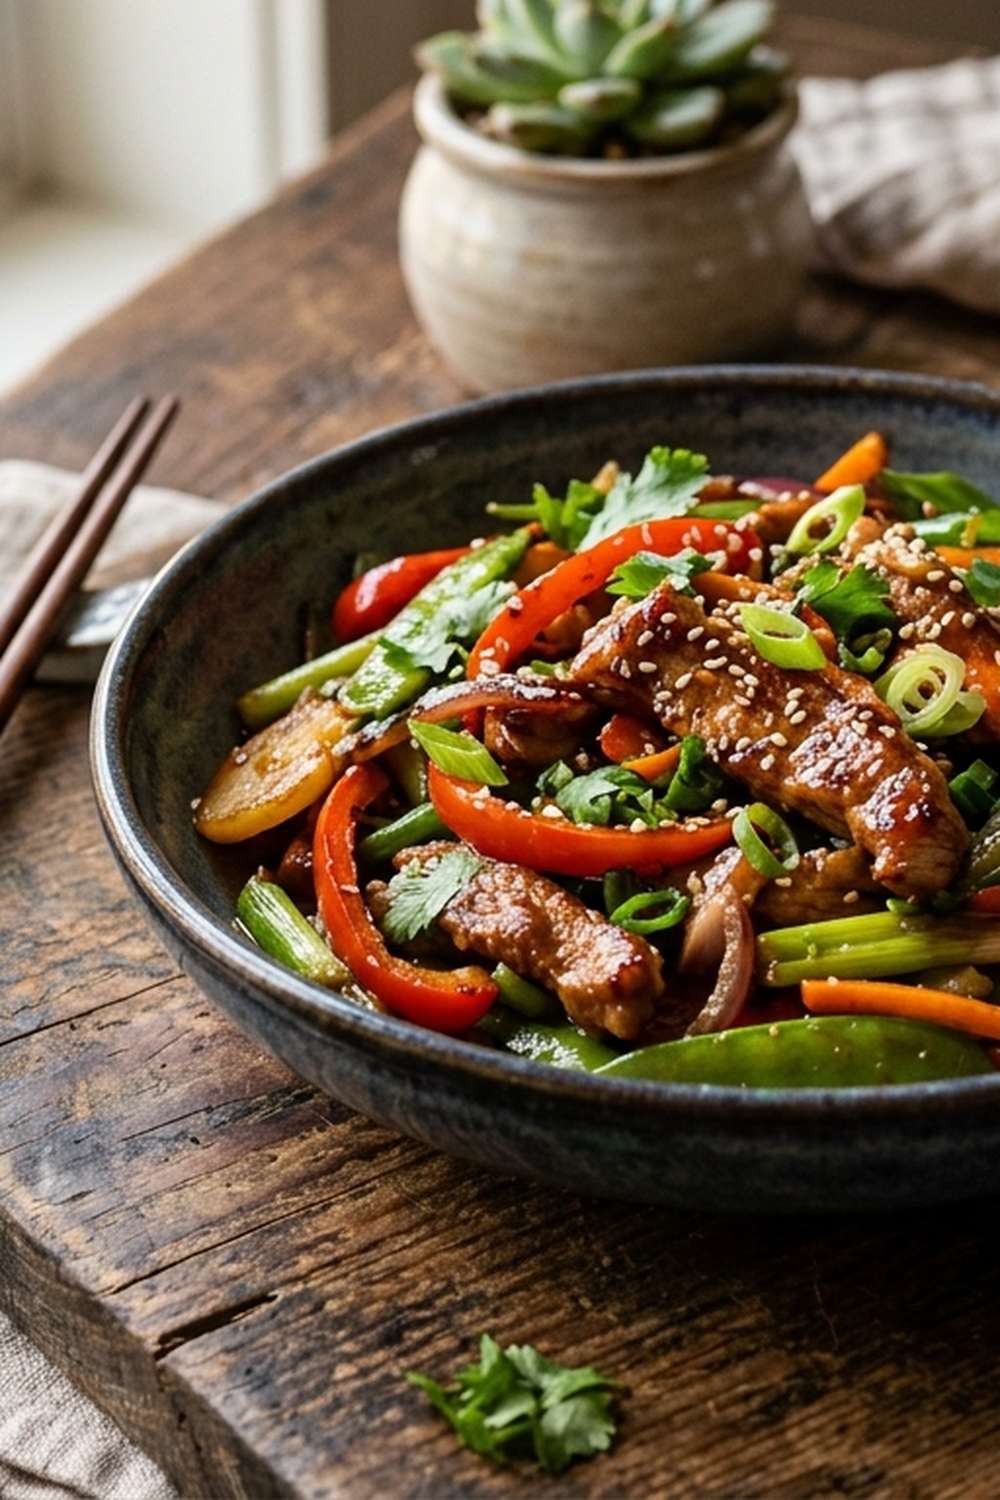
The Visual Elements That Make This Dish Stunning
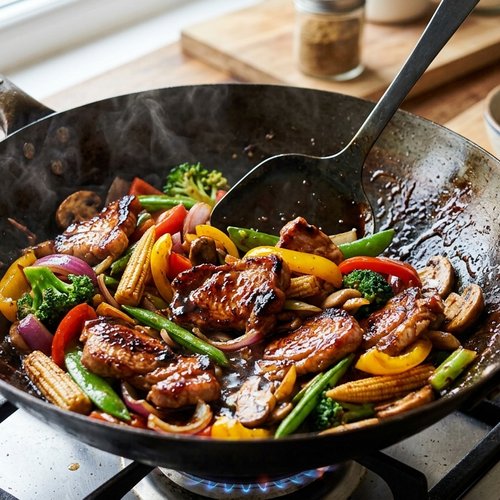
Before we dive into the how, let’s talk about the why this dish looks so restaurant-quality. It’s not magic—it’s strategy. Every element on your plate has been chosen specifically to create visual drama and depth.
- Jewel-Toned Green Peppers – These long hot peppers create brilliant emerald accents that immediately signal freshness and vibrancy. The slight charring from high heat creates depth and complexity that makes your eye want to linger on the plate.
- Glossy, Caramelized Pork – When pork hits a properly heated wok, the edges develop a gorgeous mahogany brown that catches light beautifully. This golden-brown exterior against pink interior tells the story of perfect cooking.
- Aromatic Ginger and Garlic – These humble ingredients become golden-bronze flavor bombs that punctuate the dish with color and texture variation. They prevent the plate from feeling monochromatic.
Choosing Ingredients for Maximum Visual Impact
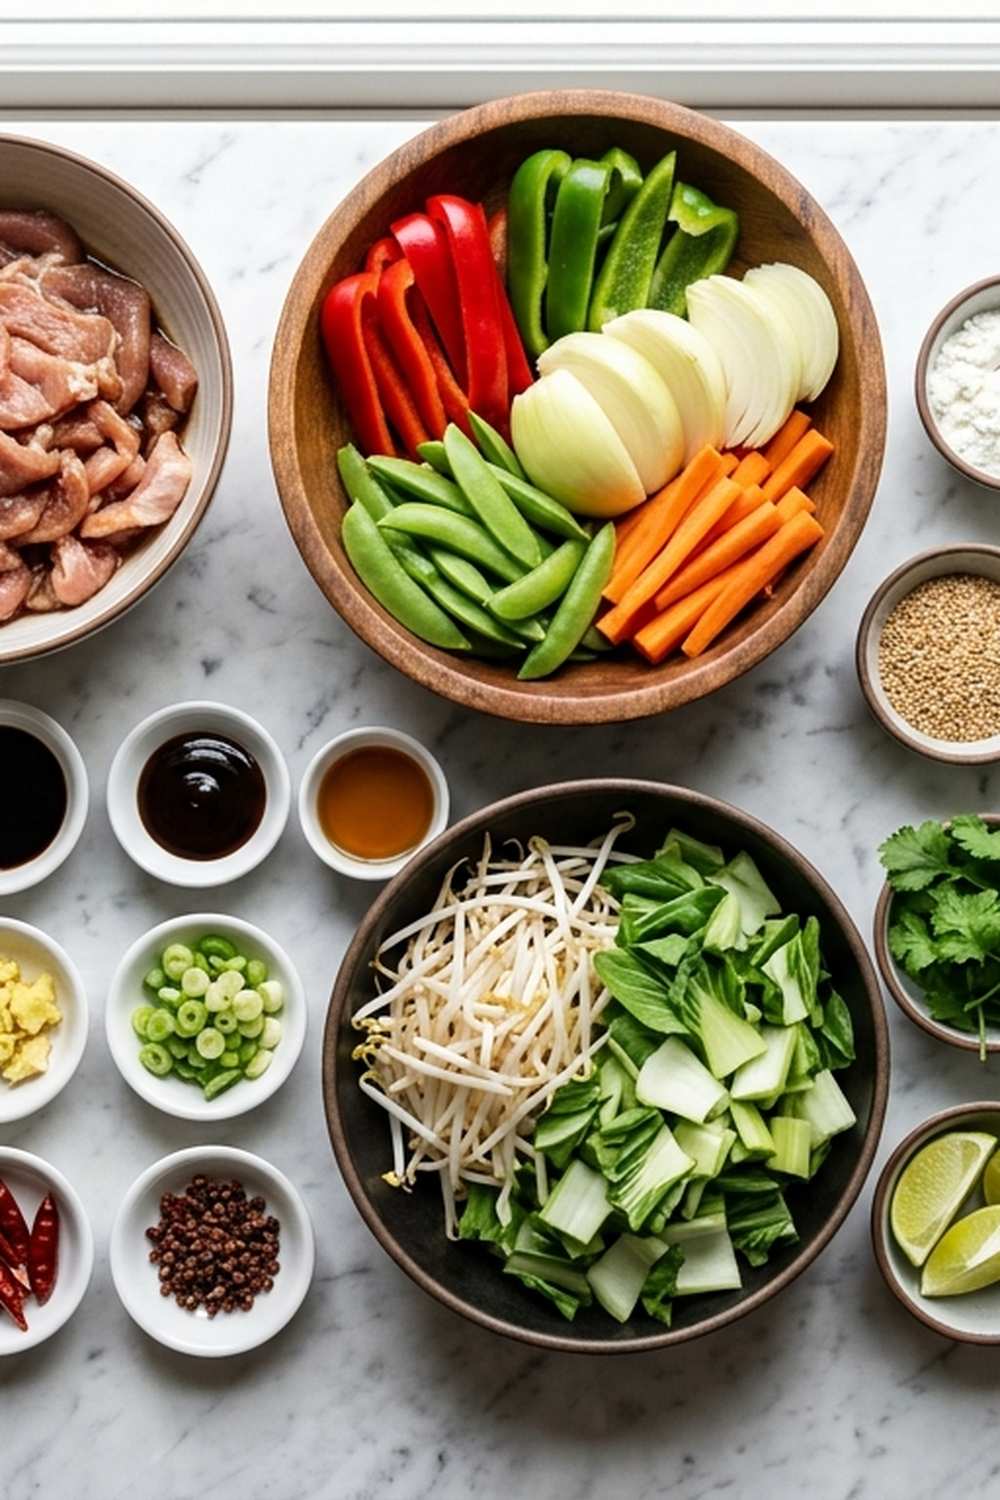
Every ingredient in this stir fry was chosen not just for nutrition, but for how it looks and performs on the plate. As a registered dietitian, I always tell families that eating with your eyes first isn’t shallow—it’s smart nutrition. We eat better when our food appeals to us visually, and we’re more likely to include it in our regular rotation. This recipe makes that philosophy delicious and practical.
- ½ teaspoon dark soy sauce (creates the final glossy, mahogany finish)
- 1 teaspoon light soy sauce (adds salty complexity without darkening the protein)
- 1 tablespoon Shaoxing wine (the second addition, for deglazing and building layers of flavor)
- 1 teaspoon sesame oil (drizzled at the very end for nutty aromatics and a professional flourish)
- 1 teaspoon cornstarch (creates a silky coating that catches the sauce beautifully)
- 6 long hot green peppers, approximately 10 to 12 ounces total (the star of the visual show—look for peppers with unblemished skin and bright, even coloring)
- 2 slices fresh ginger, about 1 inch each (peeled and thinly sliced for maximum aromatic impact)
- ½ teaspoon sugar (balances the heat from peppers with subtle sweetness)
- 1 tablespoon water (helps tenderize the meat during the marinade phase)
- 1 teaspoon Shaoxing wine (adds depth without overpowering delicate pork flavor)
- 2 teaspoons vegetable oil (for the initial pork marinade)
- 1 teaspoon oyster sauce (brings umami richness that makes people ask “what IS that flavor?”)
- 2 tablespoons vegetable oil (divided between the two cooking phases)
- 8 ounces pork shoulder or loin (cut into thin, uniform strips for even cooking and elegant presentation)
- 3 cloves garlic, thinly sliced (creates golden-brown flavor jewels throughout the dish)
How to Make Picture-Perfect Chinese Pork Stir Fry Recipe
The magic of stir-fry isn’t complicated—it’s about timing, temperature, and technique working in perfect harmony. I’ve broken this down into foolproof steps that will have you creating restaurant-quality food in your own kitchen. Think of yourself as an artist, and your wok is your canvas.
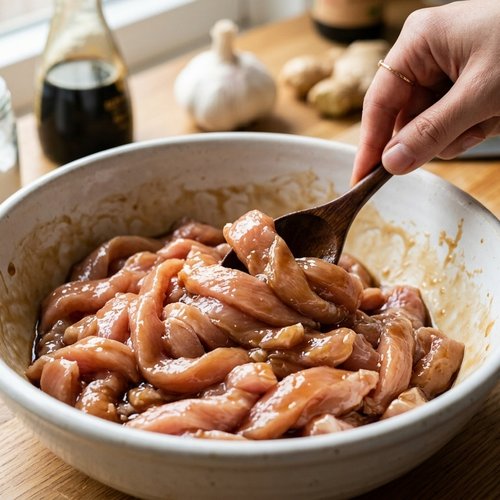
Step 1: Prepare Your Pork with a Silky Marinade
In a medium bowl, combine your pork strips with the water, cornstarch, 2 teaspoons of vegetable oil, Shaoxing wine, oyster sauce, and light soy sauce. Mix everything together thoroughly until each piece of pork is evenly coated with the marinade. This isn’t just flavor—this coating is what creates that silky, restaurant-quality texture that keeps people coming back for seconds. Set this aside while you prep everything else. This step takes just three minutes and makes a world of difference in your final result.
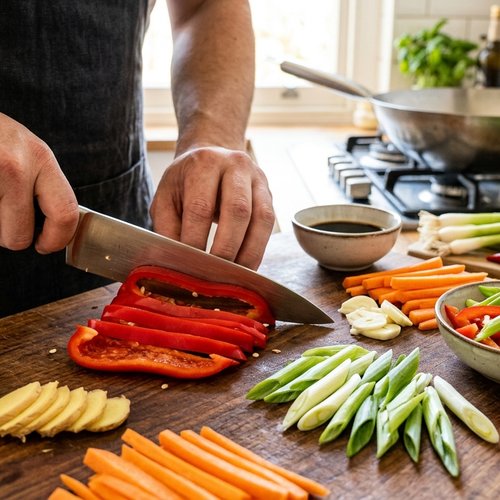
Step 2: Prep Your Vegetables for Speed and Success
Using a sharp knife, carefully de-seed your long hot peppers by slicing them lengthwise and removing the white membrane and seeds. Rinse quickly under cool water. Now slice them diagonally into thin, elegant pieces—these diagonal cuts aren’t just pretty, they’re functional. Diagonal cuts increase surface area, which means more of the pepper gets that beautiful char from the high heat. Peel your ginger and slice it thinly. Peel your garlic cloves and slice them thinly as well. The key here is consistency—uniform sizes cook evenly and look intentional on the plate.
Step 3: Heat Your Wok to the Perfect Temperature
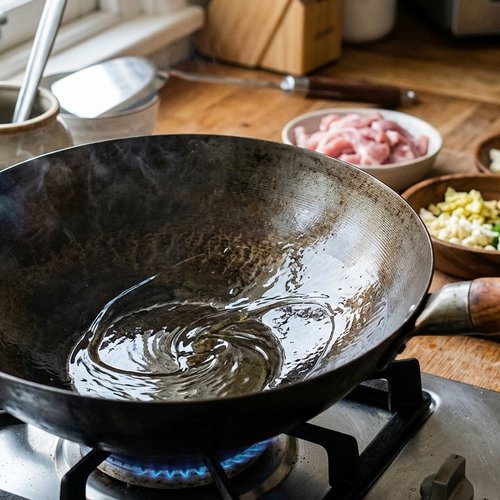
Place your wok over high heat. This is crucial. You’re looking for it to be smoking slightly—not aggressively smoking, but you should see a hint of smoke rising from the surface. This takes about two to three minutes depending on your stove. When it’s ready, add 1 tablespoon of vegetable oil and swirl it around to coat the entire surface. The oil should shimmer and move freely across the wok bottom. This temperature is what creates those gorgeous caramelized edges on your pork.
Step 4: Sear the Pork Until Golden
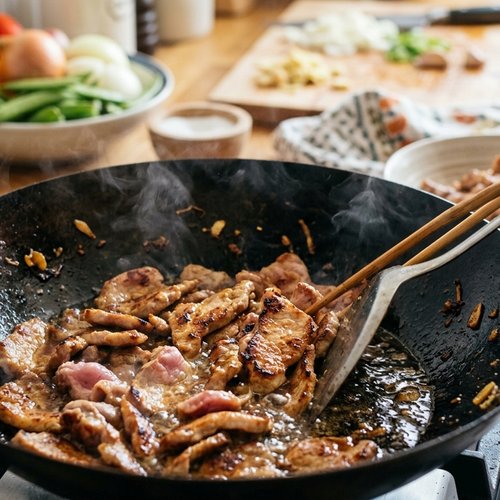
Working quickly, add your marinated pork to the screaming-hot wok. Don’t stir immediately—let it sit for about 30 seconds. This is when the magic happens. The bottom of each piece makes contact with the heat and develops that beautiful mahogany-brown crust. After 30 seconds, stir and move the pork around constantly for another minute and a half. You’re looking for the pork to be lightly browned on the edges while staying pink in the center. Remove it immediately to a clean plate. This entire step takes two to three minutes maximum. Don’t overcook—the pork will continue cooking slightly when we add it back in at the end.
Step 5: Build Flavor with Ginger, Garlic, and Peppers
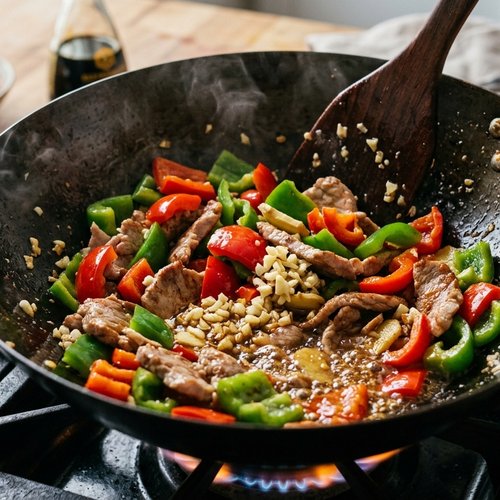
Return your wok to medium-high heat and add the second tablespoon of vegetable oil. Add your ginger slices and garlic slices first, stirring constantly for just 30 seconds. You’ll immediately smell the aromatics blooming—this is what makes people walk into your kitchen and say, “What’s cooking?” The ginger and garlic are getting golden and fragrant without burning. Now add your sliced peppers, stirring everything together. Continue cooking for another 30 to 45 seconds. You want to see the peppers just beginning to blister and develop slight char marks—this is where the visual drama comes from. The peppers should still have some crunch when you bite them.
Step 6: Deglaze and Build the Sauce
Pour in your 1 tablespoon of Shaoxing wine, stirring constantly. You’ll hear a magnificent sizzle, and you’ll see the liquid hit the hot wok surface. This is deglazing—you’re lifting up all those flavorful brown bits stuck to the bottom of the wok and incorporating them into your sauce. Stir for about 10 seconds, scraping the bottom of the wok with your spatula or wooden spoon. The wine aroma will intensify, and the pan will look dark and concentrated.
Step 7: Bring It All Together with a Glossy Finish
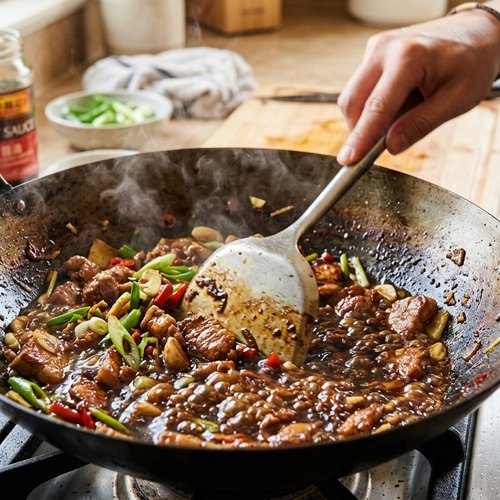
Return your cooked pork to the wok along with the ½ teaspoon of sugar and ½ teaspoon of dark soy sauce. Toss everything together over high heat for literally 10 to 15 seconds. The sugar will melt into the liquid, the dark soy sauce will coat everything evenly, and your pork will get that gorgeous glossy finish that makes people pause before taking their first bite. If you have sesame oil, drizzle in 1 teaspoon right at this moment—it adds an incredible nutty aroma and professional polish.
The Plating Masterclass
How you plate this dish transforms it from “dinner” into “an experience.” As someone who’s spent years helping families create moments worth remembering around the table, I can tell you that plating matters. It signals care. It signals intentionality. It makes your family feel valued. Here’s exactly how I do it:
- Create Height and Movement – Don’t dump everything flat on the plate. Use chopsticks or tongs to create vertical layers. Pile your pork in the center, lean peppers against it at angles, and nestle ginger and garlic pieces throughout. This height makes the dish look abundant and intentional, not tired.
- Spoon the Sauce Strategically – The glossy sauce is liquid gold. Spoon it around the edges of your pile, letting it pool slightly on one side of the plate. Leave some white space—negative space makes your food look more elegant and less overwhelming. The sauce should catch the light and look shiny and inviting.
- Finish with a Garnish that Adds Contrast – A light sprinkle of sesame seeds, a few green onion slivers, or even a tiny cilantro leaf adds that final professional touch. These garnishes break up the color slightly and add textural intrigue. Your eye naturally travels to these lighter elements first.
Photography Tips for This Dish
If you’re going to cook something this beautiful, you might as well capture it! I’ve learned a thing or two about food photography while feeding my family and documenting our meals. Here’s what makes this particular dish photograph like a dream:
- Shoot Immediately After Plating – The steam rising off the dish, the glossy sauce still shimmering, the peppers at their brightest—this is the magic window. You have maybe three to four minutes before the heat starts dissipating and the appeal fades. Have your phone or camera ready.
- Use Natural Side Lighting – Position your plate to the side of a window with natural light coming from the left or right. This side lighting makes the peppers glow, catches the glossy sauce brilliantly, and creates beautiful shadows that add depth. Overhead lighting flattens everything and makes it look less appetizing.
- Shoot at a 45-Degree Angle – Not straight down, not dead-on—a 45-degree angle shows the height and composition you worked so hard to create. It also lets viewers see the glossy sauce and the charred edges of the peppers.
Seasonal Color Variations
One of the things I love about this recipe is how adaptable it is to whatever’s in season. As a dietitian, I always encourage families to eat seasonally because that’s when produce is most affordable and nutritionally dense. Here’s how to keep this dish visually stunning year-round:
Spring Version: Use spring onions instead of some of the peppers, add thin asparagus spears, and finish with fresh mint. The lighter greens and whites signal freshness and renewal.
Summer Version: Add zucchini coins, use the brightest red peppers you can find, and finish with Thai basil. The reds and bright greens create a summery, vibrant palette.
Fall Version: Incorporate thin carrot sticks for warm orange tones, use red peppers, and finish with crispy fried shallots. This adds earthiness and warmth.
Winter Version: Use darker peppers, add thinly sliced bok choy or broccoli florets, and finish with white sesame seeds. The contrast between dark and light creates sophisticated visual interest.
Can I Store Chinese Pork Stir Fry Recipe?
Here’s the honest truth: stir-fry is best served immediately while it’s hot, the peppers still have crunch, and the sauce is glossy. However, I understand real life—sometimes you’re meal prepping, sometimes you have leftovers. I’ve got you covered.
Store any leftovers in an airtight container in the refrigerator for up to three days. The pork will stay tender, and the peppers will soften slightly (which honestly isn’t terrible—they become more tender and the flavors meld together beautifully).
To reheat, I recommend using a wok or large skillet over medium-high heat rather than a microwave. Add a tiny splash of water or broth, cover for one minute to create steam, then stir-fry for another minute or two until everything is heated through and the sauce is glossy again. This method brings the dish back to life much better than microwaving does.
You can also freeze this for up to one month. Freeze it in a flat layer on a baking sheet first, then transfer to a freezer bag once solid. This prevents everything from freezing into a solid block. Thaw overnight in the refrigerator before reheating using the method above.
Expert’s Nutritional Tip
As a registered dietitian who’s spent years helping families understand nutrition in practical terms, I want to highlight something important about this dish. The pork you choose matters more than you might think. Pork shoulder and loin are both excellent choices, but they have different nutritional profiles. Pork loin is leaner—about 3 grams of fat per 3-ounce serving compared to pork shoulder’s 8 grams. However, pork shoulder has more flavor and stays more tender during quick cooking. My recommendation? Choose based on your family’s preferences and nutritional goals. Either way, you’re getting complete protein with all essential amino acids. The real nutritional victory here is the long hot peppers—they’re nutritional powerhouses. One medium pepper provides over 100% of your daily vitamin C, plus they contain capsaicin, which research suggests may have anti-inflammatory benefits. That’s why this dish looks vibrant and tastes incredible—the most nutritious ingredients are usually the most visually appealing too.
Make-Ahead Guide
I created this guide specifically for busy families because I live this reality every single day. Meal planning isn’t about being perfect—it’s about being strategic so that dinner feels easier when 5 p.m. hits and everyone’s hungry and tired.
The Night Before: Slice your pork and prepare the marinade (water, cornstarch, oil, Shaoxing wine, oyster sauce, and light soy sauce). Cover and refrigerate. This actually helps the meat absorb the flavors even better. Separately, de-seed and slice your peppers. Store them in an airtight container. Slice your ginger and garlic. Store in separate containers. By the time you cook the next day, all your active prep work is done.
Two Hours Before Cooking: Remove your marinated pork from the refrigerator so it comes to room temperature. Cold pork won’t sear properly. This step takes 30 seconds and makes a significant difference.
During Cooking: Everything happens fast once you start—literally five minutes from wok to table. This is actually the beauty of stir-fry. It’s not a slow-cooking recipe that demands hours. It’s a quick-hit dinner that feels elegant despite being incredibly efficient.
Common Mistakes to Avoid
After helping hundreds of families master stir-fry, I’ve seen the same stumbling blocks come up again and again. Let me save you the frustration:
Mistake 1: Starting with a Cold Wok – This is the number-one reason home stir-fries don’t taste or look like restaurant versions. Your wok needs to be properly heated. I mean smoking-hot. If it’s not hot enough, the pork steams instead of sears, and you miss out on those gorgeous caramelized edges. Give your wok two to three minutes over high heat before adding oil.
Mistake 2: Overcrowding the Wok – This recipe is portioned for a reason. Adding more than 8 ounces of pork means the temperature drops significantly, and you’ll end up with steamed pork instead of seared pork. Work in batches if you’re doubling the recipe, or consider using two woks.
Mistake 3: Overworking the Vegetables – Once your peppers hit that hot wok, they cook in literally 45 seconds. Keep moving them so they don’t burn, but don’t feel like you need to cook them until they’re soft. Tender-crisp is the goal. Overcooked peppers lose their bright color and become mushy.
Mistake 4: Adding Ingredients Cold from the Refrigerator – When you add cold ingredients to a screaming-hot wok, the temperature plummets. Let your peppers, ginger, and garlic sit on the counter for five minutes before cooking. This keeps your heat consistent and ensures everything cooks evenly.
Nutrition Information
This is where I put on my registered dietitian hat and talk about the real nutritional value of what you’re about to serve your family. Per serving (assuming four servings total):
Calories: Approximately 280 | Protein: 22g | Fat: 16g | Carbohydrates: 8g | Fiber: 1.5g | Sodium: 540mg
This data is based on USDA nutritional databases for the ingredient categories used. The beauty of this dish nutritionally is that it’s protein-forward (perfect for growing kids and hungry families), it includes healthy fats from the oil and sesame oil, and the carbs are minimal and come from fresh vegetables. There’s no empty calorie filler here—everything serves a purpose both nutritionally and functionally.
The long hot peppers deserve special mention here. They’re less than 30 calories per pepper but deliver extraordinary nutritional density. They’re rich in vitamin C, vitamin A, and antioxidants. The pork provides complete protein and B vitamins, especially B12 and niacin. The ginger and garlic, though used in small amounts, add beneficial compounds like gingerol and allicin that have been studied for their health properties. This is why I created this recipe the way I did—every single ingredient earns its place on the plate.
What to Serve Alongside for a Complete Visual Spread
A stunning stir-fry deserves equally beautiful accompaniments. Here’s how I build a complete meal that looks and tastes incredible:
- this simple cake – These golden, layered pancakes provide textural contrast with their crispy exterior and tender interior. They add warm wheat tones to your table setting and give you something to scoop the stir-fry with, making the meal more interactive.
- Air Fryer Baked Potatoes – If your family prefers more substantial sides, golden-brown baked potatoes create a hearty base. They add earthiness and help round out the meal into something more filling without competing with the stir-fry’s flavors.
- White or Jasmine Rice – A simple bed of fluffy white rice lets your stir-fry shine as the star while providing the vehicle for all that gorgeous sauce. Jasmine rice has a slightly fragrant quality that complements the aromatics of ginger and garlic beautifully.

Chinese Pork Stir Fry Recipe
Ingredients
Method
- In a medium bowl, combine your pork strips with the water, cornstarch, 2 teaspoons of vegetable oil, Shaoxing wine, oyster sauce, and light soy sauce. Mix everything together thoroughly until each piece of pork is evenly coated with the marinade. This isn't just flavor—this coating is what creates that silky, restaurant-quality texture that keeps people coming back for seconds. Set this aside while you prep everything else. This step takes just three minutes and makes a world of difference in your final result.
- Using a sharp knife, carefully de-seed your long hot peppers by slicing them lengthwise and removing the white membrane and seeds. Rinse quickly under cool water. Now slice them diagonally into thin, elegant pieces—these diagonal cuts aren't just pretty, they're functional. Diagonal cuts increase surface area, which means more of the pepper gets that beautiful char from the high heat. Peel your ginger and slice it thinly. Peel your garlic cloves and slice them thinly as well. The key here is consistency—uniform sizes cook evenly and look intentional on the plate.
- Place your wok over high heat. This is crucial. You're looking for it to be smoking slightly—not aggressively smoking, but you should see a hint of smoke rising from the surface. This takes about two to three minutes depending on your stove. When it's ready, add 1 tablespoon of vegetable oil and swirl it around to coat the entire surface. The oil should shimmer and move freely across the wok bottom. This temperature is what creates those gorgeous caramelized edges on your pork.
- Working quickly, add your marinated pork to the screaming-hot wok. Don't stir immediately—let it sit for about 30 seconds. This is when the magic happens. The bottom of each piece makes contact with the heat and develops that beautiful mahogany-brown crust. After 30 seconds, stir and move the pork around constantly for another minute and a half. You're looking for the pork to be lightly browned on the edges while staying pink in the center. Remove it immediately to a clean plate. This entire step takes two to three minutes maximum. Don't overcook—the pork will continue cooking slightly when we add it back in at the end.
- Return your wok to medium-high heat and add the second tablespoon of vegetable oil. Add your ginger slices and garlic slices first, stirring constantly for just 30 seconds. You'll immediately smell the aromatics blooming—this is what makes people walk into your kitchen and say, "What's cooking?" The ginger and garlic are getting golden and fragrant without burning. Now add your sliced peppers, stirring everything together. Continue cooking for another 30 to 45 seconds. You want to see the peppers just beginning to blister and develop slight char marks—this is where the visual drama comes from. The peppers should still have some crunch when you bite them.
- Pour in your 1 tablespoon of Shaoxing wine, stirring constantly. You'll hear a magnificent sizzle, and you'll see the liquid hit the hot wok surface. This is deglazing—you're lifting up all those flavorful brown bits stuck to the bottom of the wok and incorporating them into your sauce. Stir for about 10 seconds, scraping the bottom of the wok with your spatula or wooden spoon. The wine aroma will intensify, and the pan will look dark and concentrated.
- Return your cooked pork to the wok along with the ½ teaspoon of sugar and ½ teaspoon of dark soy sauce. Toss everything together over high heat for literally 10 to 15 seconds. The sugar will melt into the liquid, the dark soy sauce will coat everything evenly, and your pork will get that gorgeous glossy finish that makes people pause before taking their first bite. If you have sesame oil, drizzle in 1 teaspoon right at this moment—it adds an incredible nutty aroma and professional polish.
Notes
FAQs
Can I Use Chicken or Beef Instead of Pork?
Absolutely. Pork shoulder works beautifully here, but chicken breast (cut thin) cooks in about the same time and is slightly leaner. Beef tenderloin or flank steak also works—in fact, flank steak might even be more visually stunning because it develops beautiful caramelization. Adjust cooking time slightly based on thickness—thin chicken might only need one minute, while thicker beef could need two. The visual approach stays the same.
What if I Can’t Find Long Hot Peppers?
Don’t stress. This recipe is adaptable. Use Anaheim peppers (slightly milder), poblano peppers (larger, more substantial), or even red bell peppers cut into long strips. You’ll lose some of that elegant elongated shape, but the dish will still be gorgeous. The cooking time remains the same. If you use bell peppers, you might want to increase the quantity slightly since they’re usually larger.
How Do I Get My Peppers That Perfect Charred Look?
This is all about heat and timing. Your wok needs to be properly preheated (smoking slightly), and your oil needs to shimmer. When you add the peppers, don’t move them for a solid 20 to 30 seconds. Let them sit so the bottom surface develops color and char. Then stir and move them around for another 20 to 30 seconds. You’re looking for about 30% of each pepper to have that beautiful dark charring while the rest stays bright green. This usually takes 45 seconds total.
Can I Make This Recipe Less Spicy for Kids?
Long hot peppers vary wildly in spice level—some are quite mild while others pack real heat. If you’re unsure, use the milder Anaheim peppers or even sweet Italian peppers. Remove the white membrane inside (that’s where a lot of heat lives) and that also removes some of the visual drama, so consider keeping it in and just using milder peppers. You could also reduce the quantity of peppers and add sliced zucchini or mushrooms for volume without heat.
What’s the Best Way to Store My Leftover Sauce Separately?
If you want to preserve that glossy finish for leftover portions, I recommend storing the stir-fry components separately from the sauce. Use a small container for the sauce and store it separately in the refrigerator. When reheating, reheat your pork and vegetables first, then add the sauce back in during the final minute. This keeps the sauce glossy and the vegetables from getting too soft. It’s a restaurant trick that actually works beautifully at home.
More Visually Stunning Recipes
- Stir Fry Pork Recipe – My classic approach to quick pork stir-fry with countless variations
- Light and Easy Five-Minute Fruit Mousse Dessert Recipe – A stunning finale that looks restaurant-quality but takes literally five minutes to assemble
- Refrigerator Pickles Recipe – Add vibrant color and crunch to any meal with homemade pickles
- Stromboli Recipe – Another showstopper that impresses without the stress
When I think about why I became a dietitian and why I’m so passionate about helping families around the table, moments like these come to mind. It’s not really about the perfect recipe or the restaurant-quality plating—though those things are fun and satisfying. It’s about creating a moment where your family gathers, sees something beautiful, tastes something delicious, and feels cared for. This Chinese pork stir fry does all three. It’s fast enough for a weeknight but elegant enough to feel special. It’s nutritious but tastes indulgent. It’s practical but looks impressive. That’s the sweet spot I’m always reaching for, and I hope you’ll find it here too. Your family deserves meals that nourish them in every way—body, eyes, and heart.
Happy Cooking!