This post contains affiliate links. As an Amazon Associate I earn from qualifying purchases.
This is the mac and cheese dish that keeps families coming back to my dinner table year after year. It pairs beautifully with a fresh green salad or baked broccoli with cheese for a complete meal that even the pickiest eaters will devour.
How This Became Our Family’s Go-To Comfort Food
I’ll never forget the Tuesday evening when my oldest came home from school exhausted and asked for “something warm and cozy.” I had exactly thirty minutes before soccer practice. That night, I stood at my stove with a pot of creamy sauce, fresh cheese, and golden pasta—and watching her face light up changed everything for me.
That moment reminded me why I became a dietitian. It wasn’t just about nutrition labels or portion sizes. It was about creating meals that heal, comfort, and bring families together, even on the busiest nights. Since then, this recipe has become our family’s anchor dish—the one we return to when we need comfort, when schedules are chaotic, and when everyone just needs to feel loved through food.
As a registered dietitian working with families across Chicago for over a decade, I’ve learned that the best recipes are the ones that fit real life. This creamy mac and cheese does exactly that.

What Is This Ultimate Creamy Mac and Cheese Recipe?
This is a baked mac and cheese that honors tradition while embracing modern convenience. Unlike the boxed versions many of us grew up with, this recipe uses a real cheese sauce made from butter, flour, and whole milk—what we call a béchamel base in culinary terms.
The beauty of this dish lies in its simplicity and depth. We’re using two types of cheese: a sharp cheddar that brings bold flavor and a buttery Gruyere that adds sophistication and smoothness. The result is a sauce that’s rich, velvety, and genuinely crave-worthy.
What makes this version special is the golden panko topping—it adds textural contrast and makes the whole dish feel restaurant-quality, even though you’re making it at home while managing homework and dinner conversations.
Why You’ll Love This Ultimate Creamy Mac and Cheese Recipe
- Comfort food that nourishes – Unlike processed versions, this uses real cheese and whole milk, giving you actual nutrients alongside the satisfaction. Your family gets calcium, protein, and B vitamins in every bite.
- Perfect for busy families – The entire recipe comes together in under an hour, making it ideal for weeknight dinners when you’re juggling multiple schedules.
- Everyone at the table eats the same thing – No separate meals for picky eaters. This naturally appeals to all ages, from toddlers to grandparents.
- Make-ahead friendly – Assemble it the night before and bake when you’re ready. This flexibility is a game-changer for meal planning.
- Impressive but approachable – Your guests will think you spent hours in the kitchen. Only you’ll know how straightforward it truly is.
- Budget-conscious – This recipe feeds a family and costs far less than takeout or processed alternatives.
The Ingredients
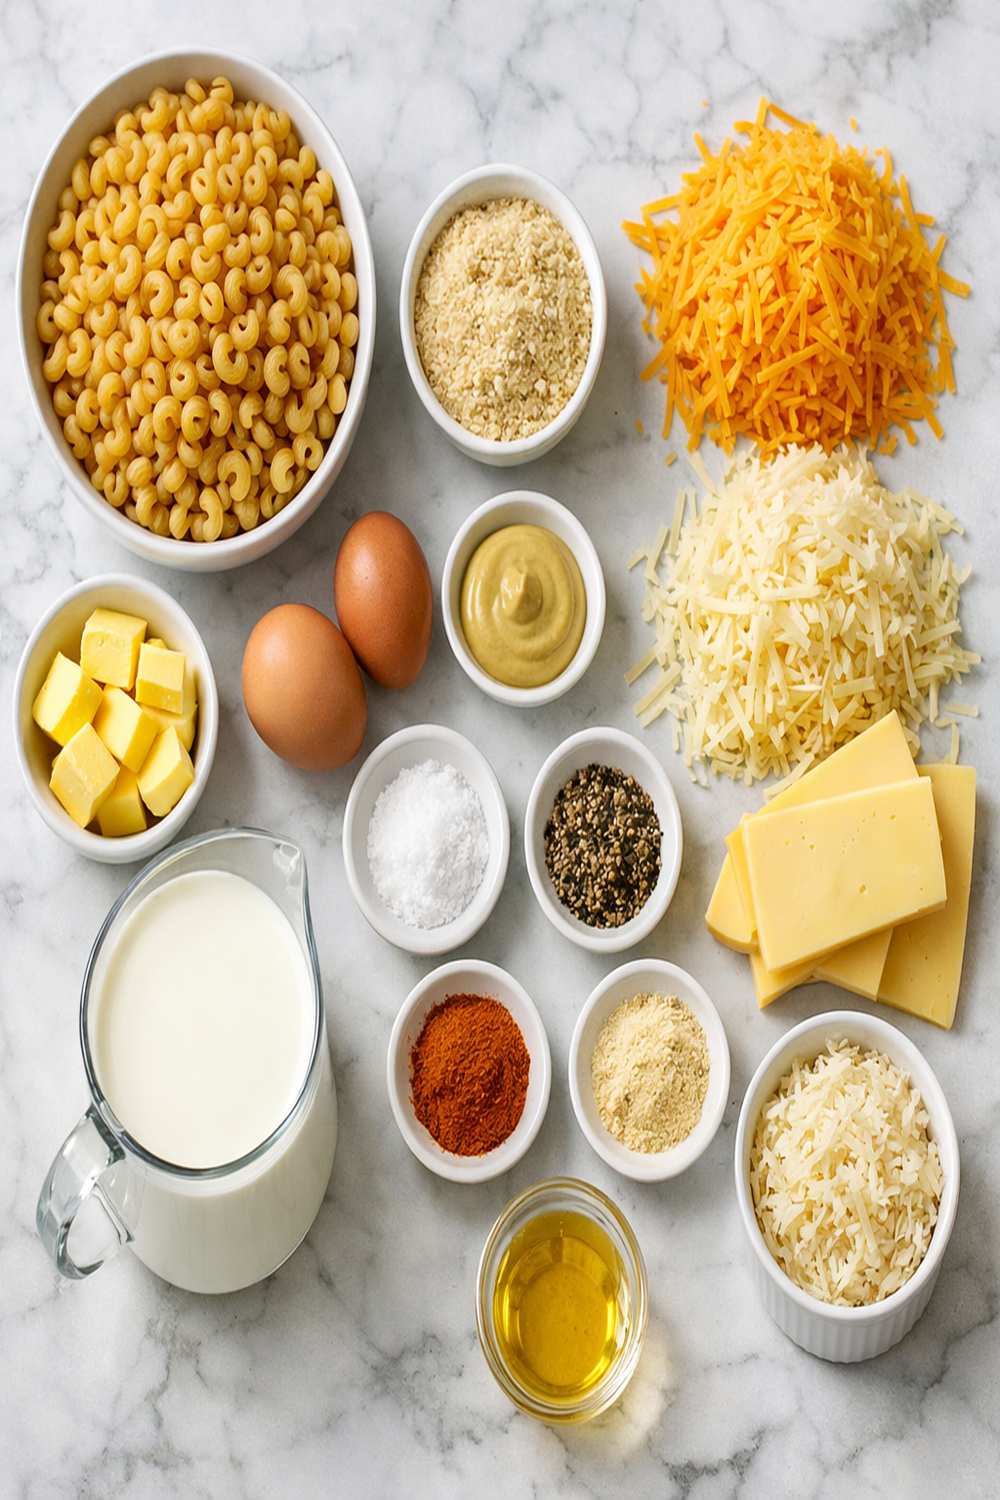
Each ingredient here plays a specific role in creating that creamy, luxurious texture we’re after. I’ve chosen quality components that make a noticeable difference without requiring specialty shopping.
- 1½ cups panko breadcrumbs (creates that crunchy golden top)
- ⅓ cup all-purpose flour (creates the roux base for silky sauce)
- 1 tablespoon extra virgin olive oil (helps prevent pasta from sticking)
- 3 cups whole milk (full-fat creates better mouthfeel than reduced versions)
- 1 cup heavy whipping cream (adds richness and prevents curdling)
- 6 tablespoons unsalted butter (divided between sauce and topping)
- 4 cups sharp cheddar cheese, shredded (aged cheddar brings deeper flavor)
- Sea salt and fresh cracked pepper (to taste—usually ½ teaspoon each)
- 2 cups Gruyere cheese, shredded (melts smoothly and adds subtle sweetness)
- ½ cup Parmesan cheese, shredded (adds sharp bite to the crust)
- 1 pound elbow pasta (or any tubular pasta shape you prefer—the curves hold sauce beautifully)
- ¼ teaspoon smoked paprika (adds depth and a hint of smokiness)
- 4 tablespoons butter, melted (for the topping)
This recipe makes 8 generous servings as a main course.
How to Make This Ultimate Creamy Mac and Cheese Recipe?
I’m going to walk you through this step by step, just like I do when teaching families in my nutrition consultations. The key to success is following the order and not rushing the sauce—that’s where the magic happens.
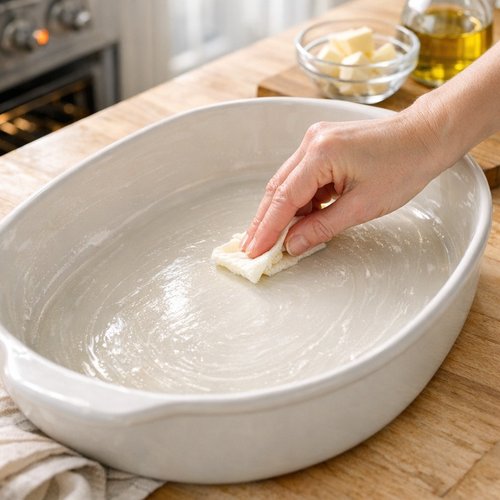
Step 1: Prepare Your Pan and Preheat Your Oven
Start by turning your oven to 350°F. While it heats, lightly grease a large baking dish—I use a 3-quart or 4-quart ceramic dish, which distributes heat evenly. A light coating of cooking spray or butter is all you need. Set it aside within arm’s reach of your stove.
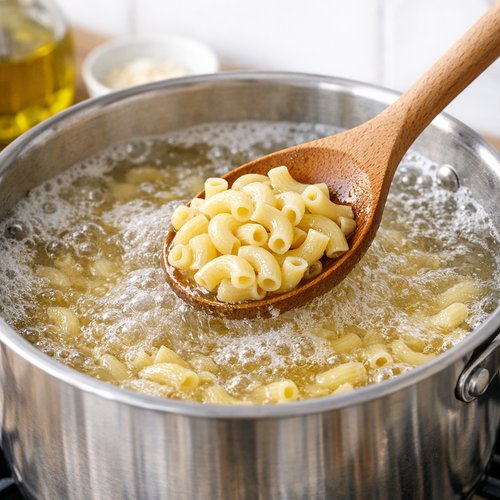
Step 2: Cook Your Pasta to Just-Shy-of-Tender
Bring a large pot of salted water to a rolling boil—the water should taste like the sea. Add your pasta and cook until it reaches one minute before al dente according to the package instructions. This is important: we’re undercooking slightly because the pasta will continue cooking in the oven.
Drain the pasta in a colander, then return it to the empty pot. Drizzle with the olive oil and stir gently to coat every piece. This prevents sticking and keeps the pasta separated. Set the pot aside while you make the cheese sauce.
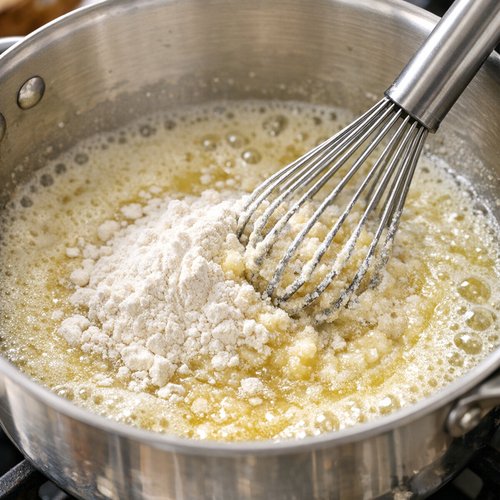
Step 3: Create Your Roux Base
In a deep saucepan or Dutch oven, melt the 6 tablespoons of butter over medium heat. Once melted and foamy, add your flour all at once and whisk constantly for about 1 minute until the mixture turns light golden and smells nutty.
You’re creating a roux here—that’s the foundation of your sauce. This step cooks out the raw flour taste while creating a thickening agent. Don’t skip it or rush it.
Step 4: Build Your Cheese Sauce
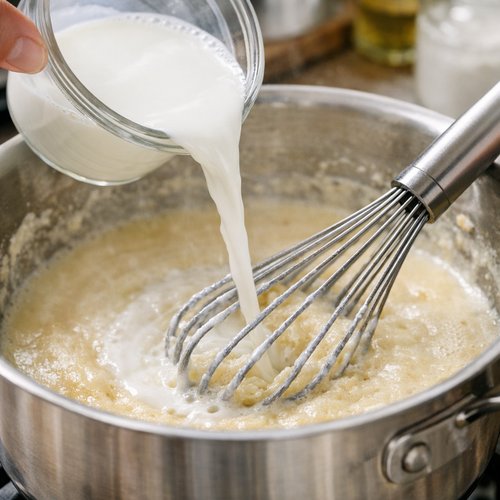
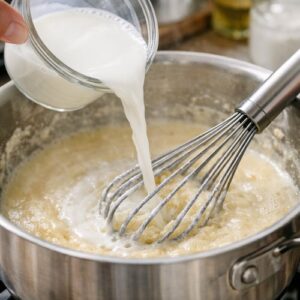
This is the critical moment. Reduce your heat to medium-low. Slowly pour in the whole milk while whisking constantly—and I mean constantly. You’re preventing lumps by combining the roux and milk gradually. Once the milk is incorporated, add the heavy cream and keep whisking until the mixture is completely smooth.
Continue cooking and whisking until you see small bubbles breaking on the surface, then continue for another 2 minutes. This ensures the flour is fully cooked and the sauce begins to thicken. Season with salt and pepper to your taste—I usually add about ½ teaspoon of each.
Step 5: Incorporate Your Cheese
Remove the pot from heat. Add 2 cups of your shredded cheddar cheese and whisk until completely smooth and incorporated. Then add the 2 cups of Gruyere cheese and continue whisking until the sauce is creamy, glossy, and noticeably thickened.
The sauce should coat the back of a spoon. If you run your finger across the spoon, the path should stay clear for a moment before sauce flows back to fill it. This is the perfect consistency.

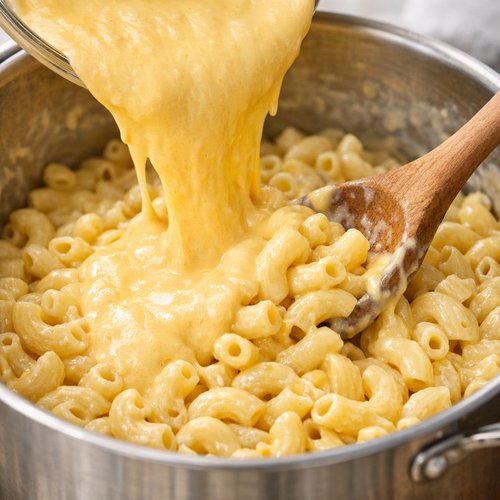
Step 6: Combine Pasta and Sauce
Pour the cheese sauce into your pot of cooled pasta. Using a wooden spoon or silicone spatula, gently fold and stir until every piece of pasta is completely coated with the creamy sauce. Take your time here—you want an even distribution so every bite has sauce.
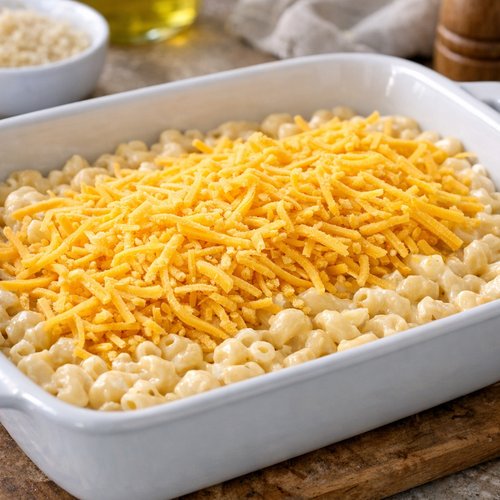
Step 7: Layer in Your Baking Dish
Pour half of your pasta mixture into the prepared baking dish, spreading it evenly across the bottom. Sprinkle the remaining 2 cups of shredded cheddar cheese over this layer. Then add the remaining pasta mixture on top, spreading it gently so the cheese shows through in places.
Step 8: Create and Add Your Golden Topping
In a small bowl, combine the panko breadcrumbs, melted butter, shredded Parmesan cheese, and smoked paprika. Stir until the breadcrumbs are evenly moistened with butter and the paprika is distributed throughout. This mixture will become your golden, crunchy crust.
Sprinkle this topping evenly over the entire surface of your pasta. Don’t press it down—you want it to stay light and crispy during baking.

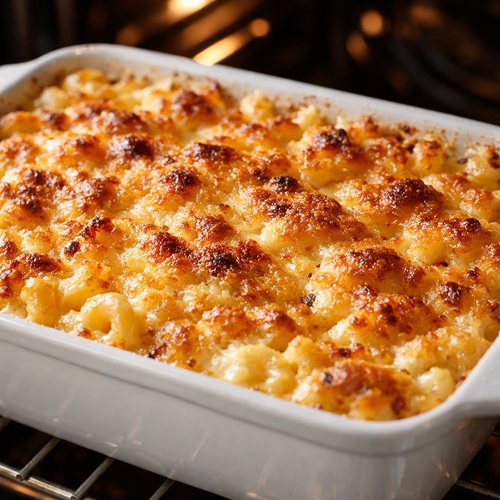
Step 9: Bake Until Bubbly and Golden
Place your baking dish in the preheated 350°F oven and bake for approximately 30 minutes, until the top is golden brown and you can see the cheese sauce bubbling around the edges of the dish. The bubbling around the edges tells you the sauce is hot all the way through.
Remove from the oven and let it rest for 5 minutes before serving. This resting period allows the sauce to set slightly, so you get clean scoops that hold together beautifully on the plate.
Expert’s Nutritional Tip
As a registered dietitian, I want to highlight something important: the full-fat milk and cream in this recipe aren’t indulgences—they’re nutritional choices. Fat-soluble vitamins like vitamin A and D, which support bone health and immunity, are absorbed best in the presence of dietary fat.
Additionally, the real cheeses provide bioavailable calcium and casein protein, which means your body actually uses these nutrients efficiently. One serving of this mac and cheese provides approximately 35 grams of protein and 600 mg of calcium—making it a legitimate nutritious meal, not just comfort food.
Tips and Tricks for Perfect Results
- Undercook your pasta intentionally – This prevents mushy, overcooked pasta after baking. The pasta continues cooking in the oven, so stopping one minute early is crucial.
- Use freshly shredded cheese – Pre-shredded cheese contains anti-caking agents that can make your sauce grainy. Take two extra minutes to shred from a block. Your sauce will be noticeably creamier.
- Keep your heat moderate – High heat can break the sauce and cause the milk solids to separate. Medium and medium-low are your friends throughout this recipe.
- Don’t skip the resting period – Those five minutes after baking allow the sauce to set and make serving infinitely easier. This is a pro tip from my years working with families who are always in a rush.
- Make the panko topping ahead – Mix the breadcrumb topping the morning of serving and store it in a sealed container. Sprinkle it on just before baking for maximum crunch.
- Use a Dutch oven or large saucepan – The depth matters. A shallow pan makes whisking and combining ingredients harder. Choose a pot that’s at least 4 quarts.
Make-Ahead Guide: Meal Prep Like a Professional
This is where this recipe truly shines for busy families. Here’s my professional meal prep breakdown:
Assemble the night before: Prepare everything through Step 7 (layering in the baking dish). Cover tightly with plastic wrap or aluminum foil and refrigerate. The next day, add your panko topping and bake as directed. You may need to add 5-10 minutes to the baking time since you’re starting with a cold casserole.
Freeze for later: Assemble the complete recipe without the panko topping. Cover with plastic wrap first, then foil to prevent freezer burn. Label with the date. Freeze for up to 3 months. Thaw overnight in the refrigerator, add topping, and bake as directed.
Cook once, eat twice: Make two batches simultaneously using two baking dishes. Bake one immediately and freeze one. You’ve now tackled two dinners in a single cooking session—this is how I manage feeding a family with a full schedule.
Common Mistakes to Avoid
- Adding cheese to boiling hot sauce – This can cause the cheese proteins to seize up and become grainy. Always remove from heat first, then add cheese off the burner.
- Using low-fat milk or cream – The fat is what creates that luxurious, creamy texture. Substituting with low-fat versions results in a thin, disappointing sauce that won’t coat the pasta properly.
- Overcooking the pasta initially – This is the number-one mistake I see. People cook pasta to tenderness, forgetting it will bake and soften further. Follow my instruction to undercook by one minute.
- Not stirring the sauce constantly while adding milk – Impatience here creates lumps that won’t disappear. Constant whisking is your insurance policy for a silky sauce.
Seasonal Variations
Fall/Winter version: Add crispy bacon bits (about ½ cup) to the pasta mixture and sprinkle fresh thyme into the panko topping. The earthiness pairs beautifully with the cheese.
Spring/Summer version: Fold fresh peas or corn kernels into the pasta mixture just before layering. Add fresh lemon zest to the panko topping for brightness. This lighter variation celebrates seasonal produce while maintaining the creamy comfort.
Sunday dinner version: Layer the mac and cheese with crispy sautéed mushrooms and caramelized onions for added depth. Use half sharp cheddar and half smoked cheddar for a complex flavor profile.
Can I Store This Ultimate Creamy Mac and Cheese Recipe?
In the refrigerator: Store leftover mac and cheese in an airtight container for up to 4 days. The sauce will thicken slightly as it cools, which is normal.
Reheating method: Preheat your oven to 325°F. Transfer the mac and cheese to a baking dish, cover with foil, and warm for 15-20 minutes until heated through. You can also microwave individual portions for 1-2 minutes, though oven reheating preserves the texture better.
In the freezer: Without the panko topping, this freezes beautifully for up to 3 months. Thaw overnight in the refrigerator before reheating. Add fresh panko topping before baking for optimal crunch.
Pro tip: Freeze individual portions in glass containers for grab-and-go lunches. These reheat beautifully and make weekday lunches significantly easier.
Nutrition Information
Based on USDA nutritional database analysis, one serving (approximately 1.5 cups) of this mac and cheese contains:
- Calories: 620
- Protein: 35 grams
- Total Fat: 32 grams (saturated: 19 grams)
- Carbohydrates: 52 grams
- Fiber: 2 grams
- Calcium: 600 mg (60% of daily value)
- Sodium: 480 mg
This represents a nutritionally complete main dish that provides substantial protein for satiety and calcium for bone health—making it far more nourishing than processed alternatives.
What Can I Serve With This Ultimate Creamy Mac and Cheese Recipe?
While this mac and cheese is substantial enough to be a main course, I always pair it with something fresh and bright to balance the richness. Here are my family-tested combinations:
- Fresh green salad with light vinaigrette – The acidity cuts through the creaminess beautifully. I use a simple lemon and olive oil dressing.
- Baked broccoli with cheese – This adds vegetables without feeling like an obligation. The kids actually ask for seconds.
- Roasted Brussels sprouts with balsamic glaze – The charred, slightly bitter flavor provides perfect contrast to sweet, creamy pasta.
- Steamed green beans with garlic – Simple, light, and lets the mac and cheese be the star.
- Fresh fruit on the side – Apple slices, berries, or grapes add refreshment and natural sweetness that complements the savory main dish.
For dessert, I often follow this meal with something lighter—perhaps banana bread with nutmeg, which provides natural sweetness without feeling heavy after the creamy main course.
Substitutes and Variations
- Different cheese combinations – Substitute sharp cheddar with aged white cheddar, or replace Gruyere with Fontina for a nuttier flavor. The ratio of 2:1 cheddar to secondary cheese works with any aged cheese pairing.
- Gluten-free pasta – Use any quality gluten-free pasta and follow the same cooking instructions. The sauce remains unchanged and works perfectly.
- Panko alternative for topping – Use crushed crackers, homemade breadcrumbs, or crushed pretzels for different textures. The mix of melted butter and Parmesan works with any of these.
- Half-and-half instead of heavy cream – If you don’t have heavy cream, use equal parts whole milk and half-and-half. The sauce will be slightly less rich but still delicious.
- Add vegetables – Stir in steamed broccoli florets, peas, roasted cauliflower, or diced bell peppers into the pasta mixture before layering. This is how I sneak vegetables past hesitant eaters.
- Protein additions – Fold in crispy bacon, diced ham, cooked ground beef, or crumbled sausage for a heartier version. About ½ pound of cooked protein per batch works perfectly.
Best Mac And Cheese Recipe
Ingredients
Method
- Start by turning your oven to 350°F. While it heats, lightly grease a large baking dish—I use a 3-quart or 4-quart ceramic dish, which distributes heat evenly. A light coating of cooking spray or butter is all you need. Set it aside within arm's reach of your stove.

- Bring a large pot of salted water to a rolling boil—the water should taste like the sea. Add your pasta and cook until it reaches one minute before al dente according to the package instructions. This is important: we're undercooking slightly because the pasta will continue cooking in the oven. Drain the pasta in a colander, then return it to the empty pot. Drizzle with the olive oil and stir gently to coat every piece. This prevents sticking and keeps the pasta separated. Set the pot aside while you make the cheese sauce.

- In a deep saucepan or Dutch oven, melt the 6 tablespoons of butter over medium heat. Once melted and foamy, add your flour all at once and whisk constantly for about 1 minute until the mixture turns light golden and smells nutty. You're creating a roux here—that's the foundation of your sauce. This step cooks out the raw flour taste while creating a thickening agent. Don't skip it or rush it.

- This is the critical moment. Reduce your heat to medium-low. Slowly pour in the whole milk while whisking constantly—and I mean constantly. You're preventing lumps by combining the roux and milk gradually. Once the milk is incorporated, add the heavy cream and keep whisking until the mixture is completely smooth. Continue cooking and whisking until you see small bubbles breaking on the surface, then continue for another 2 minutes. This ensures the flour is fully cooked and the sauce begins to thicken. Season with salt and pepper to your taste—I usually add about ½ teaspoon of each.
- Remove the pot from heat. Add 2 cups of your shredded cheddar cheese and whisk until completely smooth and incorporated. Then add the 2 cups of Gruyere cheese and continue whisking until the sauce is creamy, glossy, and noticeably thickened. The sauce should coat the back of a spoon. If you run your finger across the spoon, the path should stay clear for a moment before sauce flows back to fill it. This is the perfect consistency.

- Pour the cheese sauce into your pot of cooled pasta. Using a wooden spoon or silicone spatula, gently fold and stir until every piece of pasta is completely coated with the creamy sauce. Take your time here—you want an even distribution so every bite has sauce.

- Pour half of your pasta mixture into the prepared baking dish, spreading it evenly across the bottom. Sprinkle the remaining 2 cups of shredded cheddar cheese over this layer. Then add the remaining pasta mixture on top, spreading it gently so the cheese shows through in places.

- In a small bowl, combine the panko breadcrumbs, melted butter, shredded Parmesan cheese, and smoked paprika. Stir until the breadcrumbs are evenly moistened with butter and the paprika is distributed throughout. This mixture will become your golden, crunchy crust. Sprinkle this topping evenly over the entire surface of your pasta. Don't press it down—you want it to stay light and crispy during baking.

- Place your baking dish in the preheated 350°F oven and bake for approximately 30 minutes, until the top is golden brown and you can see the cheese sauce bubbling around the edges of the dish. The bubbling around the edges tells you the sauce is hot all the way through. Remove from the oven and let it rest for 5 minutes before serving. This resting period allows the sauce to set slightly, so you get clean scoops that hold together beautifully on the plate.

Notes
FAQs
Can I make this mac and cheese without baking it?
Absolutely! Skip the baking step and serve it straight from the stovetop. You’ll lose the golden panko crust, but the creamy mac and cheese is still delicious. This is actually my preferred method on rushed weeknights—preparation takes only 25 minutes total, and there’s one fewer dish to wash. Simply combine the pasta and sauce as directed, transfer to a serving bowl, and top with the panko mixture toasted in a separate skillet with butter until golden. Sprinkle the toasted panko over individual servings for that textural contrast.
Why did my cheese sauce break or become grainy?
This happens when cheese is added to sauce that’s too hot or too cold. The proteins in the cheese seize up and separate. Always remove your sauce from heat before adding cheese, and add cheese gradually while whisking constantly. If your sauce does break, remove it from heat immediately and whisk in a tablespoon of cold whole milk or cream. Usually this corrects the problem within a minute or two.
Can I use pre-shredded cheese to save time?
While I understand the time-saving appeal—and believe me, I’m always looking for shortcuts—pre-shredded cheese contains anti-caking agents and coatings that prevent it from melting as smoothly. You’ll notice a slightly grainy texture in the sauce. If time is truly limited, ask the deli counter to shred fresh cheese for you while you shop. Most grocery stores will do this for free, taking you from pre-shredded quality to homemade results in just five extra minutes.
How do I prevent the top from burning while the inside stays cold?
This usually means your oven temperature is too high. Use an oven thermometer to verify your oven is actually at 350°F—many home ovens run hot. If the top is browning too quickly while the middle is still cold, tent the dish loosely with aluminum foil halfway through baking, then remove the foil for the final five minutes to allow the top to finish crisping.
My pasta mixture seems too thick before baking. Is that normal?
Yes! The sauce will thicken further as it bakes and cools. What seems thick at this stage will reach perfect creamy consistency after baking. Don’t add extra milk or cream trying to thin it out—this is a common mistake that results in a watery final dish. Trust the process.
More Recipes You’ll Love
- Baked Ziti Sausage Recipe – Another cheesy baked pasta that comes together quickly and feeds a crowd beautifully
- Bacon Jalapeno Deviled Eggs Recipe – Perfect protein-rich appetizer when you want something savory alongside this main course
- BBQ Beef Recipe – A complete protein-focused meal that pairs well with a side of this mac and cheese
I hope this recipe becomes as cherished in your home as it is in mine. Over the past decade, I’ve watched families transform their relationship with home cooking through recipes like this one—dishes that are approachable enough for a Tuesday night but impressive enough for company.
The beauty of this mac and cheese is that it meets you where you are. Whether you’re a brand-new cook gaining confidence in the kitchen, a busy parent juggling multiple schedules, or someone looking to create meaningful food memories with the people you love, this recipe welcomes you.
Take your time with the sauce, use quality ingredients, and trust your instincts. You’ve got this. Happy Cooking!