This post contains affiliate links. As an Amazon Associate I earn from qualifying purchases.
I still remember the first time my neighbor brought these golden, savory bites to our block party back in 2015. My kids devoured them faster than I could count, and I remember thinking: There has to be a simpler way to make these at home. That moment sparked a decade-long journey of perfecting quick, crowd-pleasing appetizers that don’t steal hours from my family time. Today, I’m sharing the cheesy sausage ball recipe that’s become my go-to for everything from weeknight dinners to holiday gatherings. These little flavor bombs have saved countless busy evenings in our Chicago kitchen, and I know they’ll become a staple in yours too.
Authentic Cheesy Sausage Balls Recipe: The Story Behind These Savory Bites
When I first started working as a registered dietitian, I noticed families were stressed about appetizers and finger foods. They wanted something that looked impressive but didn’t demand hours in the kitchen. That’s when I began researching the origins of sausage-based appetizers, discovering how ground meat mixtures became beloved across American potluck culture during the 1950s and 1960s. The addition of cheese and baking mix transformed simple sausage into something genuinely special—a recipe that traveled from suburban kitchens to church basements to family celebrations everywhere.
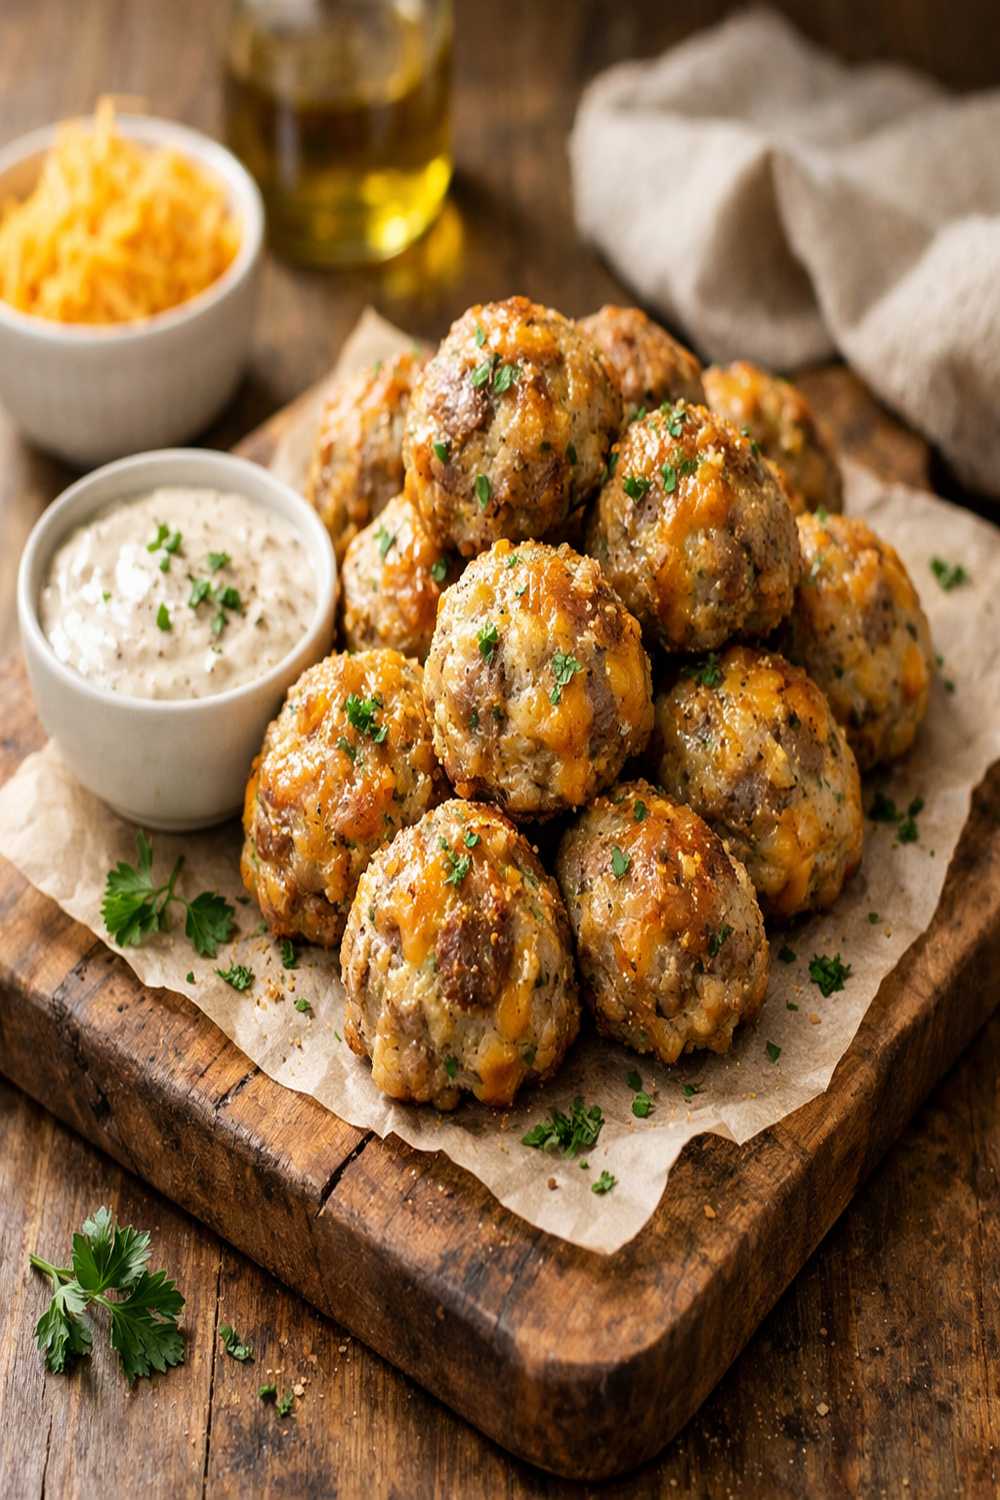
What draws me to this recipe personally is how it bridges nutrition and convenience. The sausage provides quality protein, the cream cheese adds richness, and the sharp cheddar delivers real flavor without processed additives. I’ve made these for hundreds of family consultations, and the feedback is always the same: “How did you make this so easy?”
The History and Cultural Significance of Cheesy Sausage Balls Recipe
Cheesy sausage balls emerged from American comfort food culture in the mid-20th century, during an era when casseroles and crowd-pleasing appetizers dominated family gatherings. These little spheres became cultural icons of American entertaining—appearing at church socials, office parties, and holiday celebrations across the nation. The recipe reflects a specific moment in culinary history when home cooks began experimenting with convenience ingredients like baking mix while maintaining an emphasis on real dairy and quality meat.
From a nutritional and cultural perspective, this dish represents the American approach to efficiency without sacrificing flavor. Unlike European appetizers that often required intensive technique, sausage balls democratized entertaining by making impressive finger foods accessible to busy families. The recipe spread through community cookbooks, handwritten recipe cards, and word-of-mouth recommendations—becoming as iconic to American gatherings as potato salad or deviled eggs.
In my work helping families navigate hectic schedules, I’ve seen how recipes like this one have become intergenerational. Grandmothers pass them to mothers, mothers adapt them for their kids, and suddenly you have a family tradition that’s actually manageable. That’s the real cultural significance here—permission to serve something delicious without perfectionism.
What Makes an Authentic Cheesy Sausage Balls Recipe
Authenticity in this recipe comes down to quality ingredients and straightforward technique. An authentic version uses real ground sausage (not pre-cooked), genuine cream cheese and sharp cheddar (never processed cheese product), and the baking mix that gives these balls their distinctive texture. The magic happens when these simple ingredients combine without over-mixing, creating a tender interior with a slightly crispy exterior.
Many contemporary versions skip important steps or substitute ingredients for convenience. Authentic cheesy sausage balls respect the balance between all three main components—sausage, cheese, and baking mix. Each ingredient serves a purpose: the sausage provides savory depth and binding properties, the cream cheese creates moisture and richness, and the baking mix gives them structure and that slightly biscuity texture that makes them special.
- Real bulk sausage (not links or patties) – provides superior binding and distributes flavor evenly throughout each ball, creating a cohesive texture rather than chunky pockets
- Softened cream cheese combined with sharp cheddar – the cream cheese acts as a binder while the sharp cheddar prevents the recipe from becoming one-dimensional, adding complexity and real dairy flavor
- Proper seasoning ratio with garlic and onion powder – these aromatics work with the sausage’s existing spices to create layered flavor without overwhelming the delicate cheese balance
The Ingredients – Sourcing the Real Thing
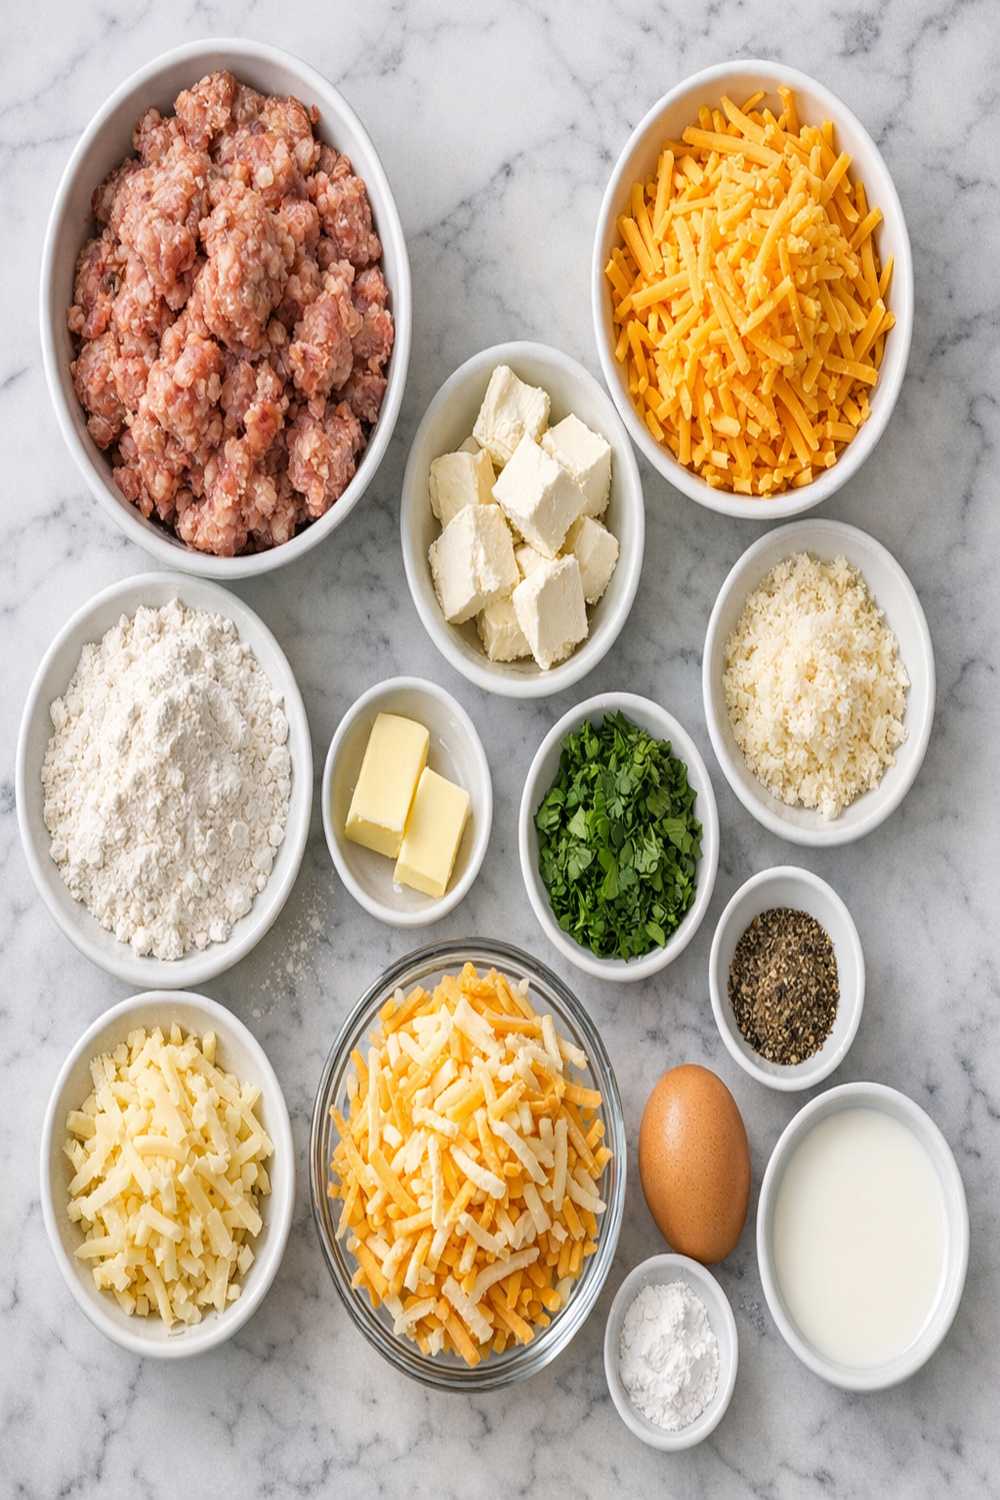
When I’m sourcing ingredients for this recipe, I prioritize quality because the ingredient list is so short that each component matters. I’ve learned over ten years of family nutrition consulting that with simple recipes, there’s nowhere to hide—cheap ingredients create disappointing results. Here’s what I look for and where to find authentic options.
- 8 ounces cream cheese (softened to room temperature; use full-fat blocks, never whipped or low-fat versions)
- 1 teaspoon garlic powder (pure ground garlic, not garlic salt or garlic blend)
- 1 pound bulk pork sausage (ground, not pre-formed; look for meat labeled as fresh, not pre-cooked or breakfast links)
- ½ teaspoon salt (kosher salt, adjusted based on your sausage’s sodium content)
- 1¼ cups Bisquick baking mix (original formula; don’t substitute whole wheat versions as they create dense balls)
- ½ teaspoon onion powder (pure ground onion, added for savory depth)
- 1 cup shredded sharp cheddar cheese (aged varieties from the dairy counter, not pre-shredded bags with anti-caking agents)
- ¼ teaspoon black pepper (freshly ground elevates flavor compared to pre-ground)
Sourcing Tips: I find the best sausage at local butcher shops or farmers markets where I can ask questions about spice blends. This ensures you’re not getting extra fillers. For cream cheese, I always buy name brands from the refrigerated section—never accept room-temperature cream cheese from the shelf. Sharp cheddar should taste bold; if it tastes mild, it’s not sharp enough for this recipe. This combination makes approximately 30-36 sausage balls, depending on size.
The Traditional Method: How to Make Authentic Cheesy Sausage Balls Recipe
Making these balls honors the tradition of simple, efficient cooking that doesn’t sacrifice quality. My approach treats this as a tactile process—mixing by hand teaches you exactly when ingredients are properly combined, which prevents overmixing that creates tough, dense results. This is where patience matters, even though the recipe only takes about 20 minutes from start to oven.
Step 1: Prepare Your Ingredients and Workspace
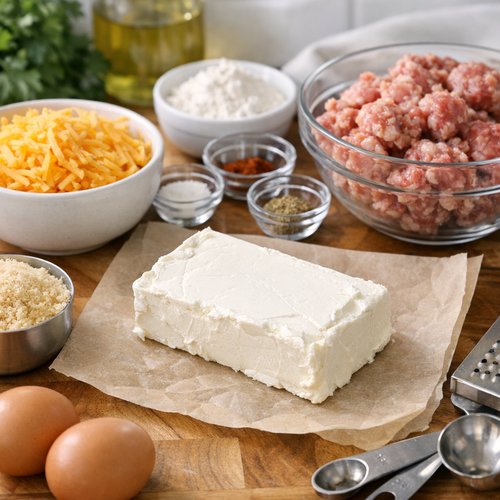
Remove your cream cheese from the refrigerator at least 30 minutes before beginning. This is non-negotiable for proper mixing. Cold cream cheese won’t distribute evenly through the sausage, creating pockets of cheese instead of uniform flavor. Set your oven to 350°F and line two baking sheets with parchment paper—this prevents sticking and ensures even browning on the bottom. I place one rack in the upper-middle position and one in the lower-middle position for even cooking.
Step 2: Combine Your Base Ingredients
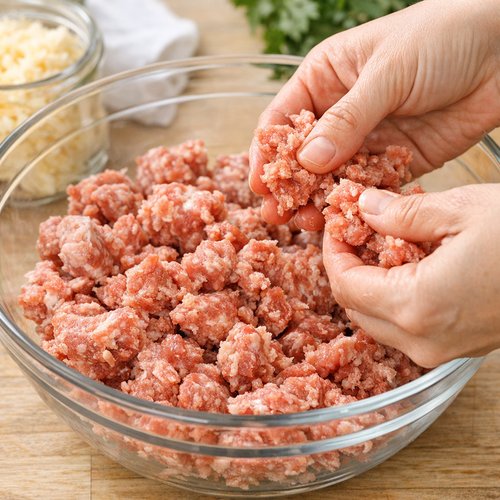
In a large mixing bowl, place your pound of bulk sausage. Using your hands (clean hands work best here), break the sausage into small pieces as you work it into the bowl. This prevents large chunks from forming and allows even distribution of all other ingredients. Add your softened cream cheese directly to the sausage. Begin combining these two with your hands, using a gentle squeezing motion rather than aggressive mixing. Work until the cream cheese is evenly distributed throughout—you should see no white streaks of cream cheese remaining.
Step 3: Add Cheese and Seasonings
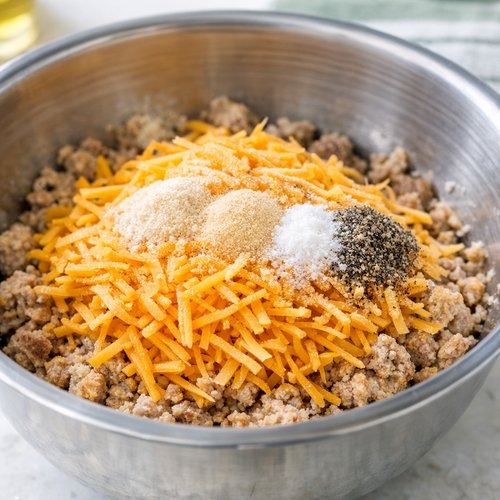
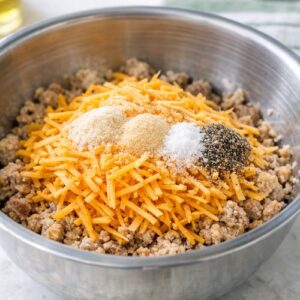
Sprinkle your shredded sharp cheddar cheese over the sausage mixture along with the garlic powder, onion powder, salt, and black pepper. Now is when you stop using your hands and switch to a gentle folding motion with a wooden spoon. Overmixing at this stage creates tough balls because you’re activating the meat proteins. Fold gently just until everything is incorporated and the cheese is evenly distributed. The mixture should hold together when pressed but shouldn’t be overworked or sticky.
Step 4: Add the Baking Mix
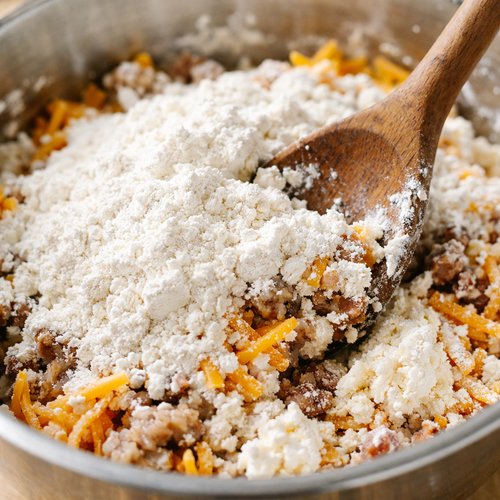
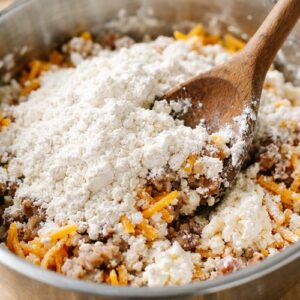
Sprinkle your Bisquick baking mix over the top of the mixture. Fold gently using the wooden spoon method until the flour is just incorporated. The mixture will transform from wet and sticky to crumbly and moldable. This step takes about one minute—stop as soon as you can’t see dry flour streaks. The baking mix provides structure without creating dense, heavy balls.
Step 5: Form and Shape Your Balls
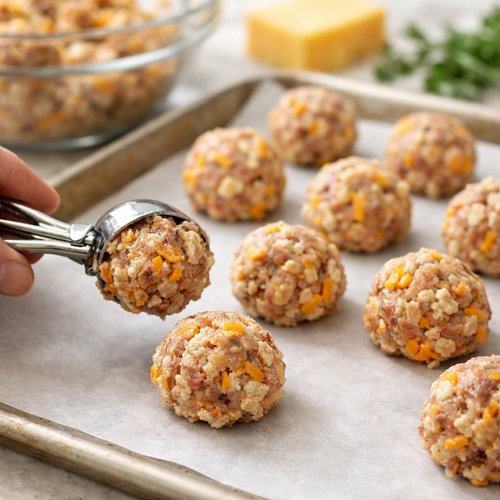
Using a small cookie scoop (about 1-inch diameter) or your hands, form the mixture into balls approximately the size of walnuts. Place them on your prepared baking sheets about one inch apart. If your hands get sticky, wet them slightly with cool water and shake off excess. Work quickly—the mixture firms up as it sits, making shaping easier after about five minutes of resting. Aim for consistent sizing so all balls bake evenly.
Step 6: Bake Until Golden and Cooked Through
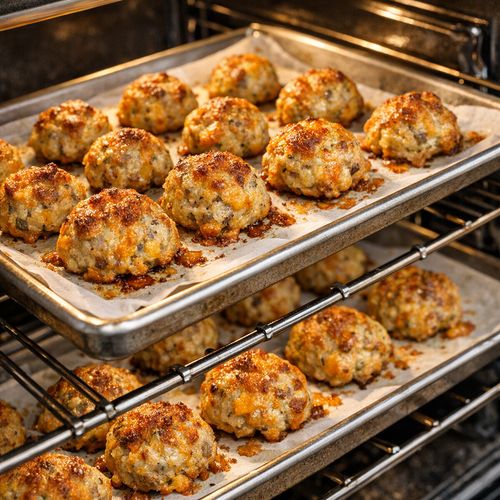
Place both baking sheets in your preheated 350°F oven. Bake for 15-18 minutes, swapping sheet positions halfway through baking. The balls are done when they’re golden brown on the exterior and a meat thermometer inserted into the largest ball reads 165°F internally. Let them cool on the baking sheets for 3-5 minutes, then transfer to a serving platter or wire rack. They’ll continue firming up as they cool.
Regional Variations Around the World
While cheesy sausage balls are distinctly American, I’ve discovered fascinating variations when working with families from different backgrounds and regions. Understanding these adaptations helps us appreciate how a simple recipe can reflect cultural preferences and available ingredients.
- Southern United States variation – incorporates spicy sausage or adds cayenne pepper for heat, reflecting the region’s preference for bold flavors; some versions include hot sauce mixed directly into the cream cheese base
- Midwestern approach (my region!) – tends toward milder seasonings and emphasizes the dairy component; often uses white sharp cheddar for a subtler flavor profile
- Texas-style adaptation – frequently adds jalapeño peppers or uses pepper jack cheese for spice; sometimes incorporates smoked sausage instead of standard pork sausage
- International interpretations – some adaptations use Italian sausage with herbs like basil and oregano, or create European-inspired versions with herbs de Provence and Gruyère cheese
Traditional Serving Customs
Cheesy sausage balls have deep roots in American entertaining traditions. These bites traditionally appear at casual gatherings—church socials, office parties, potlucks, and holiday celebrations—where finger food etiquette calls for easy, no-utensil eating. The informal nature of these balls makes them perfect for mingling and eating while standing, which is exactly why they became so popular for entertaining.
Traditionally, these are served warm, either fresh from the oven or reheated on a warming tray. I’ve observed that serving temperature matters for texture—warm balls have a slightly softer interior with a delicate crust, while room-temperature balls develop a firmer, more biscuit-like consistency. Both are delicious; it depends on your preference and timing.
In my experience consulting with families, the traditional accompaniments include simple dipping sauces like ranch dressing, marinara sauce, or honey mustard. The casual presentation—often served on a platter with toothpicks for easy grabbing—reinforces the relaxed, unpretentious nature of this dish. It’s food designed for joy and gathering, not formal presentation.
Can I Store Cheesy Sausage Balls Recipe?
One of my favorite things about this recipe is how beautifully it stores, which matters enormously when you’re managing a busy family schedule. I’ve refined my storage methods over ten years of teaching families how to prepare ahead.
Room Temperature: Store cooked balls in an airtight container for 2-3 hours maximum. This works well if you’re serving them within a few hours of baking.
Refrigerator Storage: Place cooled balls in an airtight container or sealed bag and store for up to 4 days. They hold their texture remarkably well. Reheat gently in a 300°F oven for 8-10 minutes until warmed through, or microwave for 20-30 seconds per ball.
Freezer Storage: This is where these balls truly shine. Place unbaked or baked balls on a baking sheet and freeze for 2-3 hours until solid, then transfer to a freezer bag or container. Unbaked frozen balls keep for 3 months; baked frozen balls keep for 2 months. To cook frozen unbaked balls, add 5-7 minutes to your baking time. To reheat baked frozen balls, thaw in the refrigerator overnight, then warm in a 300°F oven for 10 minutes.
From a practical standpoint, I often make these on Sunday and freeze the unbaked portions, allowing me to bake fresh balls during the week whenever I need a quick, impressive appetizer. This approach honors both nutrition and convenience—the two values that drive my work with families.
Nutrition Information
Each cheesy sausage ball contains approximately 95-110 calories, 7-8 grams of protein, 6-7 grams of fat, and 3-4 grams of carbohydrates, with about 180-200 mg sodium per ball (based on USDA data and standard serving sizes). These numbers matter when you’re feeding a family and trying to maintain nutritional balance.
From my perspective as a registered dietitian, what’s meaningful here is the protein-to-calorie ratio. These balls deliver quality animal protein in a compact package, making them genuinely satisfying despite their small size. The cream cheese and cheddar contribute bioavailable calcium and B vitamins, while the sausage provides iron and B12. This isn’t empty-calorie food; it’s nutrient-dense.
The sausage’s fat content supports satiety and fat-soluble vitamin absorption, particularly important for families concerned about nutrient density. For children, the familiar flavors and easy-to-eat format make these particularly valuable—they’re protein-rich finger foods that kids actually enjoy, which addresses a real challenge in family nutrition.
One nutritional note: check your sausage’s sodium level. Some brands are quite high in salt, so seasoning conservatively matters. I often use slightly less salt when my sausage brand reads over 400 mg sodium per serving. This kind of attention to detail is what separates sustainable family nutrition from recipes that look healthy on paper but leave families feeling deprived.
What Can I Serve With Cheesy Sausage Balls Recipe?
Over my decade of working with families, I’ve discovered that cheesy sausage balls pair beautifully with both hearty and light accompaniments, depending on your meal context. These balls work equally well as a standalone appetizer or as part of a larger spread.
For casual gatherings, I often serve them alongside simple vegetable options like fresh carrot sticks, celery, and cherry tomatoes to balance the richness. This pairing honors nutrition without requiring additional cooking. For more substantial meals, these balls complement Cincinnati Chili Recipe beautifully, creating a hearty appetizer spread that keeps guests satisfied.
I also frequently feature them alongside Pizza Bread Recipe for casual entertaining, as both have that savory, carb-and-cheese appeal that families love. The two recipes together create a satisfying, manageable appetizer menu without overwhelming prep work.
From a nutritional standpoint, pairing these protein-rich balls with fresh vegetables helps create balanced appetizer platters. My families appreciate when I suggest Baked Broccoli Recipe With Cheese as a complementary side—it echoes the cheese element while adding vegetable nutrition.
- Ranch or herb dipping sauce – complements the savory sausage and creamy cheese without competing
- Marinara or pizza sauce – creates an Italian flavor direction, particularly if using Italian sausage variations
- Honey mustard – provides sweet and tangy contrast to the rich, salty sausage balls
- Fresh vegetable platter – balances the richness and adds nutritional variety to appetizer spreads
- Crackers or breadsticks – for guests who prefer more structured vehicles for eating
Common Mistakes to Avoid
Mistake 1: Using cold cream cheese. I see this constantly when families bake these for the first time. Cold cream cheese refuses to distribute evenly, creating pockets of plain cheese that throw off the texture and flavor. Room-temperature cream cheese incorporates smoothly and creates uniform balls. Set it out 30 minutes before starting—this small step transforms results.
Mistake 2: Overmixing the batter. When I teach families cooking techniques, overmixing is where things go wrong. Overmixing activates the meat proteins and overdevelops gluten in the baking mix, resulting in tough, dense balls that feel more like meatballs than the delicate, slightly crumbly texture you want. Mix just until ingredients disappear; don’t aim for homogeneity.
Mistake 3: Skipping the baking sheet swap. Ovens have hot spots, and the bottom of most ovens runs hotter than the top. I always swap sheet positions halfway through baking to ensure even browning and cooking. Without this step, you end up with burnt bottoms and undercooked tops.
Mistake 4: Not checking for doneness with a meat thermometer. A 165°F internal temperature guarantees food safety without overdrying the balls. Guessing by color often leads to either undercooked or overcooked results. My registered dietitian background makes food safety non-negotiable in my kitchen, and I teach families to use a thermometer every single time.
Make-Ahead Guide: Prep Work That Saves Your Week
This is where my decade of helping busy families truly shines. Cheesy sausage balls are exceptional make-ahead food, and strategic preparation multiplies your weeknight flexibility.
Sunday Preparation Option: Make your entire batch of unbaked balls on Sunday. Freeze them on a baking sheet for 2-3 hours, then transfer to freezer bags with labels and dates. During the week, whenever you need an impressive appetizer or protein-rich snack, pull out what you need and bake fresh for 20-22 minutes. Your home smells incredible, the food tastes freshly made, and you’ve actually saved tremendous time.
Baked Make-Ahead Option: Bake your full batch and store in the refrigerator for up to 4 days. Reheat in a 300°F oven for 8-10 minutes before serving. This works beautifully for families planning multiple gatherings in one week.
Partial Prep: Combine your sausage, cream cheese, and cheddar the night before, cover, and refrigerate. The next day, add your baking mix and form balls. This breaks the task into manageable chunks, which is exactly how I help families actually execute meal plans.
Expert’s Nutritional Tip: The Protein Power of Strategic Snacking
As a registered dietitian who’s spent years helping families navigate nutrition, I want to share something crucial: these balls represent what I call “nutrient-dense snacking.” Each small ball delivers 7-8 grams of protein, which matters significantly for family nutrition.
Here’s what most families don’t realize: protein from quality sources like sausage and dairy triggers satiety hormones more effectively than processed snack foods. When my families offer these to their kids, the children actually feel satisfied, not ten-minutes-later hungry. That’s not coincidence; it’s nutrition science. The combination of animal protein (from sausage), dairy calcium (from cream cheese and cheddar), and complex carbohydrates (from the baking mix) creates a genuinely balanced snack that supports steady energy and proper development.
I often recommend these specifically for families with picky eaters because the familiar flavors and manageable size make protein intake less stressful. You’re not asking your child to eat “healthy;” you’re serving them something delicious that happens to be nutritious. This approach—meeting families where they are—is foundational to everything I teach.
Seasonal Variations: Adapting This Recipe Year-Round
My work with families has taught me that seasonal cooking isn’t just about availability; it’s about matching food to energy levels and cravings throughout the year. Cheesy sausage balls adapt beautifully to seasonal variations.
Spring Version: Add fresh herbs like chives, dill, or fresh parsley (about 2 tablespoons finely chopped) to your mixture. Spring entertaining often feels lighter, and fresh herbs create that brightness. Use a milder sausage to let the herbs shine through.
Summer Variation: Incorporate jalapeño peppers (about ¼ cup minced and drained of excess moisture) for a spicy kick that pairs beautifully with summer beverages. This variation works wonderfully for outdoor entertaining and reflects summer’s bolder flavor preferences.
Fall Adaptation: Add ½ teaspoon of smoked paprika to mirror autumn’s grounded, smoky flavors. Some families also experiment with sage (a pinch—it’s potent) for a more autumnal taste profile that pairs beautifully with fall gatherings.
Winter Approach: Stick closer to the traditional recipe, but consider using sharp aged cheddar and perhaps a touch of white pepper for sophistication. Winter entertaining feels rich and classical; this version honors that mood.

Cheesy Sausage Balls Recipe
Ingredients
Method
- Remove your cream cheese from the refrigerator at least 30 minutes before beginning. This is non-negotiable for proper mixing. Cold cream cheese won't distribute evenly through the sausage, creating pockets of cheese instead of uniform flavor. Set your oven to 350°F and line two baking sheets with parchment paper—this prevents sticking and ensures even browning on the bottom. I place one rack in the upper-middle position and one in the lower-middle position for even cooking.
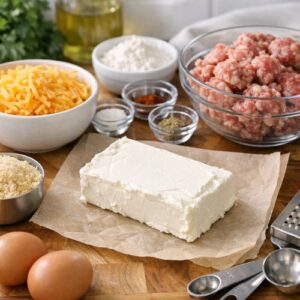
- In a large mixing bowl, place your pound of bulk sausage. Using your hands (clean hands work best here), break the sausage into small pieces as you work it into the bowl. This prevents large chunks from forming and allows even distribution of all other ingredients. Add your softened cream cheese directly to the sausage. Begin combining these two with your hands, using a gentle squeezing motion rather than aggressive mixing. Work until the cream cheese is evenly distributed throughout—you should see no white streaks of cream cheese remaining.

- Sprinkle your shredded sharp cheddar cheese over the sausage mixture along with the garlic powder, onion powder, salt, and black pepper. Now is when you stop using your hands and switch to a gentle folding motion with a wooden spoon. Overmixing at this stage creates tough balls because you're activating the meat proteins. Fold gently just until everything is incorporated and the cheese is evenly distributed. The mixture should hold together when pressed but shouldn't be overworked or sticky.
- Sprinkle your Bisquick baking mix over the top of the mixture. Fold gently using the wooden spoon method until the flour is just incorporated. The mixture will transform from wet and sticky to crumbly and moldable. This step takes about one minute—stop as soon as you can't see dry flour streaks. The baking mix provides structure without creating dense, heavy balls.
- Using a small cookie scoop (about 1-inch diameter) or your hands, form the mixture into balls approximately the size of walnuts. Place them on your prepared baking sheets about one inch apart. If your hands get sticky, wet them slightly with cool water and shake off excess. Work quickly—the mixture firms up as it sits, making shaping easier after about five minutes of resting. Aim for consistent sizing so all balls bake evenly.

- Place both baking sheets in your preheated 350°F oven. Bake for 15-18 minutes, swapping sheet positions halfway through baking. The balls are done when they're golden brown on the exterior and a meat thermometer inserted into the largest ball reads 165°F internally. Let them cool on the baking sheets for 3-5 minutes, then transfer to a serving platter or wire rack. They'll continue firming up as they cool.

FAQs
Can I use Italian sausage instead of regular pork sausage?
Absolutely! Italian sausage creates a completely different flavor profile with its herbs like fennel and garlic. I often use it when serving these alongside Baked Ziti Sausage Recipe to create an Italian-themed appetizer spread. The herbed sausage pairs beautifully with the sharp cheddar, creating a more sophisticated flavor combination. Just ensure it’s bulk Italian sausage, not links, and follow the recipe exactly as written.
What if my cream cheese is still cold when I’m ready to mix?
This is genuinely the most common question I receive. Cold cream cheese won’t combine evenly with the sausage, creating pockets of unmixed cheese. Cut your cream cheese block into small cubes while still cold, then leave on the counter for 15-20 minutes. The smaller surface area warms faster. Alternatively, microwave for 10-15 second intervals until it’s soft enough to press with your finger but not melted. Patience here prevents failure.
Can I make these without the baking mix?
The baking mix serves a specific structural purpose—it creates the slight crumbly texture and helps the balls maintain their shape during baking. Without it, you’d essentially have sausage meatballs, which are denser and greasier. If you have a flour allergy, using almond flour or another substitute dramatically changes the result. For most families, the baking mix is worth the ingredient, but you could experiment with crushed pork rinds (about 1 cup) for a lower-carb adaptation, though this creates a very different texture.
How do I prevent my sausage balls from being too greasy?
Grease is typically excess fat from the sausage rendering during baking. This happens when you use higher-fat sausage or overcrowd your baking sheet. I prevent this by ensuring at least one inch of space between balls, which allows hot air to circulate properly. Also, line your baking sheets with parchment paper, which helps manage any rendered fat. If grease still concerns you, place finished balls on a paper towel-lined plate for 1-2 minutes after baking to absorb excess surface fat.
Why are my sausage balls tough instead of tender?
This almost always comes from overmixing. When you overwork the mixture, you develop gluten in the baking mix and activate myosin in the sausage protein, both of which create tough texture. Mix just until ingredients disappear—literally one minute after adding the baking mix. Also, avoid packing the mixture when forming balls; shape gently and loosely. A light touch is your friend here.
More Recipes From This Tradition
- Best Sloppy Joes Recipe – another beloved ground meat appetizer and main dish that shares the casual, crowd-pleasing spirit of sausage balls
- Best Meatloaf Crock Pot Recipe – a traditional ground meat dish that uses similar ingredients in a different format for busy families
- Barbecue Roast Beef Recipe – another festive gathering food that appeals to the same comfort-food sensibilities
I genuinely believe that food is how we show love to our families, and cheesy sausage balls represent that philosophy perfectly. They’re simple enough that any family can execute them, impressive enough that people feel celebrated when you serve them, and delicious enough that everyone actually wants to eat them. After a decade of helping families navigate nutrition and real-life cooking, this recipe embodies everything I believe about sustainable, joyful eating.
The beautiful part about sharing this recipe with you is knowing that these balls will appear at your gatherings, fuel your kids’ after-school hunger, and create moments of connection around food. That’s the real magic here—not just the recipe itself, but what it enables in your family life. So go ahead, make a big batch, freeze half of it, and give yourself permission to serve something delicious without stress. Happy Cooking!