
This post contains affiliate links. As an Amazon Associate I earn from qualifying purchases.
Learning to make this chicken biscuit skillet isn’t just about this one dinner—it’s about mastering a technique that unlocks dozens of other comfort food classics. I discovered this magic moment ten years ago, standing in my tiny apartment kitchen after a brutal shift at the clinic. My daughter was hungry, I had no energy, and I needed something that would make everyone smile. That’s when I realized: if I could master one simple technique—building a silky, flavorful sauce—I could transform any leftover protein and vegetable into something restaurant-quality in under an hour. Today, I’m sharing that exact technique with you, along with the chicken biscuit skillet that started it all. Whether you’re drowning in after-school activities or just craving comfort food without the stress, this recipe teaches you a skill you’ll use forever.
Master the Technique Behind Chicken Biscuit Skillet (And Never Struggle in the Kitchen Again)
I’ll never forget the moment everything clicked. I was watching my seven-year-old refuse yet another “chicken thing” I’d thrown together, and I thought: what if I stopped improvising and actually learned why certain cooking techniques work? That afternoon, I made my first proper roux—that butter-flour foundation—and whisked it with milk until it transformed into something silky and luxurious. My daughter ate two bowls. That night, I realized I’d unlocked the secret to stress-free weeknight cooking: master one solid technique, and suddenly you’re not stressed anymore. You’re confident. You’re the adult in the kitchen, not the other way around.
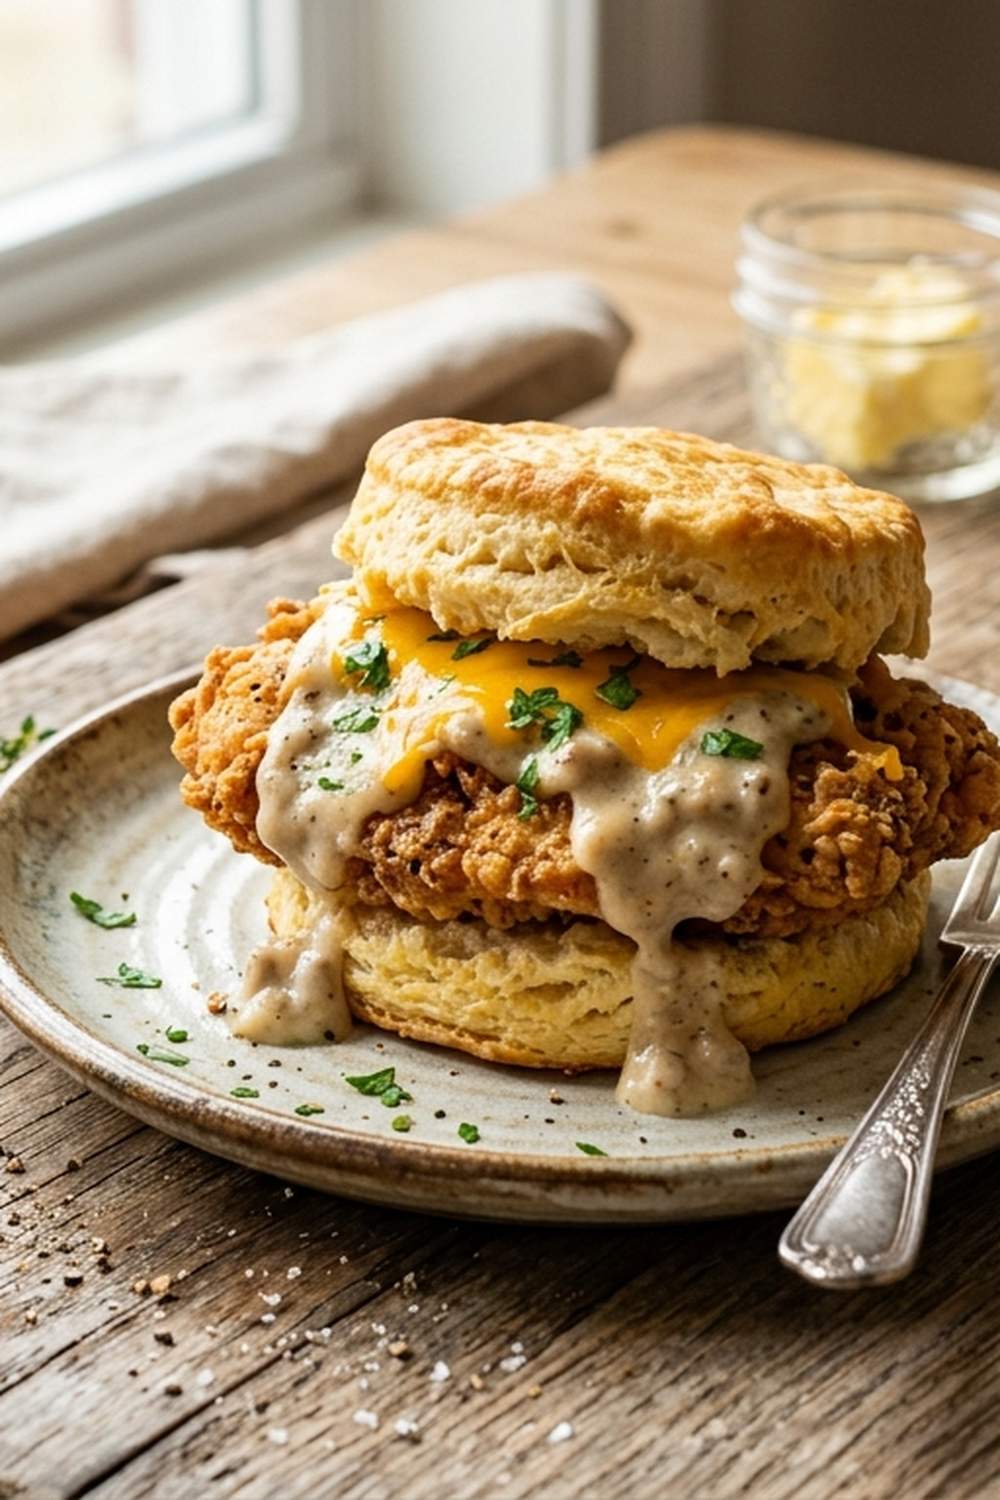
The Core Technique Explained
The heart of this recipe is roux-based sauce making—a fundamental technique that forms the backbone of countless dishes. Here’s what’s actually happening: when you combine fat (olive oil), flour, and milk in the right sequence, you’re creating an emulsion. The flour molecules swell and thicken the milk, while the fat coats each flour particle, preventing lumps from forming. This isn’t magic—it’s science. When you heat the mixture to a gentle boil and whisk constantly, you’re allowing the starch granules to absorb liquid and swell fully, which creates that luxurious, velvety texture. Understanding this process means you can troubleshoot any sauce, adjust consistency on the fly, and never feel helpless in the kitchen again.
What This Technique Unlocks
Once you master roux-based sauces, you’ll suddenly see possibilities everywhere. This one technique is the foundation for creamy soups, pot pies, gratins, and dozens of other family favorites. Here’s what opens up once you’ve made this recipe a few times:
- Creamy Chicken Pot Pie – uses the exact same sauce base, just baked in a pie shell instead of topped with biscuits
- Mushroom and Rice Casserole – the same roux technique creates the creamy binding agent
- Broccoli and Cheese Bake – identical sauce method, completely different vegetable
- Creamy Tuna Noodle Casserole – swap the chicken for canned tuna, keep the sauce technique exactly the same
- Vegetable Soup with Cream – this sauce technique transforms simple broth into something elegant and satisfying
- Classic Butternut Squash Soup – this soup uses the same roux foundation to create a silky, restaurant-quality texture
The Ingredients—Chosen to Teach the Technique
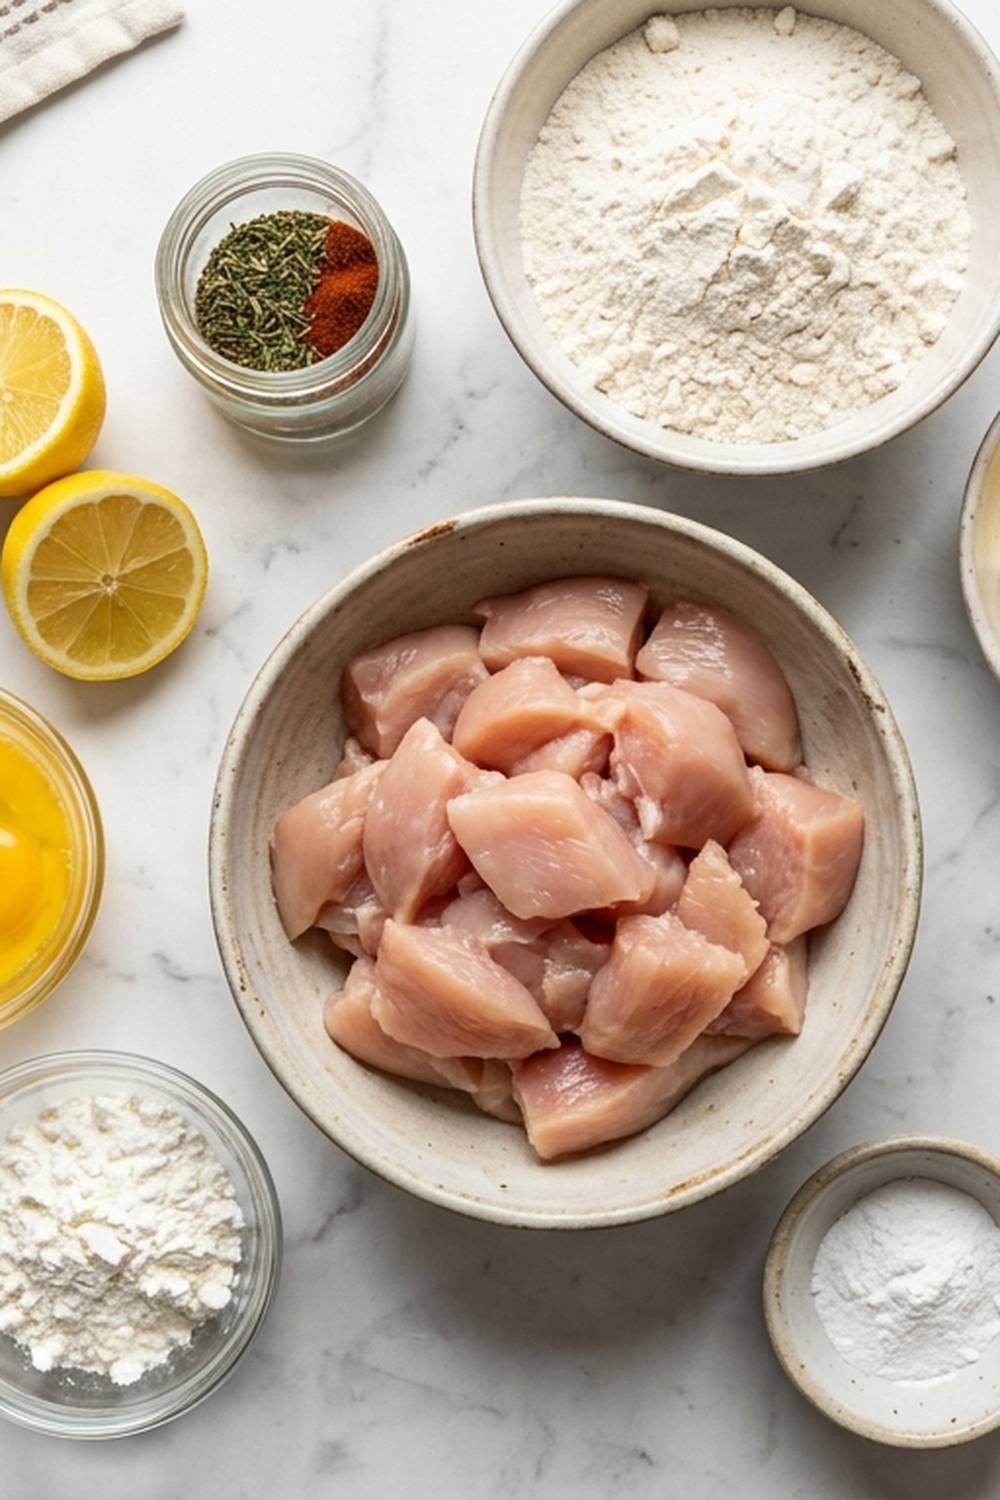
I’ve selected each ingredient specifically because it demonstrates a key principle of sauce-making. The mushrooms teach you how to build flavor through caramelization. The milk shows you how proteins and fats interact with starch. The chicken provides practice in layering flavors without overwhelming the sauce. Nothing is wasted—everything here has a teaching purpose.
For the Creamy Sauce Base
- 1 tablespoon fresh thyme leaves (shows how fresh herbs brighten creamy sauces)
- 1 and 1/2 tablespoons extra-virgin olive oil (divided into cooking and roux stages to show how fat is layered in technique)
- 1/4 cup all-purpose flour (the thickening agent that demonstrates starch gelatinization)
- 2 and 1/2 cups milk (I used nonfat, but whole milk creates an even richer sauce—you’ll notice the difference in mouthfeel)
For the Flavor Builders
- 1 and 1/2 teaspoons garlic powder (concentrated flavor that won’t water down your sauce like fresh garlic would)
- 3/4 teaspoon ground black pepper (toasted pepper adds complexity to creamy sauces)
- 1/2 teaspoon kosher salt (drawn from the USDA guidelines for proper seasoning without overwhelming nonfat milk)
- 8 ounces sliced baby bella mushrooms (teaches how to properly sauté vegetables until deeply browned)
For the Protein and Vegetables
- 1/2 teaspoon smoked paprika (optional addition that shows how spices complement roux-based sauces)
- 1 16-ounce bag frozen mixed vegetables with carrots, peas, and green beans (teaches how frozen vegetables thaw perfectly in hot sauce without releasing excess water)
- 2 cups cooked and shredded boneless, skinless chicken breasts (about 8 ounces or 2 small breasts—shows how to fold protein into sauce without breaking it down)
For Assembly
- 1 prepared batch Easy Drop Biscuit dough, unbaked (demonstrates how to layer textures—creamy sauce with tender, buttery topping)
Yield: Serves 6 adults with generous portions, or 8 smaller servings for mixed-age families.
The Masterclass: How to Make Chicken Biscuit Skillet
This isn’t just a recipe—it’s your personal cooking masterclass. I’m walking you through every technique moment, explaining the why behind each step. By the time you pull this out of the oven, you’ll have practiced sauce-making, seasoning, and texture layering. You’ll be a different cook than when you started.
Step 1: Prep Your Canvas and Set Your Temperature
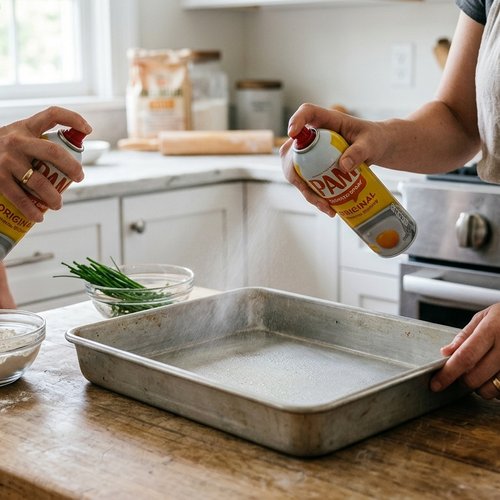
Start by preheating your oven to 400 degrees Fahrenheit. This temperature matters—too low, and your biscuits won’t puff. Too high, and they’ll brown before cooking through. While the oven preheats, lightly coat an 8×10-inch casserole dish (or any 2.5-quart dish you have) with nonstick spray. This prevents sticking and reduces cleanup stress. The lesson here: mise en place—everything prepped and ready before you start cooking. When you’re not scrambling for ingredients mid-technique, your sauce comes out silky instead of lumpy. Set the prepared dish aside where you can see it.
Step 2: Build Your Flavor Foundation Through Proper Sautéing
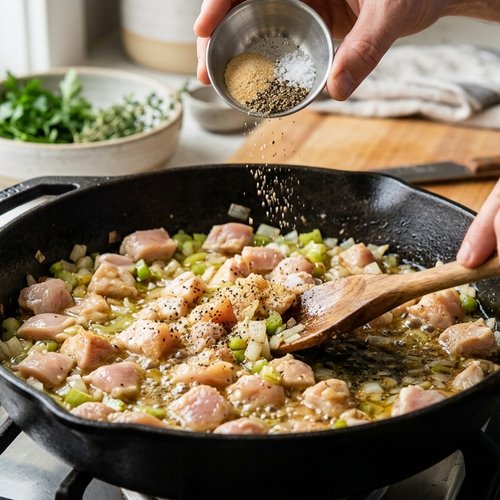
Place a large Dutch oven or heavy-bottomed pot over medium-high heat. Pour in 1 tablespoon of olive oil. Wait—this is important. You’re waiting for the oil to heat until it shimmers slightly but doesn’t smoke. This tells you the temperature is right for caramelizing, not just cooking. Mushrooms should sizzle when they hit the pan. Add your sliced baby bellas and cook for 8 minutes, stirring occasionally. You’re not rushing this. You’re watching them transform from pale and plump to deep golden-brown. This browning—called the Maillard reaction—creates hundreds of new flavor compounds that make your sauce taste sophisticated.
After 8 minutes, sprinkle in your garlic powder, salt, and black pepper. Stir everything together and cook for 3 additional minutes. Watch the color deepen even more—this is your indicator that the mushrooms are fully caramelized. The pan will smell amazing. This aroma tells you you’ve done this step correctly.
Step 3: Create Your Roux—The Foundation of Everything
Sprinkle the flour evenly over the mushrooms. Here’s the trick: don’t add milk yet. Drizzle the remaining 1/2 tablespoon of olive oil over the flour. Using a wooden spoon, stir everything together for 1 to 2 minutes, breaking up any lumps. You’re looking for a slightly dry, sandy texture that gradually turns light golden. This is your roux cooking—the flour is toasting slightly and absorbing the fat. Once the white bits disappear and everything looks pale tan, you’re ready for milk. This moment is crucial. If you rush and add milk to uncooked flour, you’ll get lumps. If you cook the roux too long, it darkens and loses thickening power.
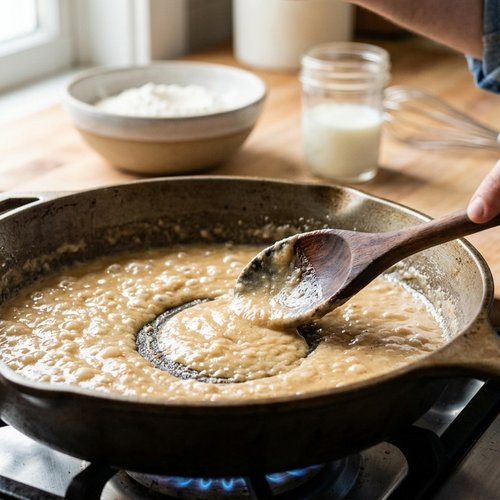
Step 4: The Critical Milk Addition—Technique That Changes Everything
Here’s where most home cooks stumble—and where you’ll shine. Pour the milk in slowly while whisking constantly. I mean constantly. Don’t stop whisking. The slow addition lets the milk gradually hydrate the flour particles, and the whisking breaks up any lumps before they can form. Start with just 1/4 cup of milk, whisking hard. The mixture will look almost paste-like. Keep going. Add another 1/4 cup, whisk, whisk, whisk. Gradually add the remaining milk, and you’ll watch something magical happen: the thick paste transforms into a silky liquid. By the time all the milk is incorporated, you should have a smooth, pourable sauce with zero lumps. Switch to a regular spoon and bring everything to a low, gentle boil over medium heat, stirring and scraping the bottom of the pan constantly. Brown bits stuck to the pan? Those are flavor. Scrape them up and incorporate them.
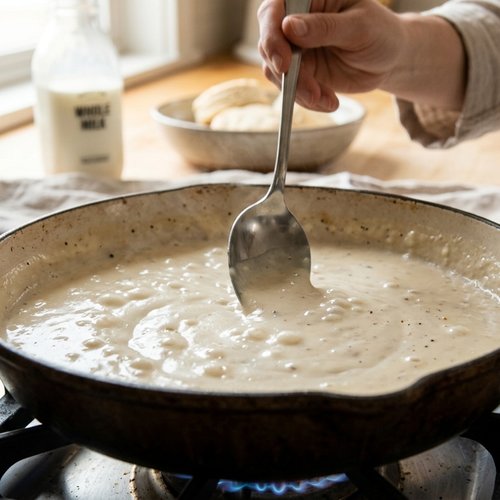
Step 5: Reduce and Thicken—Patience Pays Off
Let the sauce bubble gently for about 7 minutes, stirring frequently. You’re watching for it to reduce by about half its original volume. This concentration does two things: it thickens the sauce as water evaporates, and it intensifies every flavor. The sauce should coat the back of a spoon. If you drag your finger across the spoon, the line should hold without running. This visual test tells you the sauce is ready. If it’s still thin and runny, give it another 2 minutes of gentle bubbling.
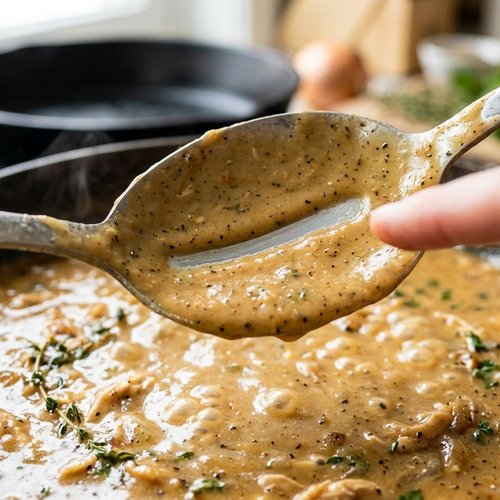
Step 6: Layer Your Proteins, Vegetables, and Herbs
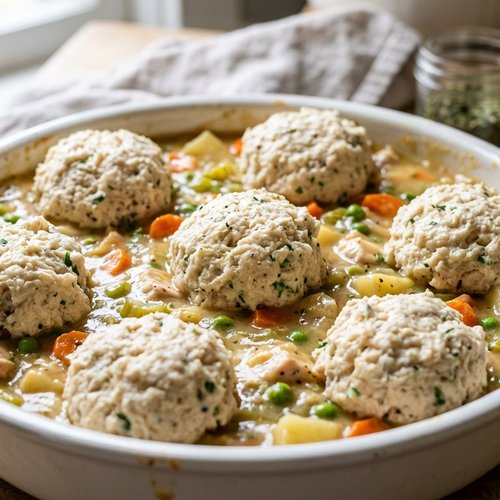
Turn off the heat. Stir in your 2 cups of shredded cooked chicken, the frozen vegetables (they’ll thaw immediately in the hot sauce), and your fresh thyme. Fold everything together gently—you’re trying to distribute ingredients evenly without breaking apart the chicken. Taste your creation. Does it need more salt? More pepper? Adjust now. This is your sauce. Make it taste right to your family. Spoon everything into your prepared casserole dish. Some filling should peek through—you’re not aiming for a completely smooth top.
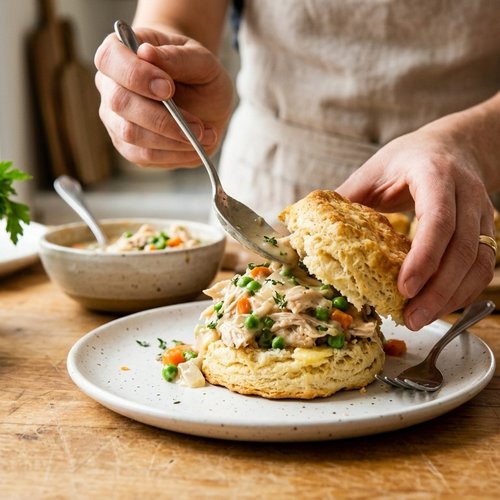
Step 7: The Biscuit Crown—Texture Magic
Drop your prepared biscuit dough by rounded spoonfuls over the filling, spacing them evenly. You want some filling visible between the biscuits—they’ll puff slightly and create a beautiful golden-brown crown. Don’t pack them too tightly. Each biscuit needs space to rise. Slide the whole casserole into your preheated 400-degree oven.
Step 8: The Final Moment—Bake Until Golden
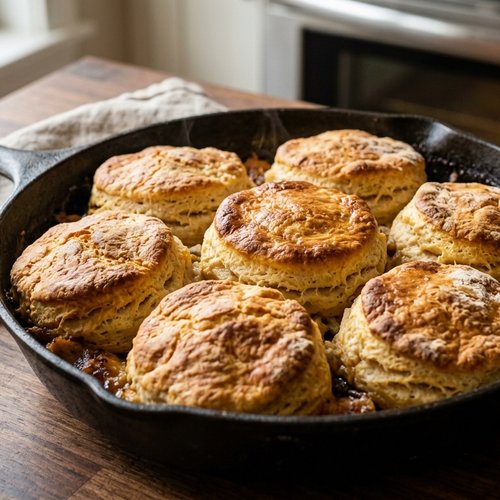
Bake for 25 to 30 minutes, watching for the biscuits to turn deep golden brown on top and cooked through. When you see them rise and brown, you’re done. Let the whole thing cool for 5 minutes before serving—this gives the sauce time to set slightly so it doesn’t run all over the plate. Serve hot, and watch your family actually ask for seconds.
How to Know You’ve Mastered the Technique
These sensory indicators tell you that you’ve truly learned this technique, not just followed steps:
- Silky, Lump-Free Sauce – when your sauce coats a spoon smoothly with zero grittiness or flour taste, you’ve nailed the roux technique. The sauce should feel luxurious on your tongue, not grainy or chalky
- Deeply Caramelized Mushrooms – before your sauce even comes together, those mushrooms should smell sweet and nutty, not pale or watery. This aroma is your proof that you understand proper sautéing temperature and timing
- Perfect Biscuit Top – golden brown, puffed, and clearly cooked through tells you that you’ve balanced the filling heat correctly and chose the right oven temperature. The biscuits shouldn’t be pale or doughy in the center
- Sauce Consistency That Holds – when reduced properly, your sauce clings to the back of a spoon instead of sliding off like water. This consistency tells you understood the reduction process
Common Technique Mistakes and How to Fix Them
- Lumpy Sauce – what happened: you added milk too fast or didn’t whisk enough. How to fix it: if lumps appear, pour the entire sauce through a fine-mesh strainer into another pot, pressing gently with a spoon. Return to heat and cook slightly longer to thicken. Next time, add milk in smaller increments and whisk for a full 30 seconds between additions
- Sauce Too Thin – what happened: you didn’t reduce it long enough, or your milk was higher in water content than expected. How to fix it: make a slurry by mixing 1 tablespoon cornstarch with 2 tablespoons cold milk, stir it into your sauce, and simmer for 2 minutes. This creates backup thickening power. Next time, let the sauce bubble longer—7 minutes is a minimum, not a maximum
- Mushrooms Smell Watery, Not Nutty – what happened: your heat wasn’t high enough, or you crowded the pan (mushrooms released water and steamed instead of browned). How to fix it: pat finished mushrooms dry with paper towels before eating. Next time, use medium-high heat consistently and don’t stir more than once per minute—give them time to develop a brown crust
- Biscuits Pale and Doughy – what happened: your oven temperature was too low, or your casserole dish was too deep and the filling insulated from heat. How to fix it: increase oven temperature to 425 degrees and check biscuits at 20 minutes next time. If using a deeper dish, bake for an extra 5 minutes
Practice Variations to Build Your Skill
Master this base recipe, then try these progressively challenging variations. Each one teaches you something new about sauce-making and flavor balance:
Variation 1: Vegetarian Version (Easy—teaches sauce layering) Skip the chicken. Increase frozen vegetables to 2.5 cups and add 1 cup diced roasted butternut squash or sweet potato. This variation teaches you how vegetables release their own juices into the sauce, slightly thinning it—so you might need an extra minute of reduction time. It’s the same technique, different ingredients.
Variation 2: Creamy Bacon and Cheddar Version (Medium—teaches flavor complexity) After the mushroom browning step, add 4 strips of crumbled crispy bacon to the pan. Before adding vegetables, stir in 1/2 cup shredded sharp cheddar cheese into the hot sauce. This variation teaches you how to layer rich flavors—the bacon adds smoke, the cheese adds depth. You’ll see how careful seasoning prevents the dish from tasting one-dimensional. You might reduce the salt slightly since cheese is salty.
Variation 3: White Wine Mushroom Version (Advanced—teaches sauce sophistication) After mushrooms are caramelized, deglaze the pan with 1/2 cup dry white wine, scraping up all browned bits. Let it bubble for 2 minutes to cook off the alcohol, then proceed with the roux. This variation teaches you how acid brightens creamy sauces and how deglazing extracts maximum flavor from browned pan bits. The wine adds complexity that makes people say, “This tastes restaurant-quality.”
Expert’s Nutritional Insight
After a decade of helping families navigate nutrition on chaotic schedules, I always notice the same thing: when you make creamy sauces from scratch instead of using cream of mushroom soup, you control the sodium and add real nutrients. This recipe uses nonfat milk and olive oil, which keeps the saturated fat moderate while providing heart-healthy unsaturated fats. The mushrooms add umami—that savory depth—so you can use less salt and still get a satisfying, flavorful dish. The frozen vegetables retain more nutrients than fresh vegetables that have traveled and sat in your refrigerator. And the bonus? Making this from scratch costs roughly 40% less than a frozen dinner version. Your family gets better nutrition, better taste, and you save money. That’s a win I can feel proud of as both a registered dietitian and a busy parent.
Make-Ahead Guide for Busy Families
This is where real-life cooking happens—in the margins of your schedule. Here’s exactly how I handle this on Monday nights when I know Wednesday will be chaos:
Full Make-Ahead Option (Best for Wednesday-night stress prevention): Prepare through Step 6 completely. Pour the entire filling into your casserole dish, let it cool to room temperature (about 20 minutes), then cover tightly with foil. Refrigerate for up to 2 days. When you’re ready to bake, remove from the refrigerator 15 minutes before baking. Top with biscuit dough and bake for 30-35 minutes (the extra time accounts for the cold filling). The sauce may look slightly separated when cold—just give it a gentle stir before adding biscuits.
Partial Make-Ahead (My favorite balance): Make the sauce base and mushroom layer in the morning. Store in a covered container in the refrigerator. That afternoon, reheat over medium-low heat, stirring constantly, then fold in the vegetables and chicken. Top with biscuits and bake. This takes your evening prep from 30 minutes to 10 minutes.
Component Prep (Maximum flexibility): Cook the chicken, sauté and refrigerate the mushrooms, and measure all dry ingredients into a small bowl. When dinner time hits, you’re just combining pre-made components. Nothing requires active attention except the initial mushroom cooking and the milk whisking.
Can I Store Chicken Biscuit Skillet?
Refrigerator: Store leftovers in an airtight container for up to 4 days. The sauce and chicken maintain quality beautifully. The biscuits will soften slightly as the filling steams them—this is normal and still delicious.
Reheating: Transfer to a baking dish, cover loosely with foil, and warm at 350 degrees for 15-20 minutes until heated through. You can also microwave individual portions for 2-3 minutes, though the oven method preserves texture better.
Freezer: I recommend freezing the filling only (without biscuits) for up to 3 months. Make fresh biscuit dough when you’re ready to bake. Thaw the filling in the refrigerator overnight, reheat gently, and proceed with baking. The frozen-then-thawed sauce texture remains silky.
Do not freeze after baking. The biscuits become tough and the sauce can separate. Freeze components separately instead.
Nutrition Information
Based on USDA nutrition data for a serving of 1/6 of the recipe (generous adult portion including biscuit):
Calories: 385 | Protein: 28g | Carbohydrates: 32g | Dietary Fiber: 3g | Total Fat: 16g (Saturated: 4g, Unsaturated: 10g) | Cholesterol: 65mg | Sodium: 520mg (using the salt listed—adjust for your taste preferences)
The protein comes from both the chicken and milk, making this a genuinely filling dish that keeps kids satisfied through the afternoon. The whole grain content (if you use whole wheat flour in your biscuits) adds fiber. The fat profile skews toward heart-healthy unsaturated from the olive oil, which dietitians actually want you eating. This isn’t health food that tastes like punishment—it’s genuinely nourishing comfort food that happens to fit into a balanced diet.
What to Serve With Chicken Biscuit Skillet?
This dish is rich enough to stand alone, but smart pairings make it shine. I always think about balance: creamy filling needs brightness, so I reach for these:
- Simple Green Salad with Lemon Vinaigrette – the acid cuts through cream and gives your palate a refresh between bites. Toss mixed greens with a 3-to-1 lemon juice and olive oil ratio
- Roasted Asparagus or Green Beans – vegetables cooked until slightly caramelized add textural contrast without competing with the creamy sauce
- Refrigerator Pickles – these homemade pickles are tangy, crunchy, and provide the brightness that cuts through richness
- Steamed Broccoli with Garlic – simple, familiar, and the garlic echoes the flavors already in your skillet
- Crusty Bread or Dinner Rolls – for soaking up every drop of that silky sauce (yes, I allow this in my house)
- Roasted Root Vegetables – carrots, parsnips, or beets add earthy sweetness and visual contrast to all that golden-brown creamy goodness
Seasonal Variations You’ll Love
Spring Version: Replace mushrooms with sliced asparagus (sauté 8 minutes) and frozen peas with fresh peas if you can find them. Add the zest of one lemon to the finished sauce and fresh dill instead of thyme. This version tastes bright and awakening.
Summer Version: Use zucchini and yellow squash instead of mushrooms, and incorporate fresh corn kernels (about 1 cup). Add fresh basil instead of thyme. The vegetables stay lighter and the basil makes you taste the season.
Fall Version: Add 1 cup diced roasted butternut squash to the filling, use sage instead of thyme, and reduce salt slightly since the squash adds sweetness. This version feels harvest-oriented and warming.
Winter Version: Use diced carrots and parsnips sautéed until caramelized, add 1/2 teaspoon dried rosemary, and top with biscuits that have a sprinkle of sea salt. This version feels cozy and grounding.

Chicken Biscuit Recipe
Ingredients
Method
- Start by preheating your oven to 400 degrees Fahrenheit. This temperature matters—too low, and your biscuits won't puff. Too high, and they'll brown before cooking through. While the oven preheats, lightly coat an 8x10-inch casserole dish (or any 2.5-quart dish you have) with nonstick spray. This prevents sticking and reduces cleanup stress. The lesson here: mise en place—everything prepped and ready before you start cooking. When you're not scrambling for ingredients mid-technique, your sauce comes out silky instead of lumpy. Set the prepared dish aside where you can see it.
- Place a large Dutch oven or heavy-bottomed pot over medium-high heat. Pour in 1 tablespoon of olive oil. Wait—this is important. You're waiting for the oil to heat until it shimmers slightly but doesn't smoke. This tells you the temperature is right for caramelizing, not just cooking. Mushrooms should sizzle when they hit the pan. Add your sliced baby bellas and cook for 8 minutes, stirring occasionally. You're not rushing this. You're watching them transform from pale and plump to deep golden-brown. This browning—called the Maillard reaction—creates hundreds of new flavor compounds that make your sauce taste sophisticated. After 8 minutes, sprinkle in your garlic powder, salt, and black pepper. Stir everything together and cook for 3 additional minutes. Watch the color deepen even more—this is your indicator that the mushrooms are fully caramelized. The pan will smell amazing. This aroma tells you you've done this step correctly.
- Sprinkle the flour evenly over the mushrooms. Here's the trick: don't add milk yet. Drizzle the remaining 1/2 tablespoon of olive oil over the flour. Using a wooden spoon, stir everything together for 1 to 2 minutes, breaking up any lumps. You're looking for a slightly dry, sandy texture that gradually turns light golden. This is your roux cooking—the flour is toasting slightly and absorbing the fat. Once the white bits disappear and everything looks pale tan, you're ready for milk. This moment is crucial. If you rush and add milk to uncooked flour, you'll get lumps. If you cook the roux too long, it darkens and loses thickening power.
- Here's where most home cooks stumble—and where you'll shine. Pour the milk in slowly while whisking constantly. I mean constantly. Don't stop whisking. The slow addition lets the milk gradually hydrate the flour particles, and the whisking breaks up any lumps before they can form. Start with just 1/4 cup of milk, whisking hard. The mixture will look almost paste-like. Keep going. Add another 1/4 cup, whisk, whisk, whisk. Gradually add the remaining milk, and you'll watch something magical happen: the thick paste transforms into a silky liquid. By the time all the milk is incorporated, you should have a smooth, pourable sauce with zero lumps. Switch to a regular spoon and bring everything to a low, gentle boil over medium heat, stirring and scraping the bottom of the pan constantly. Brown bits stuck to the pan? Those are flavor. Scrape them up and incorporate them.
- Let the sauce bubble gently for about 7 minutes, stirring frequently. You're watching for it to reduce by about half its original volume. This concentration does two things: it thickens the sauce as water evaporates, and it intensifies every flavor. The sauce should coat the back of a spoon. If you drag your finger across the spoon, the line should hold without running. This visual test tells you the sauce is ready. If it's still thin and runny, give it another 2 minutes of gentle bubbling.
- Turn off the heat. Stir in your 2 cups of shredded cooked chicken, the frozen vegetables (they'll thaw immediately in the hot sauce), and your fresh thyme. Fold everything together gently—you're trying to distribute ingredients evenly without breaking apart the chicken. Taste your creation. Does it need more salt? More pepper? Adjust now. This is your sauce. Make it taste right to your family. Spoon everything into your prepared casserole dish. Some filling should peek through—you're not aiming for a completely smooth top.
- Drop your prepared biscuit dough by rounded spoonfuls over the filling, spacing them evenly. You want some filling visible between the biscuits—they'll puff slightly and create a beautiful golden-brown crown. Don't pack them too tightly. Each biscuit needs space to rise. Slide the whole casserole into your preheated 400-degree oven.
- Bake for 25 to 30 minutes, watching for the biscuits to turn deep golden brown on top and cooked through. When you see them rise and brown, you're done. Let the whole thing cool for 5 minutes before serving—this gives the sauce time to set slightly so it doesn't run all over the plate. Serve hot, and watch your family actually ask for seconds.
Notes
FAQs
Can I use rotisserie chicken instead of cooking my own?
Absolutely. This is exactly how I make this on nights when I grab a rotisserie chicken from the grocery store on the way home. Shred 1.5 cups of rotisserie chicken meat instead of cooking breasts. The finished dish tastes just as good, and you’ve cut your prep time by 15 minutes. This is not cheating—this is parenting.
What if my sauce breaks or becomes grainy while cooking?
This usually means your temperature spiked too high or you stopped whisking. The fix: immediately remove the pot from heat, pour the entire sauce through a fine-mesh strainer into a clean pot, pressing gently with a spoon to force it through. Return to medium-low heat and whisk in an additional 1/4 cup milk. Simmer gently for 3-4 minutes, stirring constantly. The sauce will smooth out. Next time, keep heat at medium-high maximum and whisk constantly during that critical boiling phase.
Can I make this without milk—maybe with coconut milk or cream?
Yes, with adjustments. Use 2 cups of your chosen liquid. Full-fat coconut milk creates a tropical flavor that’s interesting but noticeable—pair it with lime zest instead of thyme. Heavy cream makes this very rich (reduce to 2 cups since cream has more fat). Half-and-half is a lovely middle ground. Nonfat milk keeps the dish lighter while still tasting luxurious—my choice for busy families trying to maintain balance. Whatever you choose, whisk it in slowly and reduce until thickened, exactly as the recipe describes.
My biscuits came out doughy in the center—how do I prevent this?
Your oven temperature might be running cool (buy an oven thermometer—they’re $8 and change everything), or your casserole dish is too deep and insulating the biscuits from heat. Solution: Increase oven temperature to 425 degrees and check biscuits at 20 minutes instead of 25. If using a deep casserole, bake for the full 30-35 minutes. Pale, doughy biscuits mean they didn’t get enough direct heat. The oven thermometer is your investment in never worrying about this again.
Can I use fresh vegetables instead of frozen?
Yes, and I do it sometimes with fresh peas in spring or fresh corn in summer. Sauté fresh vegetables separately until tender (about 5-7 minutes for most choices) before folding them into the hot sauce. Frozen vegetables are already partially cooked, so they integrate faster. Fresh vegetables will release more water as they cook, so you might need an additional 1-2 minutes of reduction time. The flavor is wonderful but requires slightly more active cooking time.
More Recipes Using This Technique
Once you’ve mastered roux-based sauces, these recipes become accessible and fun:
- White Chili Crock Pot Recipe – uses a similar creamy base technique in a hands-off format
- Classic Butternut Squash Soup – demonstrates how to apply this sauce technique to silky, elegant soups
- Stir Fry Pork Recipe – shows how to create a glossy sauce that coats protein beautifully
- Cincinnati Chili Recipe – a different sauce application that shows flexibility in technique
You’ve now learned something that transforms your relationship with weeknight cooking. You understand why sauces work, how to fix them when they don’t, and where this skill takes you next. That’s the difference between following recipes and becoming a confident cook. You’re going to walk into your kitchen on Wednesday night when your schedule is chaos, and instead of panic, you’re going to feel capable. You’re going to make something creamy and golden and delicious, and your family will eat it, and you’ll know exactly why it worked. That’s not a small thing. That’s real expertise. That’s freedom.
Happy Cooking!