
This post contains affiliate links. As an Amazon Associate I earn from qualifying purchases.
Getting kids to eat blackened shrimp feels impossible—until you try this approach. I’ve watched countless families transform their dinner table when shrimp enters the rotation, and honestly, it comes down to knowing how to make it fun and accessible for young palates. When my own daughter first turned her nose up at seafood, I realized the problem wasn’t the shrimp itself—it was the presentation and the spice level. This recipe fixes both. It’s bold enough for adults who crave real flavor, yet mild enough that children feel brave trying something new. Pair this with sides like Pizza Bread Recipe or Baked Ziti Sausage Recipe, and you’ve got a dinner that satisfies everyone at the table in under 20 minutes.
Blackened Shrimp Recipe the Whole Family Will Actually Eat (Picky Eaters Included)
Three years ago, I was stuck in the worst dinner rut. My kids were eating the same five meals on repeat—chicken nuggets, pasta, tacos, repeat. My husband complained that weeknight dinners felt predictable, but I was too exhausted to experiment. One Tuesday, I decided to try something bold: blackened shrimp. I kept the spice rub mild, skipped the cayenne pepper that usually shows up in traditional recipes, and let my kids help coat each piece. My six-year-old loved the “fancy” aspect of flipping the shrimp. My nine-year-old was convinced she was helping me cook something “restaurant-quality.” Suddenly, everyone was excited about dinner instead of rolling their eyes when I announced the menu.
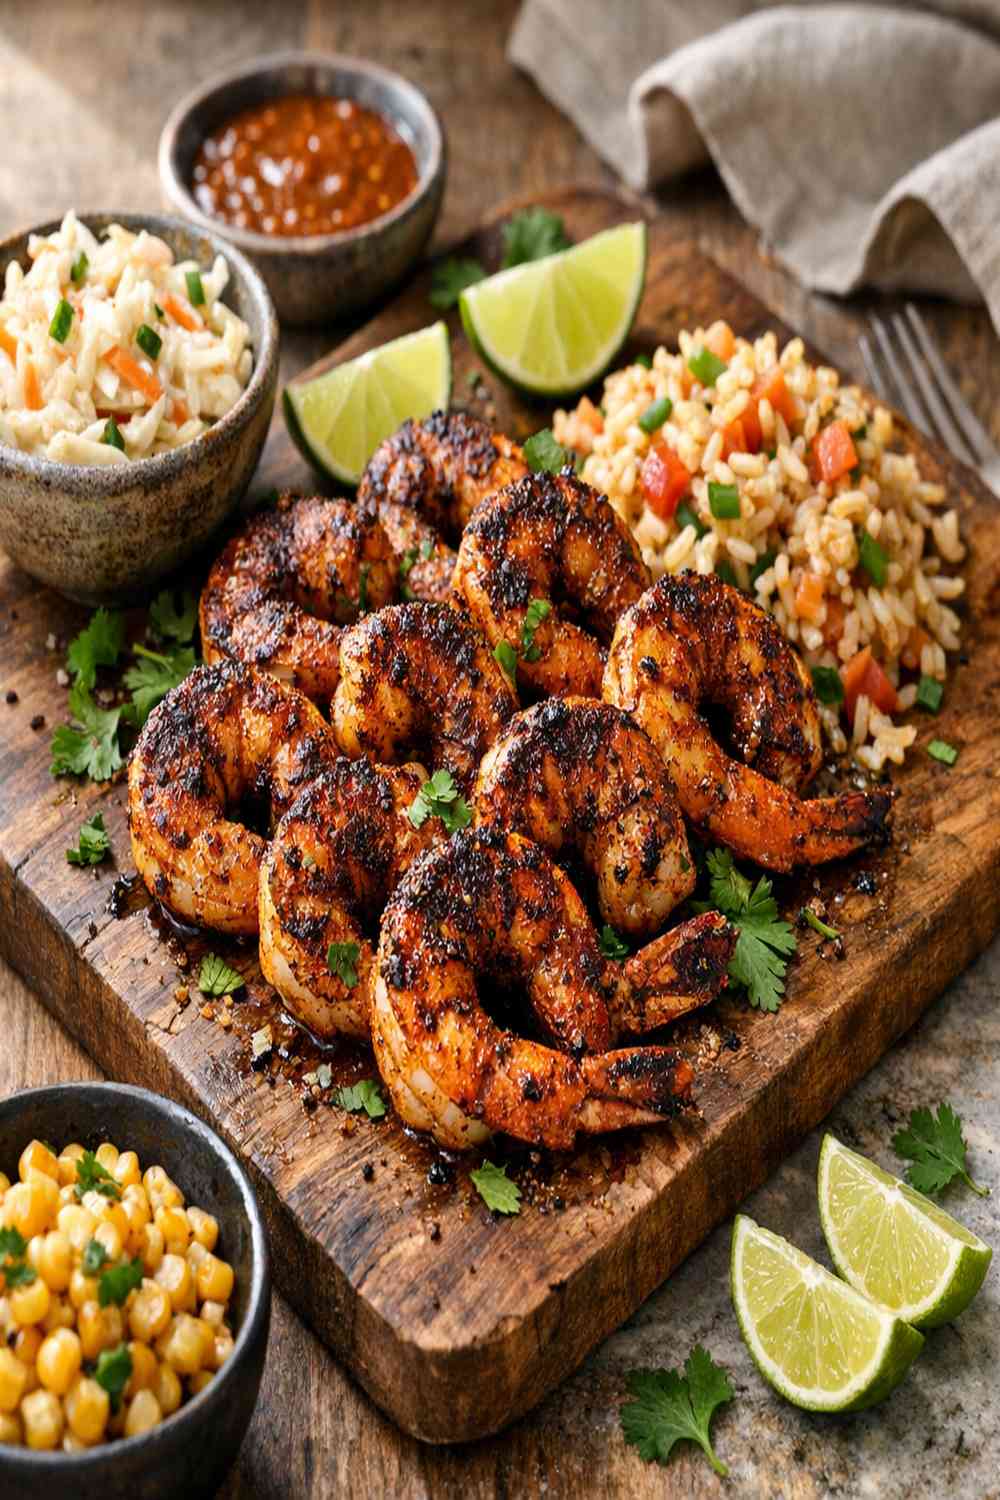
What changed everything wasn’t just the recipe—it was giving my kids ownership. They felt like they were part of creating something special, which made them actually want to taste it. That’s the magic moment every parent is chasing at dinner time.
Why Kids Love This Version
This blackened shrimp recipe hits all the marks that make kids enthusiastic about trying new foods. The cooking happens fast right in front of them, the spice level is totally customizable, and there’s something about the crispy exterior that appeals to the textural preferences kids often have. Plus, shrimp cooks in minutes—there’s no long wait that tests anyone’s patience.
- Quick cooking time creates excitement – Kids can literally watch their dinner transform in the pan in under five minutes. This instant gratification keeps their attention and makes them curious about the result instead of bored while waiting.
- Customizable spice level removes the power struggle – By letting each family member choose how much seasoning they want, picky eaters feel in control instead of forced into something scary. A mild version tastes delicious to young kids, while adults can load up the spice rub.
- Protein that doesn’t feel “heavy” – Shrimp has a completely different texture than chicken or beef. Kids who are bored with typical proteins often get excited about trying something that feels novel and restaurant-quality at home.
How to Get Kids Involved in Making This
One of my favorite parts about this recipe is that there are genuinely fun tasks for every age group. Cooking together isn’t just about getting dinner on the table—it’s about building food confidence and creating memories. Here’s how I involve my kids at different stages:
- Ages 3-5: Spice blending helpers – Let toddlers and preschoolers pour pre-measured spices into a bowl while you supervise. They love the sensory experience, and it builds curiosity about flavors. Give them a child-safe spoon to stir the mixture together. Their “help” might make a small mess, but that’s the point.
- Ages 6-9: The coating crew – School-age kids can handle putting shrimp in a bowl and coating each piece with the spice mixture using their hands (they actually prefer this to utensils). Talk them through why each spice matters. This is also the perfect age to teach them about food safety—washing hands, not touching their face while handling raw shrimp.
- Ages 10+: Pan managers (with supervision) – Older kids can handle the actual cooking with direct parental oversight. Teach them how to recognize when the shrimp is done (it should turn from translucent to opaque and pink). They can handle the flip, manage heat levels, and add the garlic at the right moment. This is real cooking responsibility.
The Ingredients – Hidden Nutrition, Visible Deliciousness
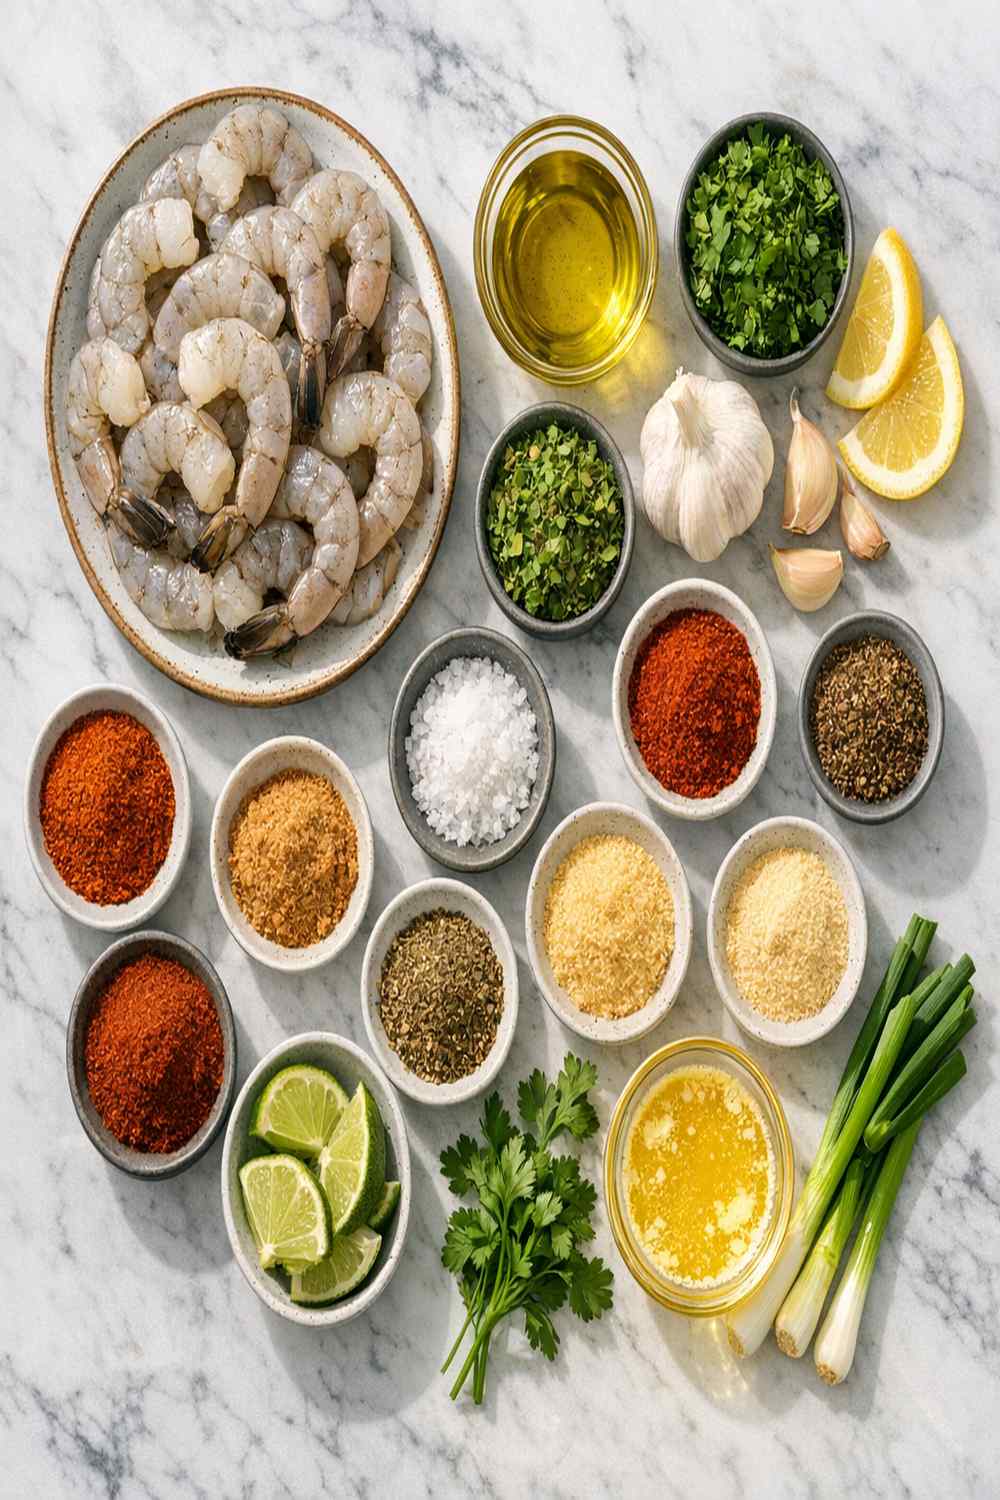
This ingredient list is shorter than most recipes, which is intentional. I’m a registered dietitian, and I believe that simple recipes with quality ingredients are ones families actually stick with. Every single component here serves a purpose—either adding flavor or boosting nutrition in ways kids won’t notice or fight against. The spice rub creates that signature blackened crust that looks impressive, while the fresh garlic and cilantro add brightness that even picky eaters appreciate.
- ½ teaspoon freshly ground black pepper (adjust down for younger kids if needed)
- 4 cloves fresh garlic (minced finely—adds finishing flavor that makes this taste restaurant-quality)
- 2 limes (cut into wedges for squeezing—the acid brightens everything and feels fancy)
- ½ cup fresh cilantro (chopped, for garnish—kids can pick leaves if they’re hesitant about the green herb)
- 1 tablespoon chili powder (adds warmth and mild heat without overwhelming young palates)
- 2 teaspoons brown sugar (balances the spices with subtle sweetness—kids notice this!)
- 1 teaspoon garlic powder (concentrated garlic flavor that makes everything taste “fancy”)
- 1 tablespoon extra-virgin olive oil (high quality matters here since it’s not cooked down in a long recipe)
- 1 teaspoon ground cumin (brings earthiness that pairs beautifully with shrimp)
- 1 teaspoon dried oregano (Mediterranean herb that kids typically accept well)
- 1½ pounds large shrimp (uncooked, peeled, and deveined—about 16-20 per pound for easy cooking)
- 1 tablespoon paprika (creates the signature dark, crispy exterior while adding subtle sweetness)
- 1 teaspoon sea salt (don’t skip this—it draws out the shrimp’s natural sweetness)
How to Make Blackened Shrimp Recipe for the Whole Family
I always frame cooking with kids as a fun activity rather than a chore. This recipe is perfect because it moves quickly, so even if someone loses focus halfway through, you’re still getting dinner on the table in 15 minutes. The steps are straightforward enough that you can actually talk and laugh while you cook instead of being stressed about timing.
Step 1: Blend Your Spice Rub Together
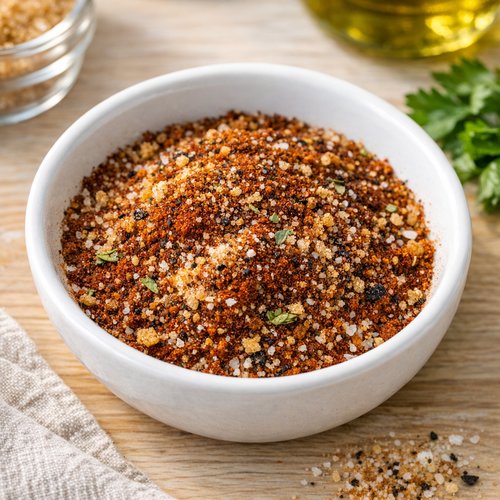
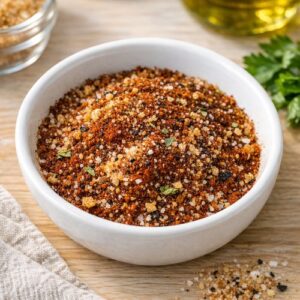
In a small bowl, combine the chili powder, paprika, ground cumin, dried oregano, garlic powder, brown sugar, sea salt, and freshly ground black pepper. This is the perfect step for kids ages 3 and up—let them help measure and pour while you supervise. Make sure hands are clean and that no spices end up on the floor (though honestly, some will). Stir everything together until the mixture is evenly combined. You’re looking for a unified rub, not separate spice particles. This spice blend can actually be made ahead and stored in an airtight container for up to two weeks, which makes busy weeknights even easier.
Step 2: Coat the Shrimp Generously
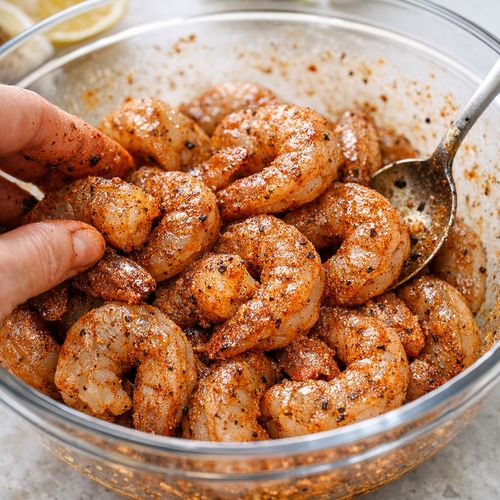
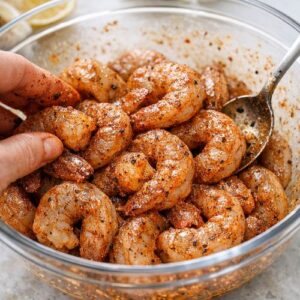
Place your 1½ pounds of shrimp in a medium bowl. Pour the spice mixture over top and gently toss everything together using your hands or a spoon. Make sure each shrimp gets coated evenly—this is where kids ages 6-9 really shine. They can use their hands to coat, which they actually prefer over utensils. Every piece should have a light coating of the spice rub on both sides. Set the coated shrimp aside for 15-30 minutes if you have time. This isn’t absolutely necessary, but it allows the flavors to start penetrating the shrimp, making the final dish even more flavorful. If you’re in a rush, you can start cooking immediately—you’ll still get delicious results.
Step 3: Heat Your Skillet Properly
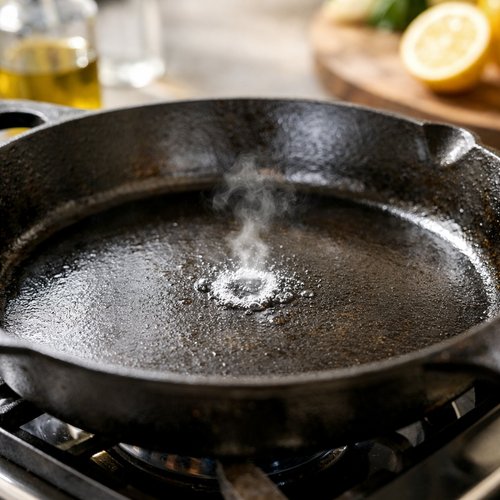
Place a large skillet over medium-high heat. Let it get hot for about 1-2 minutes—you’ll know it’s ready when a drop of water sizzles immediately on contact. Add 1 tablespoon of extra-virgin olive oil and let it heat until it’s shimmering but not smoking. Keep children back from the stove at this point—the oil is extremely hot and can cause serious burns. This is the moment where older kids (10+) can observe and learn about heat management, but you’re in full control of the pan.
Step 4: Cook the Shrimp Until Blackened and Pink
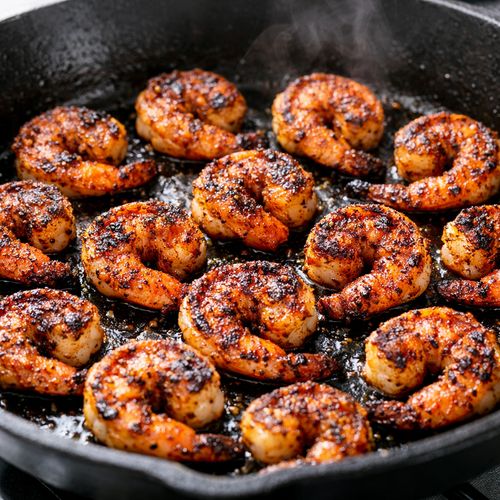
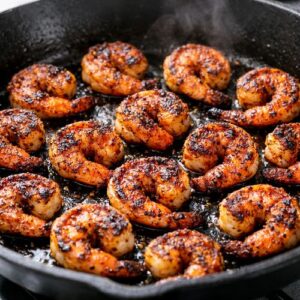
Carefully arrange your spiced shrimp in a single layer in the hot skillet. Don’t overcrowd the pan—if they’re all piled on top of each other, they’ll steam instead of sear. Work in batches if needed. Let them cook undisturbed for exactly 2 minutes. You’ll see the edges start turning pink and the spice rub will darken beautifully. After 2 minutes, flip each shrimp and cook for another 2 minutes on the second side. The shrimp should be opaque throughout and have a gorgeous dark, crispy exterior. Use tongs or a spatula to flip—fingers and hot oil don’t mix, especially with kids watching. This is the moment kids ages 10+ can step in under your direct supervision and handle the flipping.
Step 5: Add Fresh Garlic for That Restaurant Finish
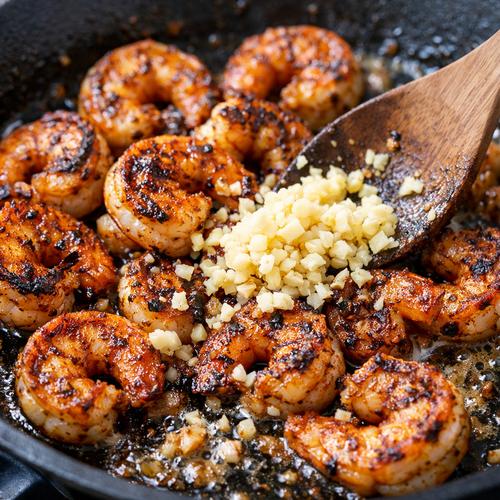
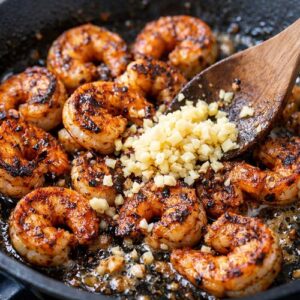
Once the shrimp is cooked through (about 4 minutes total), add your minced fresh garlic directly to the pan. Stir everything together gently and cook for just 30 seconds. The garlic will toast slightly and release its aroma, which signals to everyone in your house that dinner is literally seconds away. Don’t cook the garlic longer than 30 seconds—you want fragrant and golden, not brown and bitter. This final step is what transforms good blackened shrimp into restaurant-quality blackened shrimp.
Step 6: Garnish and Serve Immediately
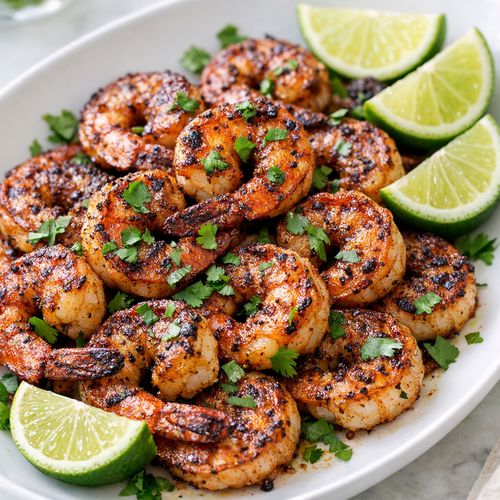
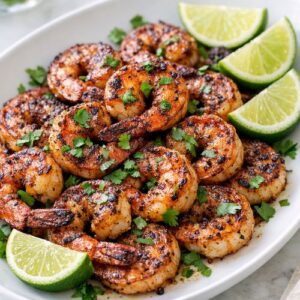
Transfer your blackened shrimp to a serving platter or individual plates right away. Sprinkle generously with fresh chopped cilantro and arrange lime wedges around the plate. Let each family member squeeze lime juice over their portion—this adds brightness and makes the whole dish feel more interactive. Serve immediately while the shrimp is still warm and the spice rub is at its crispiest. Kids love being able to customize their own lime juice amount, which gives them another layer of control over their meal.
Expert’s Nutritional Tip: Why Shrimp Is Your Secret Weapon for Picky Eaters
As a registered dietitian who’s worked with hundreds of families, I can tell you that shrimp is genuinely one of my favorite proteins to introduce to children who are hesitant about seafood. It’s mild-flavored, quick to cook, and packed with nutrients that support growth and brain development. Shrimp is exceptionally high in selenium (one 3-ounce serving provides over 40% of the daily value), which supports thyroid function and immune health. It’s also a great source of choline, essential for brain development and memory—exactly what developing kids need. Because shrimp cooks so quickly, it retains more heat-sensitive nutrients than proteins that require longer cooking times. Plus, the texture is completely different from chicken or beef, which often helps kids who are stuck in protein ruts feel excited about trying something new.
Customization Station: Let Everyone Build Their Own
This is honestly my favorite strategy for managing different preferences at one dinner table. Instead of me cooking multiple meals or forcing kids to eat something they’re uncertain about, I set up a “customization station” where everyone can build their own version. It removes the power struggle and puts control back in kids’ hands, which paradoxically makes them more willing to try things.
- Spice rub intensity – Offer three options: mild (just half the spice rub), medium (full recipe as written), or bold (extra chili powder and paprika for brave eaters). Let each person coat their own shrimp according to their comfort level. Kids who are hesitant about spice feel safe trying the mild version, while adults get the full flavor experience.
- Serving style choices – Some kids prefer their shrimp served plain for dipping, while others love it with all the cilantro and lime. Let everyone choose their own toppings. You might serve cilantro and lime wedges on the side so kids can add as much or as little as they want, which again removes the pressure.
- Dipping sauce options – Set out a mild ranch, a squeeze bottle of lime juice, or even a simple sour cream mixed with cilantro. Having options makes the meal feel more interactive and restaurant-like, which kids genuinely respond to.
Make-Ahead Guide: Meal Prep for Busy Weeks
One of the biggest advantages of this recipe is how well it adapts to meal prep. I use this strategy constantly during my most hectic weeks. You can prepare components ahead and actually have easier cooking days. Here’s my professional approach:
Make the spice rub up to 2 weeks ahead: Combine all dry spices in an airtight container and store in your pantry. When you’re ready to cook, you literally just grab the container and coat your shrimp. This saves mental energy on busy weeknights because you’ve eliminated one decision point.
Prep and coat shrimp up to 8 hours ahead: You can coat your shrimp with the spice rub in the morning and store it covered in the refrigerator. This is perfect for families where parents want to minimize cooking time after work. Just pull the shrimp out 10 minutes before cooking to bring it closer to room temperature, then proceed with the hot skillet step.
Cooked shrimp stores for 3 days: This is my secret weapon for building lunch options. I’ll often cook a double batch of blackened shrimp on Sunday and use it throughout the week. Serve it cold over salads on Tuesday, warm it up in a skillet with pasta on Thursday, or dice it and add it to quesadillas on Friday. Kids are way more likely to eat shrimp when they’ve already tasted it once and liked it.
Scaling for Different Family Sizes
The recipe as written serves 4 people as a main dish (about 6 ounces of shrimp per person). But families have different sizes and appetites, so here’s how to adjust:
Family of 2: Use ¾ pound shrimp with half the spice amounts. Cut all other ingredients in half. The cooking time stays exactly the same—still 2 minutes per side.
Family of 4 (as written): 1½ pounds shrimp with full spice rub amounts.
Family of 6: Use 2¼ pounds shrimp with 1.5 times the spice amounts. You’ll likely need to cook in two batches since your skillet can only fit so much shrimp in a single layer. Keep the first batch warm in a low oven (200°F) while you cook the second batch.
Family of 8+: Triple the recipe and definitely cook in multiple batches. This prevents the shrimp from steaming instead of searing, which is crucial for getting that beautiful blackened exterior.
Can I Store Blackened Shrimp Recipe?
Yes, and I actually think leftovers are one of the best perks of this recipe. Here’s my professional storage guide:
Refrigerator storage: 3 days maximum. Store cooled shrimp in an airtight container on a shelf (not the door). When you’re ready to eat, you can eat it cold straight from the container, or warm it gently in a skillet over low heat for about 2 minutes. Don’t use a microwave—it can make shrimp rubbery.
Freezer storage: up to 3 months. Freeze in a single layer on a baking sheet for 2 hours first, then transfer to a freezer bag. This prevents them from sticking together in one clump. Thaw overnight in the refrigerator before reheating.
Lunchbox hack: Pack leftover blackened shrimp in a small container with a lime wedge and some cilantro. Kids often find cold shrimp fascinating as a lunch protein because it’s so different from typical lunch meats. Pair it with some rice or a grain salad, and you’ve got a lunch that’s actually exciting to eat.
Nutrition Information
One serving of this blackened shrimp recipe (approximately 6 ounces) contains about 180 calories, 34 grams of protein, 2 grams of fat, and 2 grams of carbohydrates. Based on USDA FoodData Central, shrimp is one of the leanest proteins available while simultaneously being nutrient-dense. It’s an exceptional choice for families focused on building strong bodies and developing brains. The protein supports muscle development and keeps kids feeling full through afternoon activities. The selenium content (mentioned earlier) reaches nearly 50% of the daily value in just one serving, which supports immune function—critical for school-age kids exposed to constant germs. Additionally, shrimp contains omega-3 fatty acids, essential for cognitive development and supporting brain health during crucial growth years. The spice rub adds virtually no calories but brings significant flavor and anti-inflammatory compounds from the cumin and paprika. This is truly nutritional efficiency—maximum nutrition and flavor with minimal calories, which means kids stay satisfied longer.
What to Serve Alongside for a Complete Family Meal
Blackened shrimp is incredibly versatile, which means you can pair it with sides that your whole family will eat. I always think about building a meal that hits different textures and temperatures so everyone stays interested from start to finish. Here are my go-to pairings:
- Cilantro lime rice – Cook white or brown rice with a little extra lime juice and fresh cilantro mixed in. Kids who are hesitant about eating plain rice suddenly accept it when it’s flavored this way. This is my most-used side because it’s genuinely kid-approved and feels restaurant-quality without being complicated.
- Roasted sweet potato wedges – Cut sweet potatoes into wedges, toss with a little olive oil and salt, and roast at 400°F for about 20 minutes. The natural sweetness appeals to kids, and the soft texture pairs beautifully with the crispy shrimp. Plus, sweet potatoes add fiber and beta-carotene.
- Steamed broccoli with garlic – Steam fresh broccoli and toss with a tiny bit of olive oil and minced garlic. The simplicity actually works here—kids appreciate when vegetables taste like themselves rather than being drowning in heavy sauces. Serve lime wedges on the side for squeezing.
- Black beans and corn – Combine canned black beans (rinsed) with thawed frozen corn, a squeeze of lime, and some fresh cilantro. This adds plant-based protein and makes the meal feel complete and satisfying. Kids love the mix of textures.
- Avocado slices – Just slice fresh avocado and serve alongside. The creamy texture contrasts beautifully with the crispy shrimp, and healthy fat keeps everyone satisfied. If kids are texture-hesitant about avocado, serve it plain without guacamole preparation.
For drinks, Frozen Bellini Recipe is a gorgeous adult option, or keep kids’ drinks simple with water infused with lime slices. If you’re looking for meal inspiration beyond seafood, Barbacoa Recipe Instant Pot offers a completely different flavor profile that your family might love on alternate weeks.
Common Mistakes to Avoid When Making Blackened Shrimp
I’ve made plenty of mistakes in my own kitchen, and I want to help you skip the learning curve. These are the most common things I see families struggle with:
Overcrowding the pan: When shrimp are piled on top of each other, they steam instead of sear, which means no crispy blackened exterior. Always arrange them in a single layer, and cook in batches if needed. This extra step is absolutely worth the superior results.
Cooking shrimp from frozen without thawing: Frozen shrimp need time to come to room temperature before cooking. If you throw frozen shrimp directly into a hot pan, the outside will cook before the inside has a chance to thaw, resulting in unevenly cooked shrimp. Thaw in the refrigerator overnight or on the counter for 30 minutes before cooking.
Using too much spice rub on younger kids’ portions: Even though this recipe is mild compared to traditional blackened shrimp, kids’ palates are still developing. Offer the mild option without apology—they’re actually tasting and appreciating the shrimp protein underneath, which is the goal. Heavy spice can turn them off from trying seafood again.
Cooking the garlic too long: That 30-second garlic step is critical. Cook it longer and it becomes bitter and burns, which ruins the delicate finish you’ve built. Set a timer if you have to—30 seconds genuinely makes a huge difference.
Seasonal Variations: How to Adapt This Recipe Throughout the Year
One of my favorite things about teaching families to cook is helping them develop seasonal eating habits. This shrimp recipe adapts beautifully throughout the year, which keeps it from becoming boring on your regular rotation.
Spring version: Use fresh tarragon instead of oregano in your spice rub, and add fresh asparagus to your side dishes. Squeeze fresh spring lemon instead of (or in addition to) lime for brightness. Serve alongside new potatoes with fresh herbs mixed in.
Summer version: Add lime zest directly to your spice rub for extra citrus punch. Serve the shrimp over a bed of greens as a light salad with cucumber and cherry tomatoes. Grilled corn pairs beautifully as a side. This version feels like a fresh, light meal kids will actually be excited about in hot weather.
Fall version: Swap the oregano for smoked paprika for deeper, warmer flavor. Serve with roasted root vegetables—carrots, parsnips, and that sweet potato wedge suggestion from earlier. The warmer spice profile feels more substantial as weather cools down.
Winter version: Add a tiny pinch of cayenne pepper for warmth, and serve the shrimp over creamy cauliflower rice or alongside white beans. Use orange zest instead of lime, which feels more seasonal and gives the dish a different flavor dimension. Pair with roasted Brussels sprouts for a hearty winter meal.

Blackened Shrimp Recipe
Ingredients
Method
- In a small bowl, combine the chili powder, paprika, ground cumin, dried oregano, garlic powder, brown sugar, sea salt, and freshly ground black pepper. This is the perfect step for kids ages 3 and up—let them help measure and pour while you supervise. Make sure hands are clean and that no spices end up on the floor (though honestly, some will). Stir everything together until the mixture is evenly combined. You're looking for a unified rub, not separate spice particles. This spice blend can actually be made ahead and stored in an airtight container for up to two weeks, which makes busy weeknights even easier.
- Place your 1½ pounds of shrimp in a medium bowl. Pour the spice mixture over top and gently toss everything together using your hands or a spoon. Make sure each shrimp gets coated evenly—this is where kids ages 6-9 really shine. They can use their hands to coat, which they actually prefer over utensils. Every piece should have a light coating of the spice rub on both sides. Set the coated shrimp aside for 15-30 minutes if you have time. This isn't absolutely necessary, but it allows the flavors to start penetrating the shrimp, making the final dish even more flavorful. If you're in a rush, you can start cooking immediately—you'll still get delicious results.
- Place a large skillet over medium-high heat. Let it get hot for about 1-2 minutes—you'll know it's ready when a drop of water sizzles immediately on contact. Add 1 tablespoon of extra-virgin olive oil and let it heat until it's shimmering but not smoking. Keep children back from the stove at this point—the oil is extremely hot and can cause serious burns. This is the moment where older kids (10+) can observe and learn about heat management, but you're in full control of the pan.

- Carefully arrange your spiced shrimp in a single layer in the hot skillet. Don't overcrowd the pan—if they're all piled on top of each other, they'll steam instead of sear. Work in batches if needed. Let them cook undisturbed for exactly 2 minutes. You'll see the edges start turning pink and the spice rub will darken beautifully. After 2 minutes, flip each shrimp and cook for another 2 minutes on the second side. The shrimp should be opaque throughout and have a gorgeous dark, crispy exterior. Use tongs or a spatula to flip—fingers and hot oil don't mix, especially with kids watching. This is the moment kids ages 10+ can step in under your direct supervision and handle the flipping.
- Once the shrimp is cooked through (about 4 minutes total), add your minced fresh garlic directly to the pan. Stir everything together gently and cook for just 30 seconds. The garlic will toast slightly and release its aroma, which signals to everyone in your house that dinner is literally seconds away. Don't cook the garlic longer than 30 seconds—you want fragrant and golden, not brown and bitter. This final step is what transforms good blackened shrimp into restaurant-quality blackened shrimp.
- Transfer your blackened shrimp to a serving platter or individual plates right away. Sprinkle generously with fresh chopped cilantro and arrange lime wedges around the plate. Let each family member squeeze lime juice over their portion—this adds brightness and makes the whole dish feel more interactive. Serve immediately while the shrimp is still warm and the spice rub is at its crispiest. Kids love being able to customize their own lime juice amount, which gives them another layer of control over their meal.
FAQs
Can I make this recipe for kids who have never eaten shrimp before?
Absolutely, and this is actually the perfect recipe for introducing shrimp to kids. Start with the mild spice version—about half the spice rub applied lightly. Serve a single piece alongside something comforting they already love (like rice or a familiar vegetable). The quick cooking time means the shrimp won’t have that strong “fishy” flavor that sometimes turns kids off. Let them see you enjoying it first. Often, kids are more willing to try something when they watch a trusted adult eating it happily. Keep pressure-free and let them decide if they want to taste it. Sometimes it takes multiple exposures before they’re ready—that’s completely normal and developmentally appropriate.
What’s the difference between blackened shrimp and regular cooked shrimp?
The main difference is the cooking method and the spice rub. Blackened shrimp uses a hot skillet to create a dark, crispy, charred exterior while keeping the inside tender and juicy. Regular cooked shrimp might be boiled, steamed, or gently sautéed without the intense heat. The spice rub adds incredible flavor that plain shrimp doesn’t have. For kids especially, that crispy exterior is exciting and feels more “restaurant quality,” which builds their confidence around trying new foods.
Is this recipe safe for kids with shellfish allergies?
No. Shrimp is a shellfish, and shellfish allergies are serious. If anyone in your family has a shellfish allergy, this recipe is not appropriate for them. However, you could make the spice rub and apply it to white fish like cod or tilapia as an alternative. The flavors work beautifully with other proteins, though the cooking time might differ slightly.
Can I make this recipe without cilantro if my kids hate it?
Completely yes. Cilantro is absolutely optional—some kids (and adults) genuinely have a genetic variation that makes cilantro taste soapy, and that’s not a character flaw. Simply omit the cilantro and serve with extra lime wedges instead. The lime brightens the dish just as effectively. You could also use fresh parsley as a substitute if you want some green freshness without the cilantro flavor.
How do I know when shrimp is fully cooked?
Fully cooked shrimp turns from translucent (see-through) to opaque (solid-looking) and changes from gray to pink. When you cut one open, there should be no translucent center—it should be solid white or pink throughout. The exact time depends on shrimp size, but as written in this recipe (with large shrimp at 2 minutes per side), you’re aiming for about 4 minutes total cooking time. Overcooked shrimp becomes rubbery and tough, so timing really matters here. Once you’ve made this a couple times, you’ll recognize that moment when they’re just right without even checking.
More Family-Friendly Recipes
- Cincinnati Chili Recipe – A cozy, kid-friendly chili that’s perfect for cooler months and builds on familiar flavors kids already enjoy
- BBQ Beef Recipe – Tender, flavorful beef that kids love, perfect for family dinners and weeknight cooking
- Best Meatloaf Crock Pot Recipe – An easy slow-cooker option that builds comfort-food appeal while keeping your hands free
Cooking this blackened shrimp recipe together is about so much more than getting dinner on the table. It’s about building food memories with your kids, teaching them that trying new things is brave and exciting, and proving that restaurant-quality meals don’t require complicated instructions or hours in the kitchen. Some of my favorite memories with my own kids happened during those 15 minutes at the stove—when my daughter felt proud coating the shrimp, when my son successfully flipped his first piece, when everyone at the table tried something new and realized they actually liked it. Those moments build confidence around food that lasts into adulthood. I encourage you to give this recipe a try, involve your kids at whatever level feels comfortable, and celebrate the small victories when they taste something new. That’s what family dinners are really about. Happy Cooking!