This post contains affiliate links. As an Amazon Associate I earn from qualifying purchases.
Five ingredients. That’s all it takes to make incredible homemade ice cream that tastes like it came from an artisanal creamery. No long shopping lists, no pantry raid required. Just pure, creamy indulgence that I’ve perfected over a decade of feeding my own family and helping parents discover that cooking doesn’t need to be complicated to be delicious. When my kids ask for dessert on a hot Chicago summer night, this is what I reach for—and honestly, it’s easier than you’d think.
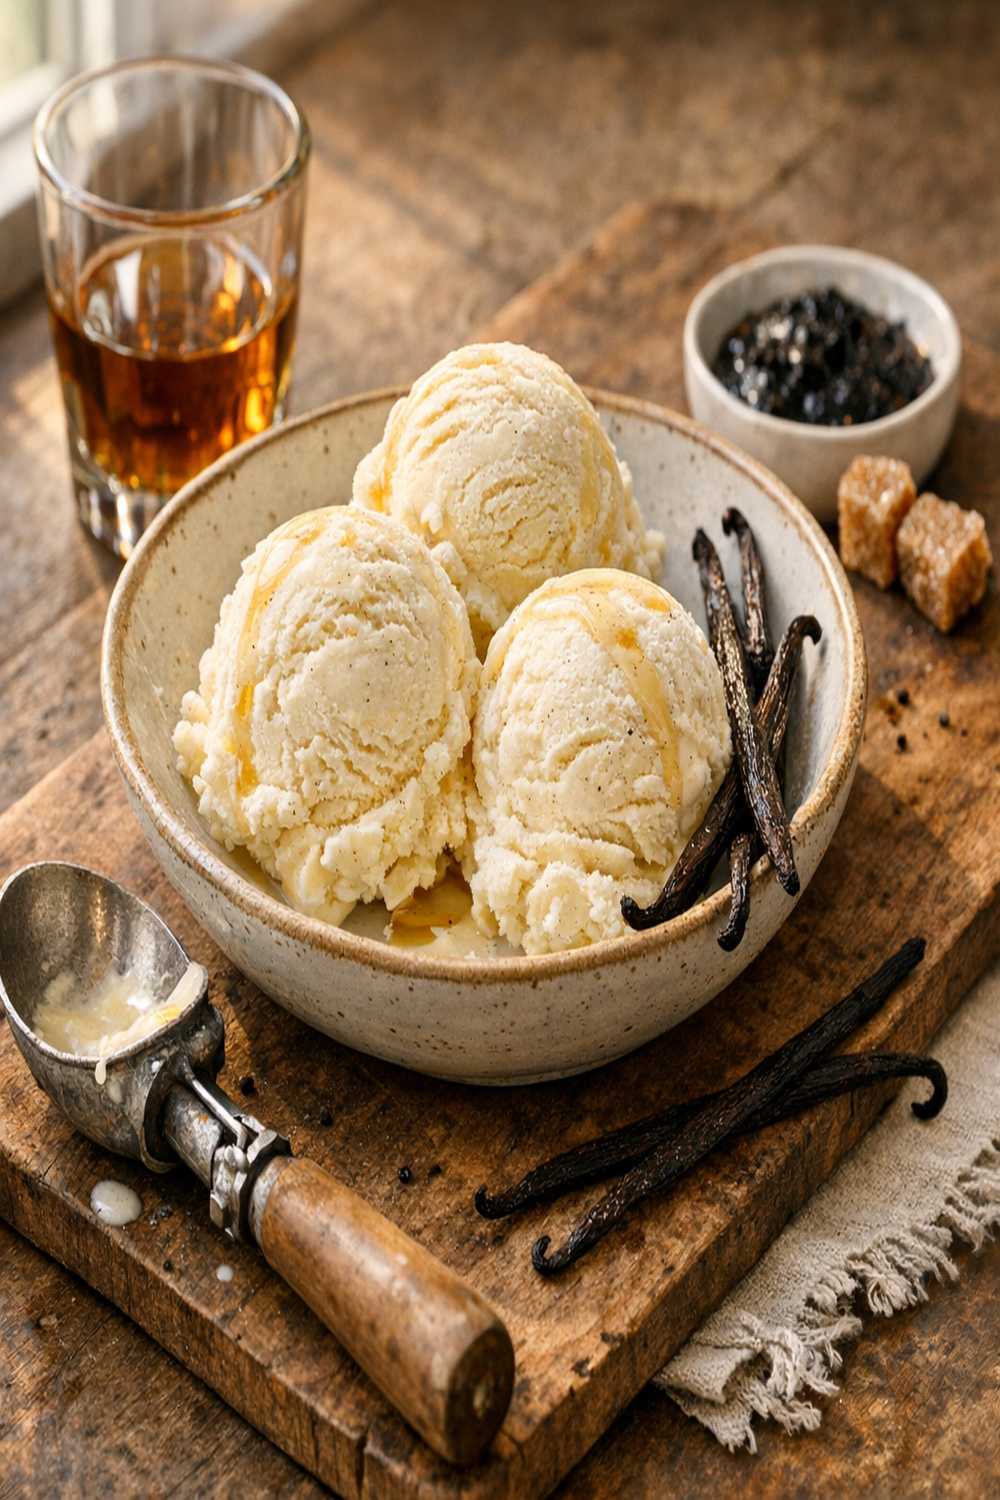
Bourbon Vanilla Ice Cream Recipe That Proves Simple Is Best
I’ll never forget the night I stopped trying to impress people with ten-ingredient recipes and started asking myself a different question: What if fewer ingredients meant better flavor? That shift happened in my kitchen about seven years ago when I was standing in front of an overflowing pantry, stressed about a dinner party, realizing I’d bought ingredients I didn’t actually need.
That’s when I discovered the power of restraint. When you’re working with just five core ingredients, each one has to earn its place. There’s nowhere to hide, no filler ingredients to mask mistakes. Instead, every element shines. The bourbon deepens the vanilla’s complexity. The eggs create silk-like richness. The cream and milk work in perfect harmony to create that crave-worthy texture.
This bourbon vanilla ice cream became my wake-up call. I realized that the families I work with don’t need more recipes—they need better recipes. Ones that respect their time, their budgets, and their desire to serve something genuinely good.
Why 5 Ingredients Is Actually an Advantage
- Real cost savings per serving – Premium vanilla beans and quality bourbon are investments, but because the recipe is so clean, you’re not diluting them with unnecessary additions. You get more bang for your ingredient buck.
- Faster shopping and less waste – I spend less time at the store and never end up with half-used bottles cluttering my fridge. My grocery bill is lower, and I’m actually using everything I buy. That matters when you’re juggling a family schedule.
- Easier to master and repeat perfectly – With fewer moving parts, you can focus on technique. Once you understand the custard-making process, you can make this blindfolded. Consistency builds confidence in the kitchen.
- Each ingredient gets to shine – With no competition from extra flavors or fillers, the vanilla bean’s natural floral notes, the bourbon’s warmth, and the cream’s luxurious body all come through clearly. You’re tasting quality, not quantity.
Choosing Your 5 Ingredients Wisely
When I design recipes for families, I use what I call the “maximum flavor strategy.” Every single ingredient must do at least two jobs. The vanilla bean? It provides flavor and natural sweetness. The egg yolks? They create richness AND act as an emulsifier to keep the texture smooth. The bourbon? It adds depth AND prevents the ice cream from freezing solid (which means less work for your machine).
I deliberately chose to keep this recipe to its absolute essentials. Heavy cream, whole milk, real vanilla bean, egg yolks, sugar, and bourbon—nothing else needed. Some recipes add salt, corn syrup, or extra stabilizers, but I’ve found that when you start with quality ingredients and proper technique, you don’t need them. Your ice cream will be naturally creamy and stable.
This is also a recipe that honors whole foods. My kids know exactly what’s in their dessert. No gums, no additives, no mystery ingredients. As a registered dietitian, that matters to me professionally and personally.
The 5 Ingredients
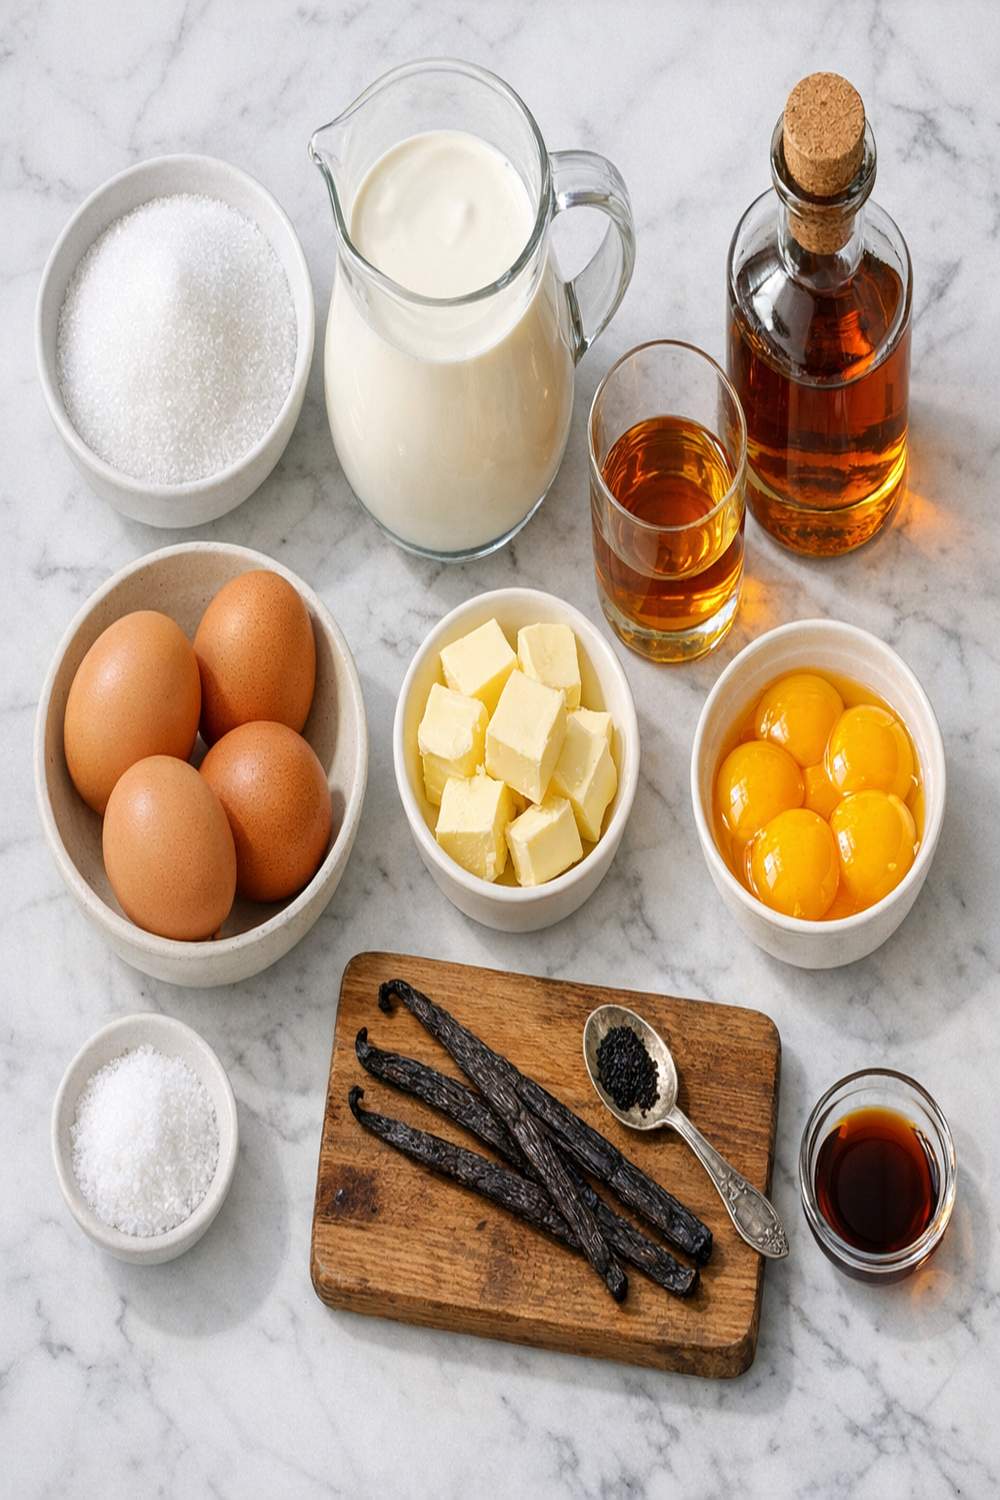
I want you to understand why each of these five ingredients made the final cut. This isn’t a “less is more” recipe that sacrifices quality—it’s a lesson in strategic simplicity. Every single item pulls its weight and creates something greater than the sum of its parts.
- 1/3 cup bourbon (deepens vanilla notes and prevents rock-hard freezing)
- 1 1/4 cups whole milk (balances richness with lighter texture and prevents the ice cream from being too heavy)
- 1 1/2 cups heavy cream (the fat base that creates that luxurious, creamy mouthfeel no milk alone can achieve)
- 1 cup granulated sugar (sweetens while helping lower the freezing point so the ice cream stays scoopable)
- 1 premium vanilla bean, split lengthwise (real vanilla creates complexity that extract simply cannot match—the seeds provide visible flecks and authentic flavor)
- 6 large egg yolks, room temperature (creates silky texture through emulsification and adds nutritional richness with choline and lutein)
- 1/8 teaspoon table salt (enhances all the other flavors and balances sweetness)
How to Make Bourbon Vanilla Ice Cream Recipe With Just 5 Ingredients
The elegance of this recipe lies in understanding that with so few ingredients, every technique matters intensely. You’re not relying on twenty different components to create complexity—you’re relying on method. The custard-making process is where the magic happens. This isn’t difficult, but it does require your attention. I promise it’s worth it.
Step 1: Combine Your Dairy and Infuse With Vanilla
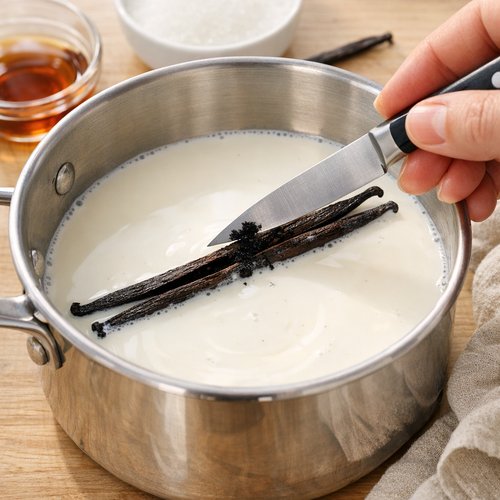
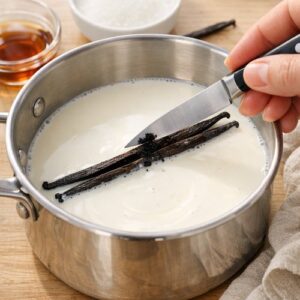
Pour 1 1/2 cups heavy cream and 1 1/4 cups whole milk into a medium saucepan. Using a sharp knife, carefully split your vanilla bean lengthwise and scrape the tiny black seeds directly into the cream mixture. Don’t throw away that empty pod—add it to the pan too. The pod contains additional flavor compounds that will infuse as the mixture heats.
This is your first critical moment: place the saucepan over medium-high heat and warm the mixture until steam rises steadily from the surface and you see small bubbles forming around the edges. You want it hot enough that it would be uncomfortable to hold your finger in, but not boiling. This temperature activates the vanilla and pasteurizes the dairy.
Step 2: Prepare Your Egg Yolk Mixture
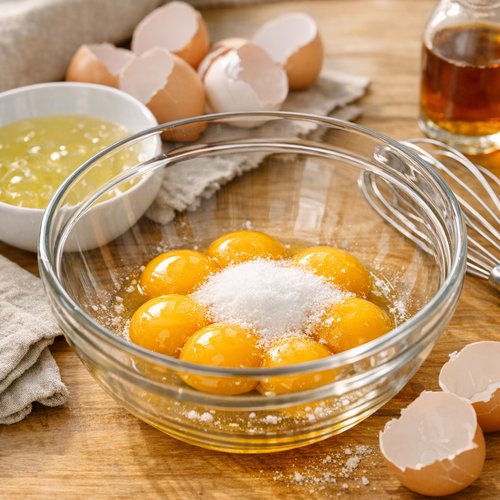
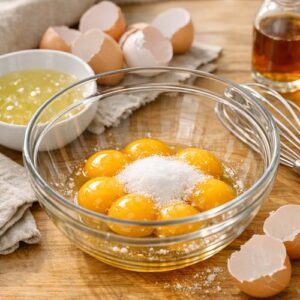
While the cream heats, crack your 6 eggs and separate the yolks from the whites (save those whites for an omelet or scrambled eggs tomorrow—don’t waste them). Place the yolks in a medium mixing bowl and add 1 cup sugar and 1/8 teaspoon salt.
Whisk these together vigorously for about 2-3 minutes. You’re looking for the mixture to become pale, slightly fluffy, and noticeably lighter in color. This whisking aerates the yolks and helps them incorporate smoothly once you add the hot cream. If you skip this step or rush it, you risk ending up with scrambled eggs instead of a silky custard.
Step 3: Create the Custard Base (The Critical Tempering Step)
This is where most people get nervous, but I’m going to walk you through it slowly. Once your cream mixture is steaming hot and your egg mixture is pale and whisked, you need to temper the eggs—meaning you slowly bring them to temperature without scrambling them.
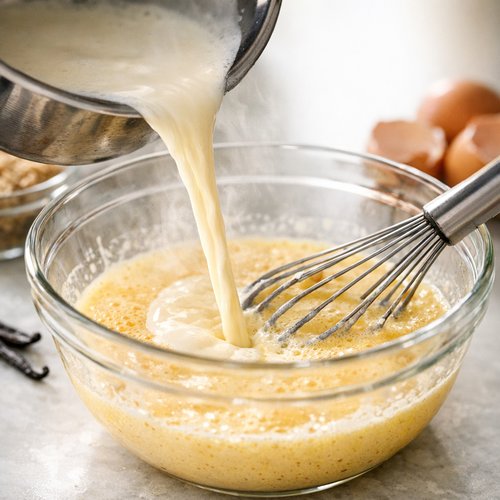
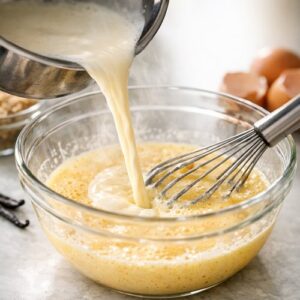
Pour the hot cream mixture into the bowl with the egg yolks in a very thin, steady stream while whisking constantly. This is not the time to hurry. Take 30-45 seconds to pour in about half the cream while whisking. This allows the eggs to gradually warm up. Once you’ve added half the cream and the mixture is well combined, add the remaining cream in a steady stream while continuing to whisk.
I learned this technique years ago, and it’s transformed how I approach custard-based desserts. The key is patience and motion—never stop whisking, and never pour too fast.
Step 4: Cook the Custard to Perfection
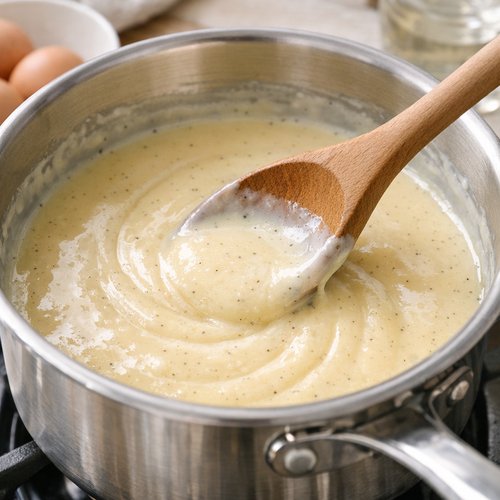
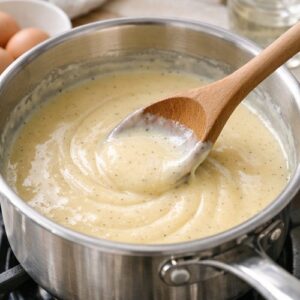
Pour your entire tempered mixture back into the saucepan and place it over medium-low heat. You’ll need to stir constantly and patiently for about 8-12 minutes until the custard thickens enough to coat the back of a wooden spoon. Here’s how to test: dip a spoon in the custard, run your finger across the back of the spoon, and if it leaves a clear trail that doesn’t immediately disappear, you’re done.
This is the second critical moment: do not allow the mixture to boil. If you see large bubbles breaking the surface or the temperature rises too high, you’ll scramble the eggs. Medium-low heat is your friend here. Stir in circular motions, scraping the bottom and sides of the pan. This takes longer than you might expect, but that’s okay. The wait creates a perfectly silky result.
Step 5: Strain and Add Bourbon
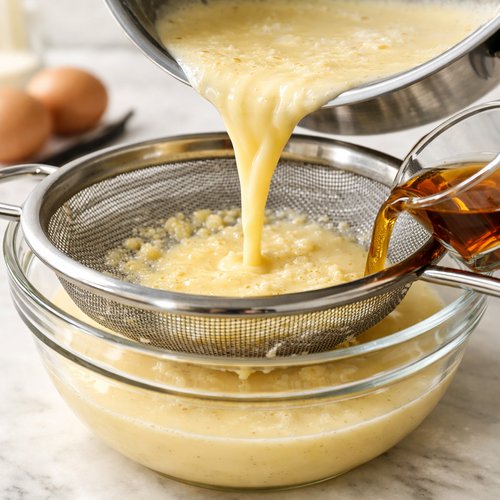
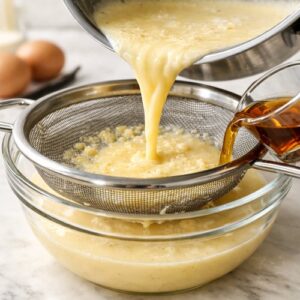
Remove your saucepan from heat. Set a fine-mesh strainer over a clean bowl and carefully pour the custard through it. This strains out any bits of cooked egg white or vanilla bean pod pieces, ensuring a perfectly smooth texture. Discard what’s in the strainer.
Add 1/3 cup bourbon to your strained custard and stir to combine. The alcohol will give you a subtle warmth and deepen the vanilla’s complexity. Don’t worry—most of the alcohol content will evaporate during freezing, but enough will remain to prevent the ice cream from freezing rock-solid, which actually makes it easier to scoop.
Step 6: Chill Completely
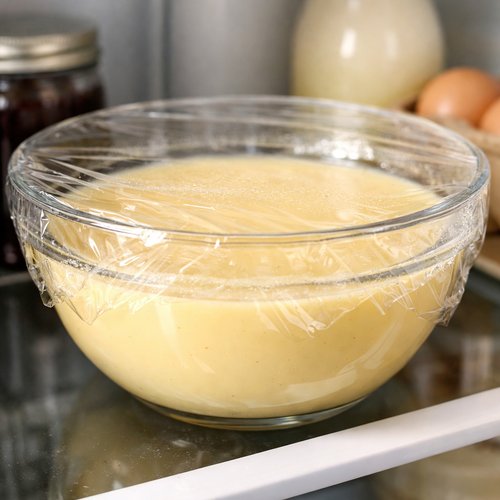
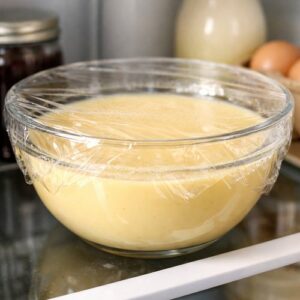
Cover your bowl with plastic wrap and refrigerate for at least 4-5 hours, preferably overnight. This resting time is not negotiable. The custard needs to chill completely, and the flavors need time to deepen and meld. Trying to freeze warm or room-temperature custard will result in icy texture and poor results from your ice cream machine.
I usually make this custard in the evening and let it sit in the fridge overnight. Then I churn it the next day. It fits perfectly into a real family schedule.
Step 7: Churn Into Ice Cream
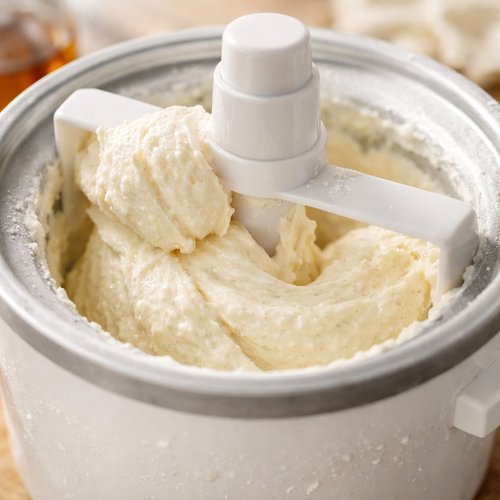
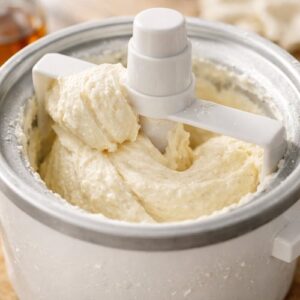
Follow your ice cream machine’s instructions for freezing. Most machines take 20-30 minutes to churn your custard into soft-serve consistency. Remove the ice cream from the machine and immediately transfer it to a freezer-safe container.
Smooth the top with a spatula, then press plastic wrap directly onto the surface of the ice cream before covering the container. This plastic-wrap-directly-on-surface trick prevents ice crystals from forming on top. Because this recipe contains alcohol, it will take slightly longer to freeze solid than traditional ice cream—usually 4-6 hours in your freezer. That’s perfectly normal and actually a sign you’ve made it correctly.
The Optional 6th Ingredient (If You Want to Elevate)
If you’re feeling adventurous and want to take this from excellent to extraordinary, add 1 teaspoon of pure vanilla extract along with the bourbon in Step 5. This gives you double vanilla impact—the real vanilla bean provides those floral, complex notes, while the extract adds bright vanilla punch. It’s an optional addition that costs about 15 cents but elevates the entire experience. Some parents I work with reserve the extra vanilla for when they’re serving this to guests or making it as a special treat for their kids’ birthdays.
5-Ingredient Variations
- Bourbon Vanilla Bean with Nutmeg Notes – Use this ice cream as a base to serve alongside my my go-to banana bread for a warm-and-cold dessert combination that feels fancy but requires zero additional cooking.
- Coffee-Forward Version – Replace the bourbon with 1/3 cup strong, cooled espresso or cold brew concentrate. Keep the vanilla bean for balance. This creates an incredible affogato when paired with warm espresso poured over a scoop.
- Spiced Bourbon Vanilla – Add 1/4 teaspoon each of ground cinnamon and freshly grated nutmeg when you strain the custard. Serve this over Apple Crisp Recipe With Brown Sugar for a dessert that feels like autumn in every bite.
Can I Store Bourbon Vanilla Ice Cream Recipe?
Yes, and this recipe actually stores beautifully. Keep your finished ice cream in an airtight freezer-safe container with that plastic wrap pressed directly onto the surface. It will keep for up to 2 weeks without significant quality loss, though I find it’s best within the first 7-10 days when the texture is most creamy.
The custard base, before churning, keeps in the refrigerator for up to 3 days. This means you can make the base on Monday evening and churn it on Thursday if life gets hectic. I often make the custard when I have a free 45 minutes, then freeze it when I have time to run the ice cream machine.
You can also freeze the unchurned custard in an airtight container for up to 1 month. Thaw it in the refrigerator overnight before churning. This is a game-changer for parents who like to prep desserts ahead.
Nutrition Information
Based on USDA nutritional analysis, one serving (approximately 1/2 cup) of this bourbon vanilla ice cream contains approximately 285 calories, 19 grams of fat, 27 grams of carbohydrates, and 3 grams of protein. The egg yolks provide choline, which supports brain health—something I always mention to parents concerned about nutrition. This recipe yields approximately 1 quart (16 servings), making it perfect for a family of four with enough for seconds or guests.
From a nutritional standpoint, this ice cream is notably better than commercial versions. You’re getting real cream (not hydrogenated oils), whole milk (not corn syrup), actual eggs (not gums and stabilizers), and real vanilla (not artificial flavoring). The sugar content is comparable to store-bought ice cream, but you’re controlling every other ingredient. That matters.
Expert’s Nutritional Tip: Why Real Vanilla Bean Changes Everything
Here’s something I learned during my dietitian training that still influences how I cook for my family: vanilla extract is processed through alcohol, which can actually strip some of the delicate flavor compounds that make real vanilla beans special. Real vanilla beans contain over 250 distinct flavor compounds, while extract captures only a fraction of those.
But more importantly for families watching nutrition, real vanilla beans contain vanillin, which has been studied for its potential anti-inflammatory properties. It’s a small amount, but it’s another reason whole ingredients matter. When you’re investing in quality food for your family, you’re not just buying flavor—you’re buying something that’s genuinely better for your body.
Make-Ahead Guide: Preparing Bourbon Vanilla Ice Cream With Busy Schedules in Mind
Day 1 – Evening (15 minutes active time): Make your custard base. Heat the cream and milk, temper the eggs, cook the custard, strain, add bourbon, and refrigerate. This is the most hands-on part, but it’s concentrated and manageable.
Day 2 – Anytime (30 minutes active time): Take the custard from the fridge (it’s been resting, which improves flavor). Churn in your ice cream machine according to manufacturer instructions. Transfer to freezer-safe container with plastic wrap pressed on surface. Freeze for 4-6 hours until firm.
Advanced Make-Ahead (for parents planning 2+ weeks ahead): Make the custard base and freeze it in an airtight container for up to 1 month. On the day you want ice cream, simply thaw overnight in the refrigerator and churn. This works beautifully when you’re planning a dinner party or special celebration.
I use this approach constantly with my own family. Last month, I made three batches of custard during a slow weekend afternoon, froze them all, and then had ice cream ready whenever we wanted it. Zero stress, maximum flavor.
Common Mistakes to Avoid
- Rushing the whisking step. Don’t whisk your egg yolks and sugar for just 30 seconds and call it done. Those 2-3 minutes of vigorous whisking are essential for aerating the yolks and preventing scrambling when you add the hot cream. This is the most common mistake I see, and it’s the easiest to fix—just slow down.
- Pouring the hot cream too quickly. I’ve seen people pour the entire pot of hot cream into the eggs in one aggressive pour. Result? Scrambled eggs. Tempering is about patience. Thirty seconds of slow, steady pouring while whisking constantly will save your entire batch.
- Skipping the refrigeration time. I understand the urge to eat ice cream immediately, but those 4-5 hours of chilling are when the flavors meld and the custard reaches the proper temperature for churning. Warm custard will not freeze properly in your machine. I promise it’s worth the wait.
- Not pressing plastic wrap directly onto the ice cream surface. This single step prevents ice crystals and freezer burn. It looks fussy, but it’s the difference between beautiful, creamy ice cream in two weeks and grainy, icy ice cream in one.
Seasonal Variations: How to Adapt This Recipe Year-Round
Spring Variation: Add 1/2 teaspoon of fresh lemon zest to your custard after straining. Serve alongside fresh strawberries or use this as a base for an ice cream sandwich with delicate butter cookies.
Summer Variation: This recipe is perfect as-is for hot weather, but you can add 1/4 teaspoon of cardamom powder for warm spice notes. Serve in cones or drizzle with a little melted dark chocolate that hardens on contact.
Fall Variation: Add 1/2 teaspoon of ground cinnamon and 1/4 teaspoon of ground cloves to your custard. Serve generously over Authentic Dutch Apple Pie Recipe for a dessert that screams autumn comfort.
Winter Variation: Keep the bourbon but add 1/4 teaspoon of peppermint extract along with the vanilla. This creates a sophisticated mint-bourbon vanilla ice cream that feels festive without being overly sweet.
What to Serve With Bourbon Vanilla Ice Cream Recipe?
This ice cream is elegant enough to stand completely alone, but when you’re serving it at a family gathering, here are my favorite simple pairings that don’t complicate the minimal philosophy:
- Warm apple crisp – The temperature contrast and natural sweetness of apples complement the bourbon perfectly. I love using my Apple Crisp With Quick Oats Recipe because it’s fast and uses minimal ingredients, matching the spirit of this ice cream.
- Simple butter cookies – Store-bought is absolutely fine here. Soft butter cookies with vanilla ice cream is a classic pairing that needs nothing else.
- Fresh berries with a drizzle of honey – Raspberries, strawberries, or blackberries with a tiny spoon of honey and a scoop of ice cream feels fancy but requires zero additional cooking.
- Dark chocolate sauce (homemade or quality store-bought) – The bourbon vanilla plays beautifully with rich chocolate. Drizzle it on top just before serving so it hardens slightly against the cold ice cream.

Bourbon Vanilla Ice Cream Recipe
Ingredients
Method
- Pour 1 1/2 cups heavy cream and 1 1/4 cups whole milk into a medium saucepan. Using a sharp knife, carefully split your vanilla bean lengthwise and scrape the tiny black seeds directly into the cream mixture. Don't throw away that empty pod—add it to the pan too. The pod contains additional flavor compounds that will infuse as the mixture heats. This is your first critical moment: place the saucepan over medium-high heat and warm the mixture until steam rises steadily from the surface and you see small bubbles forming around the edges. You want it hot enough that it would be uncomfortable to hold your finger in, but not boiling. This temperature activates the vanilla and pasteurizes the dairy.
- While the cream heats, crack your 6 eggs and separate the yolks from the whites (save those whites for an omelet or scrambled eggs tomorrow—don't waste them). Place the yolks in a medium mixing bowl and add 1 cup sugar and 1/8 teaspoon salt. Whisk these together vigorously for about 2-3 minutes. You're looking for the mixture to become pale, slightly fluffy, and noticeably lighter in color. This whisking aerates the yolks and helps them incorporate smoothly once you add the hot cream. If you skip this step or rush it, you risk ending up with scrambled eggs instead of a silky custard.
- This is where most people get nervous, but I'm going to walk you through it slowly. Once your cream mixture is steaming hot and your egg mixture is pale and whisked, you need to temper the eggs—meaning you slowly bring them to temperature without scrambling them. Pour the hot cream mixture into the bowl with the egg yolks in a very thin, steady stream while whisking constantly. This is not the time to hurry. Take 30-45 seconds to pour in about half the cream while whisking. This allows the eggs to gradually warm up. Once you've added half the cream and the mixture is well combined, add the remaining cream in a steady stream while continuing to whisk. I learned this technique years ago, and it's transformed how I approach custard-based desserts. The key is patience and motion—never stop whisking, and never pour too fast.
- Pour your entire tempered mixture back into the saucepan and place it over medium-low heat. You'll need to stir constantly and patiently for about 8-12 minutes until the custard thickens enough to coat the back of a wooden spoon. Here's how to test: dip a spoon in the custard, run your finger across the back of the spoon, and if it leaves a clear trail that doesn't immediately disappear, you're done. This is the second critical moment: do not allow the mixture to boil. If you see large bubbles breaking the surface or the temperature rises too high, you'll scramble the eggs. Medium-low heat is your friend here. Stir in circular motions, scraping the bottom and sides of the pan. This takes longer than you might expect, but that's okay. The wait creates a perfectly silky result.
- Remove your saucepan from heat. Set a fine-mesh strainer over a clean bowl and carefully pour the custard through it. This strains out any bits of cooked egg white or vanilla bean pod pieces, ensuring a perfectly smooth texture. Discard what's in the strainer. Add 1/3 cup bourbon to your strained custard and stir to combine. The alcohol will give you a subtle warmth and deepen the vanilla's complexity. Don't worry—most of the alcohol content will evaporate during freezing, but enough will remain to prevent the ice cream from freezing rock-solid, which actually makes it easier to scoop.
- Cover your bowl with plastic wrap and refrigerate for at least 4-5 hours, preferably overnight. This resting time is not negotiable. The custard needs to chill completely, and the flavors need time to deepen and meld. Trying to freeze warm or room-temperature custard will result in icy texture and poor results from your ice cream machine. I usually make this custard in the evening and let it sit in the fridge overnight. Then I churn it the next day. It fits perfectly into a real family schedule.
- Follow your ice cream machine's instructions for freezing. Most machines take 20-30 minutes to churn your custard into soft-serve consistency. Remove the ice cream from the machine and immediately transfer it to a freezer-safe container. Smooth the top with a spatula, then press plastic wrap directly onto the surface of the ice cream before covering the container. This plastic-wrap-directly-on-surface trick prevents ice crystals from forming on top. Because this recipe contains alcohol, it will take slightly longer to freeze solid than traditional ice cream—usually 4-6 hours in your freezer. That's perfectly normal and actually a sign you've made it correctly.
Notes
FAQs About Bourbon Vanilla Ice Cream Recipe
Can I make this without an ice cream machine?
Technically yes, but it requires more work and produces a slightly different texture. After your custard is chilled, pour it into a shallow freezer-safe container and freeze for 2 hours. Stir vigorously with a fork, breaking up ice crystals. Repeat every 30 minutes for the next 2-3 hours. This method creates a denser, more granular texture than machine-churned ice cream, but it’s still delicious and saves you from buying equipment.
Can I substitute the vanilla bean with vanilla extract?
You can, but I really don’t recommend it for this particular recipe. The vanilla bean is one of your five stars—it deserves to play a starring role. If you substitute with extract, use 1.5 teaspoons pure vanilla extract instead of the bean. However, you’ll lose the visible flecks and some of the complex flavor that makes this recipe special. If budget is a concern, vanilla beans are often cheaper bought online in bulk than in grocery stores.
Is there an alcohol-free version?
Absolutely. Replace the 1/3 cup bourbon with 1/3 cup whole milk or additional heavy cream. Your ice cream will freeze slightly firmer than the bourbon version, which is actually nice for scooping. You won’t lose significant flavor—the vanilla bean is still doing all the heavy lifting. Some families prefer this version, and it’s equally delicious.
What if my custard broke or looks grainy while cooking?
If you notice scrambled-looking bits while cooking, immediately remove the pan from heat and strain the custard through a fine-mesh strainer into a bowl. The texture won’t be quite as silky, but it will still be delicious. To prevent this, remember that medium-low heat is essential, and you cannot stop stirring. Once you make this successfully once, you’ll have the timing locked in for future batches.
Can I double this recipe?
Yes! Simply double all ingredients and follow the same process. The only change is cooking time might increase by a few minutes since you have more volume. Stir constantly and use the same visual test (coating the back of a spoon) to determine doneness. I often double this recipe for dinner parties or to fill my freezer for the month.
More 5-Ingredient Recipes You’ll Love
- Frozen Bellini Recipe – Another elegant frozen dessert that relies on quality ingredients and careful technique
- Pizza Bread Recipe – Proof that simple ingredients create craveable results
- Cincinnati Chili Recipe – A completely different flavor profile with the same minimalist philosophy
- Best Meatloaf Crock Pot Recipe – Simple ingredients, zero stress, incredible results
After a decade of helping families find joy in cooking without stress, I’ve learned that the best recipes aren’t the most complicated ones—they’re the ones we actually make. This bourbon vanilla ice cream recipe proves that restraint is powerful. Five ingredients, simple technique, extraordinary results.
When my kids come home on hot summer afternoons and ask for something special, I don’t stress about complicated recipes or long ingredient lists. I remember that I have a freezer full of ice cream that I made myself, with my own hands, using ingredients I understand and trust. That’s the real luxury.
Happy Cooking!