This post contains affiliate links. As an Amazon Associate I earn from qualifying purchases.
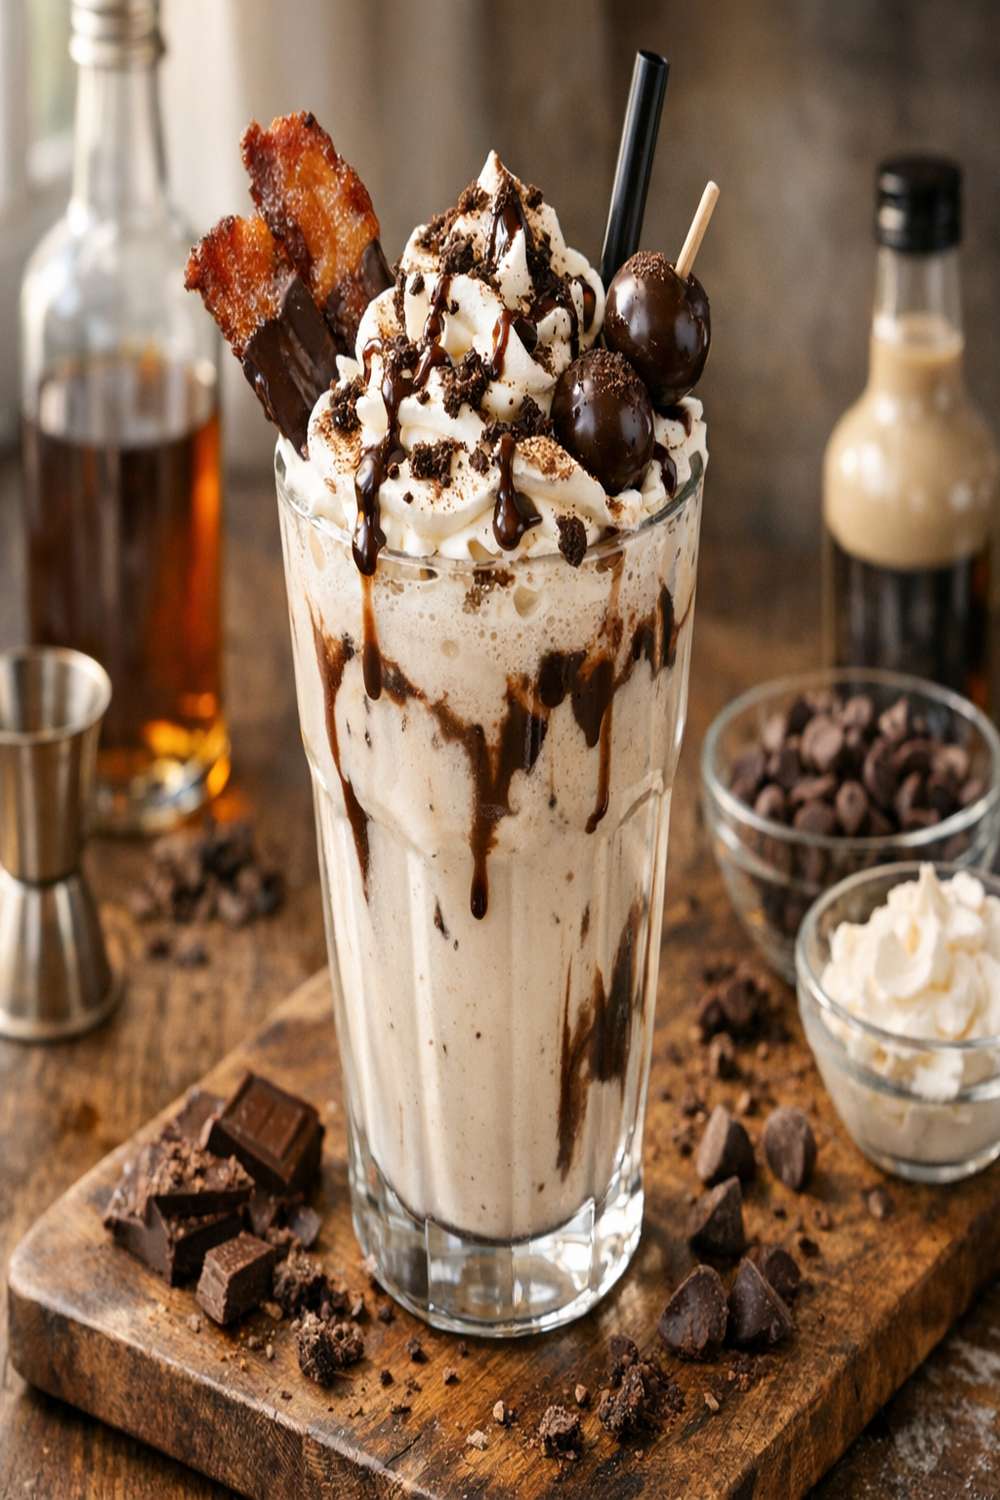
Learning to make a boozy milkshake isn’t just about creating one delicious drink—it’s about mastering the emulsification technique that unlocks dozens of other creamy, luxurious desserts and cocktails. I discovered this years ago when my husband’s college friends came over after the kids were asleep, and I realized I had zero “grown-up dessert” recipes in my back pocket. That night, I blended together a simple vanilla shake with a splash of cream liqueur, and something clicked. The technique I learned transformed not just how I make desserts, but how I think about combining flavors and textures. Once you understand how to properly emulsify cream-based drinks, you’ll find yourself creating restaurant-quality cocktails at home whenever the mood strikes.
Master the Technique Behind the Boozy Milkshake (And Never Struggle With Creamy Drinks Again)
I’ll never forget the afternoon I stood in my kitchen staring at a separated, grainy mess of a shake. My first attempt at a boozy milkshake had curdled because I’d simply poured everything into the blender without thinking about the science underneath. My registered dietitian training had taught me about emulsification in food science class, but I’d never really applied it to something this fun before. That’s when it hit me: the same principles that keep salad dressing smooth are what make a perfect creamy shake. Once I understood that alcohol needs to be treated as a flavor component rather than a liquid base, everything changed.
From that moment on, I started experimenting with ratios, temperatures, and blending techniques. I learned that the order you add ingredients matters tremendously. The ice cream’s fat content acts as a natural emulsifier, binding the spirit and cream together into something silky rather than separated. My kids think I’m just making “fancy shakes,” but what I’m really doing is teaching myself a professional technique that shows up in sophisticated desserts, creamy soups, and elegant cocktails across the culinary world.
The Core Technique Explained
Emulsification is the art of combining two ingredients that normally wouldn’t mix—like fat and liquid—into a stable, creamy whole. Think about oil and vinegar in salad dressing. They want to separate, right? But when you whisk them together with an emulsifier (like egg or mustard), they stay blended.
In a boozy milkshake, ice cream is doing the emulsifying work. The fat in the ice cream acts as a bridge, holding the spirit and cream together in a smooth suspension. When you blend everything at the right speed, you’re creating tiny ice cream particles suspended throughout the liquid—which is literally what makes the shake feel creamy instead of separated and grainy.
The spirits (in this case, a cream liqueur and vanilla vodka) could easily curdle or separate from the dairy without proper technique. But when ice cream is present and the blending speed is controlled, the fat molecules wrap around the spirit molecules, keeping everything perfectly integrated. This is why temperature, ingredient order, and blending speed matter so much. Too much agitation and the ice cream melts too quickly. Too little and the ingredients don’t fully incorporate.
What This Technique Unlocks
Once you master emulsification in creamy drinks, you’ll be amazed at what you can suddenly make:
- Frozen cocktails and dessert drinks – uses the same emulsification principle with various spirits and flavors
- Creamy pasta sauces – like the technique in my weeknight pasta, where fat and liquid must blend seamlessly
- Smooth soups and bisques – uses emulsification to create silky texture without separation
- Custards and puddings – the same fat-binding principle creates luxurious mouthfeel
- Homemade ice cream and gelato – understanding emulsification makes you a better ice cream maker
- Creamy salad dressings and vinaigrettes – the foundational emulsification technique in its simplest form
The Ingredients—Chosen to Teach the Technique
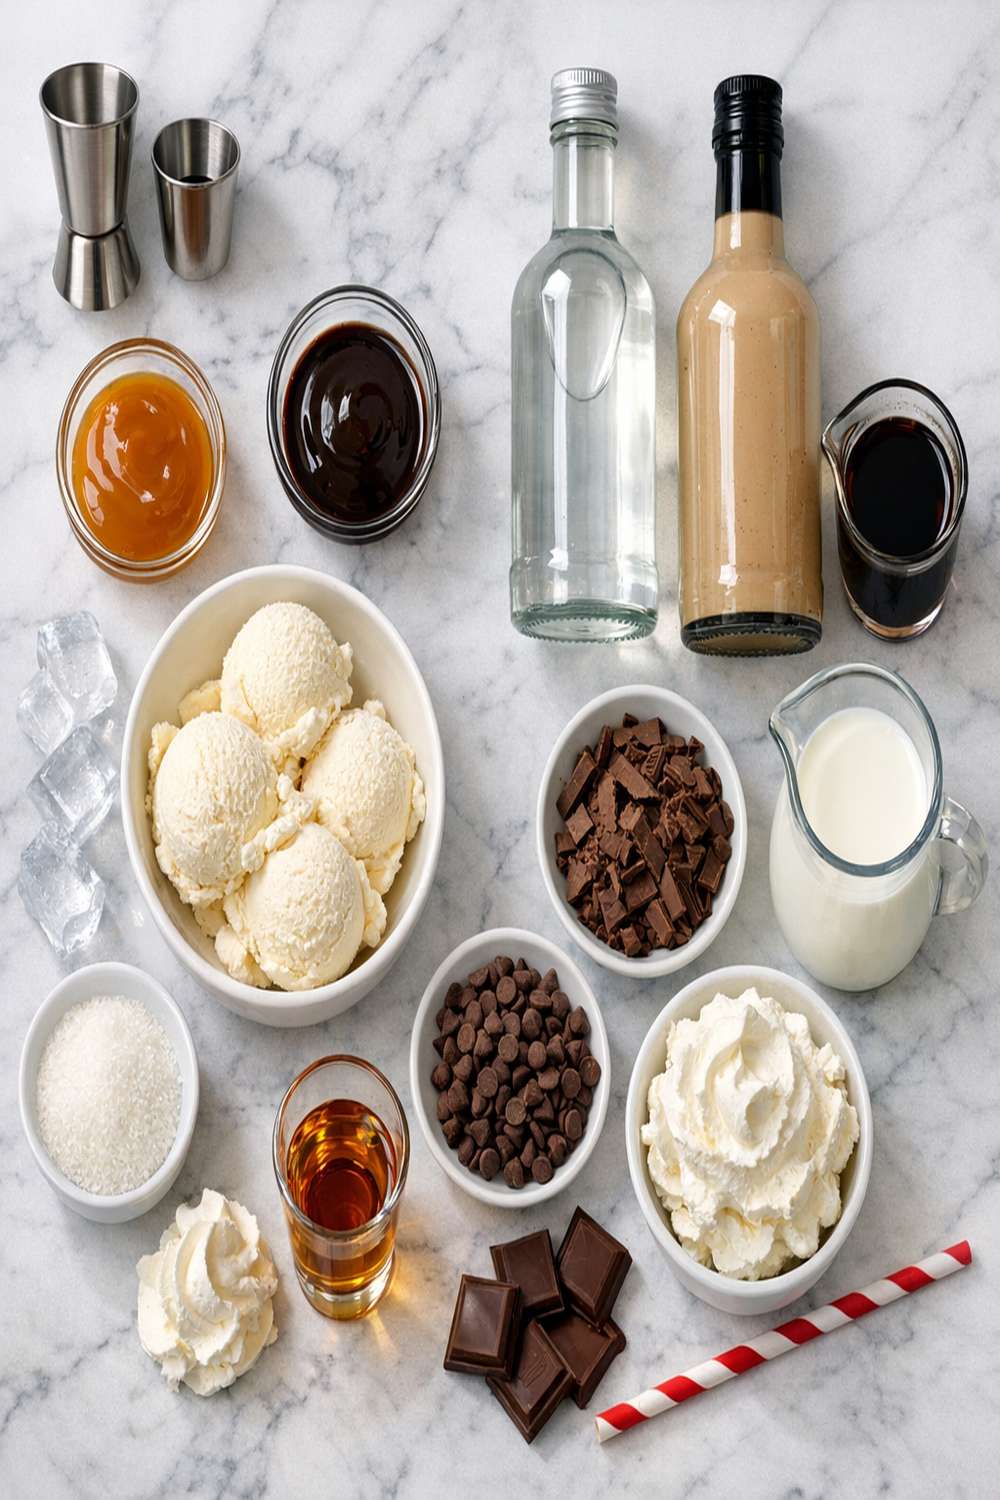
I’ve chosen these ingredients specifically because each one teaches you something about how emulsification works. The vanilla ice cream is your star emulsifier. The spirits demonstrate how fat-based ingredients can stabilize alcohol. The cookies add texture while showing how solids interact with emulsified liquids. Every single ingredient has a job in teaching you this technique.
For the Shake Base
- 2 ounces vanilla vodka (about ¼ cup, demonstrating how clear spirits integrate with creamy bases)
- 2 ounces cream liqueur such as Bailey’s (about ¼ cup, adding rich fat content that stabilizes beautifully)
- 2 pints premium vanilla ice cream (slightly softened for 5-10 minutes at room temperature—this matters tremendously for emulsification)
- ½ cup whole milk (full-fat dairy ensures proper emulsification and prevents separation)
For the Garnish and Rim
- 3 tablespoons chocolate syrup (for dipping and coating the glass rim)
- 12 chocolate sandwich cookies (like Oreos, crushed into small pieces that blend into the shake)
- ¼ cup chocolate sprinkles (long jimmies work best, sticking beautifully to the syrup-coated rim)
- 2 tall glasses (chilled in the freezer for 10 minutes before serving, keeping the shake colder longer)
- 1 cookies and cream chocolate bar (chilled, for a final elegant garnish on top)
Makes: 2 generous servings (about 12-14 ounces each)
The Masterclass: How to Make Your Boozy Milkshake Recipe
This isn’t just mixing ingredients—this is a lesson in precision that will transform how you approach creamy drinks forever. Every step teaches you something about emulsification that you’ll use in countless other recipes. Let’s break this down so you truly understand what’s happening at each stage.
Step 1: Prepare Your Glasses for Success
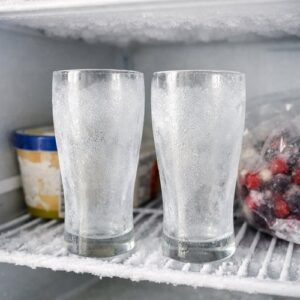
Here’s the first technique lesson: everything must be properly chilled before you begin. Take two tall glasses and place them in your freezer for at least 10 minutes. While they’re chilling, prepare your rim coating stations.
Pour the chocolate syrup onto a small shallow plate. Spread the chocolate sprinkles onto another small plate, making sure you have enough coverage that you can fully coat a glass rim. This preparation step isn’t just about looks—cold glasses keep your emulsified shake at the proper temperature longer, preventing separation once it’s poured.
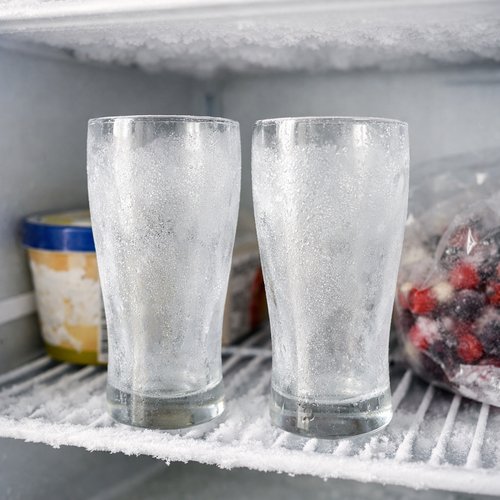
When you’re ready, remove one glass from the freezer. Dip the rim into the chocolate syrup first, coating it completely. The syrup acts as an adhesive, helping the sprinkles stick. Then immediately dip that syrup-coated rim into the sprinkles, rotating slowly to ensure full coverage. Repeat with the second glass. Set both aside or return them to the freezer while you blend.
Step 2: Arrange Your Ingredients in the Blender (Order Matters!)
This step teaches you the most important emulsification lesson: ingredient order dramatically affects how well your shake comes together. Don’t just dump everything in randomly.
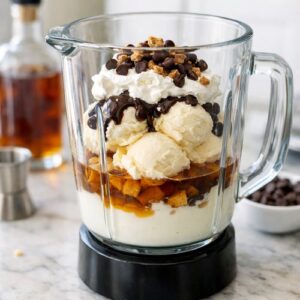
Start by adding the slightly softened vanilla ice cream to your blender first. Why? Because the ice cream will be the foundation and emulsifier for everything else. Add it in chunks rather than one big scoop—this helps the blender process it more evenly. Then add the crushed chocolate sandwich cookies directly on top of the ice cream.
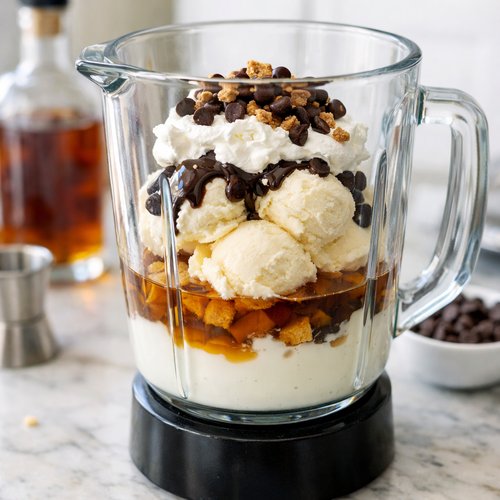
Next, pour the cream liqueur over the cookies and ice cream. Pouring the spirit over solid ingredients rather than liquid prevents it from splashing and helps it distribute evenly. Then add the vanilla vodka on top of that. Finally, pour the whole milk around the sides of the blender—this gives the blades something to grip and start the emulsification process.
Step 3: Blend With Precision and Control
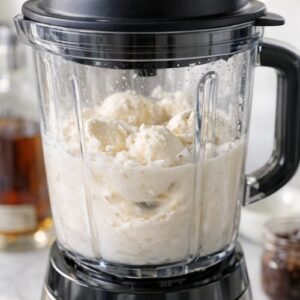
Start your blender on low speed. This is crucial—starting at high speed will overmix and cause the ice cream to melt too quickly, breaking your emulsion. Listen for the sound to change from chunky resistance to a smooth whir. This takes about 15-20 seconds.
Once everything is beginning to combine, gradually increase to medium-high speed. You’re not looking for a completely smooth blend yet—you want to blend for about 30-45 seconds total, just until the mixture is creamy and mostly smooth but still has some body to it. Over-blending causes the shake to separate and become too thin. The texture should pour easily but still feel luxurious and substantial on your tongue.
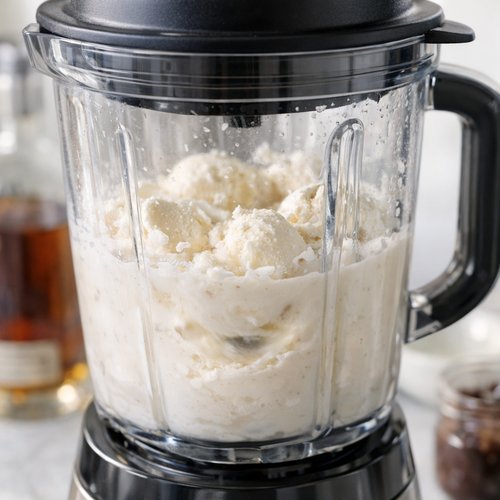
If your shake seems too thick, add 1-2 tablespoons more milk and pulse briefly. If it seems too thin (separated), you likely over-blended—this is a learning moment for next time, and the shake will still taste delicious even if the texture isn’t perfect.
Step 4: Pour Into Your Prepared Glasses Immediately
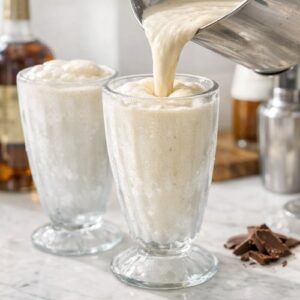
Remove your prepared glasses from the freezer and pour the shake directly into them. Speed matters here—emulsified drinks start to separate the moment they stop moving and begin to warm. Pour steadily and completely into both glasses.
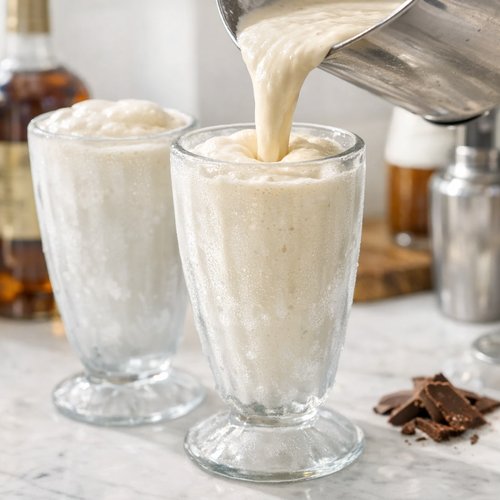
The shake should come nearly to the rim, looking thick and creamy rather than thin and liquidy. The chocolate-rimmed glasses add an elegant touch that makes this feel like a special treat, which it absolutely is.
Step 5: Garnish and Serve Immediately
Break off a piece of the chilled cookies and cream chocolate bar and balance it on top of each shake, nestled into the thick shake itself. Serving immediately ensures your emulsified shake stays at its perfect texture—cold, creamy, and stable. The moment you pour it, the clock starts ticking on emulsion stability.
Hand these to your lucky recipients right away and watch their faces light up. This is your moment to celebrate your new technique mastery. Enjoy responsibly!
How to Know You’ve Mastered the Technique
Perfect emulsification in a boozy milkshake shows itself in very specific ways. Watch for these markers of success:
- Smooth, consistent color throughout – there are no visible streaks, layers, or separation between cream and liquid. The entire shake is one uniform tan-brown color when you look through the glass.
- Thick, luxurious mouthfeel – when you take a sip, it feels substantial and creamy on your tongue, not watery or grainy. It coats your mouth pleasantly rather than sliding down thin and thin.
- No graininess or crystallization – there are no ice shards, crystallized spirits, or separated oil spots. The texture is silky-smooth from the first sip to the last.
- Proper pour consistency – the shake moves from blender to glass smoothly but holds its shape briefly when poured. It’s thicker than a soda but pourable, never stiff or overly liquid.
- Stable for 5-10 minutes – a properly emulsified shake maintains its texture and doesn’t begin to separate even if you let it sit in a cold glass for several minutes.
Common Technique Mistakes and How to Fix Them
- Grainy or icy texture – This happens when ice cream chunks aren’t fully incorporated. Solution: Blend longer at medium speed, but stop before you see the consistency becoming too thin. Add milk gradually if needed, blending in short pulses rather than continuously.
- Thin, separated shake that looks oily on top – You’ve over-blended and broken your emulsion. The fat and liquid have separated. Solution: For next time, blend for less time. If it happens now, add a small scoop of fresh ice cream and blend very gently for 5 seconds to re-emulsify.
- Shake tastes too strongly of alcohol – The spirits weren’t evenly distributed through the ice cream base. Solution: Make sure to add spirits over the ice cream, then immediately start blending. Don’t let the alcohol pool in one spot.
- Shake is too thick to drink through a straw – You didn’t add enough liquid. Solution: Add milk one tablespoon at a time, blending briefly after each addition, until you reach your desired consistency. Remember, it should pour smoothly but still feel creamy.
Practice Variations to Build Your Skill
Master the basic technique first, then challenge yourself with these progressively sophisticated variations:
Variation 1: The Classic Chocolate Upgrade (Easiest) – Make the shake exactly as written, but add 2 tablespoons of chocolate syrup to the blender along with the milk. This teaches you how to incorporate additional flavors without breaking emulsification. The chocolate adds richness without destabilizing the shake because it’s added with the milk rather than separately.
Variation 2: The Coffee Cocktail (Intermediate) – Replace ½ cup of the ice cream with coffee ice cream, and use 1 ounce of the cream liqueur and 1 ounce of coffee liqueur instead of both vanilla vodka. This teaches you how to balance multiple spirits without overpowering the emulsion. You’ll learn that different spirits emulsify slightly differently, and managing multiple spirits requires extra attention to blending speed and order.
Variation 3: The Seasonal Specialty (Advanced) – Create a peppermint shake by replacing vanilla ice cream with peppermint ice cream, using 1 ounce of peppermint schnapps and 1 ounce of white crème de cacao instead of the original spirits, and crushing up 4-5 candy canes instead of cookies. This challenges your understanding of how temperature, fat content, and ingredient interactions all affect emulsification. Peppermint components can curdle more easily, teaching you to work quickly and blend with precision.
Can I Store Boozy Milkshake Recipe?
The short answer: not really, and that’s by design. A properly emulsified shake is best enjoyed within 5-10 minutes of blending, while the texture is still perfect and cold. The emulsion will slowly break down as the ice cream melts and temperatures rise, causing the shake to separate.
However, you can prepare components ahead of time. Chill your glasses for up to 2 hours in advance. You can crush your cookies and prepare your rim coating stations up to 1 hour ahead. Store spirits and milk in the refrigerator (they’ll keep indefinitely). The moment you blend, though, you’re in a race against time—make it, serve it, enjoy it.
If you have leftover shake that’s begun to separate, don’t throw it away! You can re-blend it briefly to re-emulsify, or simply stir it well before drinking. It’ll taste just as good even if the texture has changed slightly.
Expert’s Nutritional Tip
As a registered dietitian, I want to be honest about what this shake is: it’s an indulgence, and that’s perfectly okay. This isn’t something you’d serve nightly, but it’s exactly the kind of special-occasion treat that makes life enjoyable. The full-fat ice cream I specify isn’t a mistake—the fat is essential for proper emulsification, yes, but it also provides fat-soluble vitamins like vitamin A and K2. The dairy provides calcium and protein. The spirits add essentially zero nutritional value but endless joy, which matters for your overall wellness too.
I serve these maybe once or twice a month when adults gather, and I make sure to enjoy them fully without guilt. Teaching your family—and yourself—that some foods are “special occasion” foods actually helps create a healthier relationship with eating overall.
Nutrition Information
Per serving (1 shake, approximately 14 ounces):
- Calories: 520
- Total Fat: 22g (includes 13g saturated fat)
- Cholesterol: 65mg
- Sodium: 145mg
- Total Carbohydrates: 58g (includes 48g sugars)
- Protein: 6g
- Alcohol content: approximately 15% ABV (alcohol by volume)
Note: This nutrition information is based on standard ice cream, cookies, and spirits and may vary slightly based on specific brands. Data sourced from USDA FoodData Central and manufacturer nutrition labels. Remember that this is a special-occasion treat—enjoy it as part of a balanced lifestyle.
What to Serve With Boozy Milkshake Recipe?
The beauty of this shake is that it stands beautifully on its own as a dessert. You don’t need a full meal beforehand—I typically serve these after dinner with coffee when we’re gathered as adults. However, here are some pairings that make the experience even more special:
- Chocolate cake or brownies – If you want food alongside these shakes, keep it simple. Let the shake be the star, and pair it with something uncomplicated like Best Mac And Cheese Recipe earlier in the evening so guests arrive satisfied but not too full.
- Crispy cookies or biscotti – Texture contrast is delightful. Something crunchy alongside something creamy creates an interesting eating experience.
- Fresh berries on the side – If you want something lighter, serve fresh raspberries or strawberries alongside. The tartness balances the richness beautifully.
- After-dinner coffee – I always have decaffeinated and caffeinated coffee available. Some guests love a boozy shake with black coffee on the side.
Make-Ahead Guide
Here’s my professional make-ahead strategy for when you’re hosting:
3-4 hours before serving: Remove your ice cream from the freezer and let it sit in the refrigerator. It will slowly soften to exactly the right texture. Meanwhile, chill your serving glasses in the freezer. Prepare your rim coating stations—chocolate syrup on one plate, sprinkles on another—and cover them with plastic wrap so they’re ready when you need them.
30 minutes before serving: Crush your chocolate cookies into the size you want. Some people prefer them almost pulverized into the shake, others like small chunks. Your preference! Place the cookies in a small bowl. Verify that your spirits are cold and your milk is cold. Get your chilled glasses out and set them on the counter where you’ll be blending.
10 minutes before serving: This is go-time. Assemble the shakes one at a time if making for a crowd, or both at once if just for two people. The total blending and serving process takes less than 3 minutes per batch. Have your guests ready to receive them immediately—they’ll taste best within moments of blending.
Seasonal Variations
Spring/Summer: Replace some of the vanilla ice cream with strawberry or mint ice cream. Use 1 ounce of strawberry liqueur and keep the vodka. The fresher flavors feel light and celebratory for warmer months.
Fall: Use 1 pint vanilla ice cream and 1 pint salted caramel or cinnamon ice cream. Replace vodka with 2 ounces of spiced rum. Add ¼ teaspoon of pumpkin pie spice to the blender. This variation teaches you how warm spices interact with creamy emulsions—they bloom beautifully when blended with fat.
Winter: Use peppermint or eggnog ice cream. Replace the liqueurs with 1 ounce of peppermint schnapps and 1 ounce of brandy. Garnish with crushed candy canes instead of the chocolate bar. Winter shakes feel festive and indulgent.

Boozy Milkshake Recipe
Ingredients
Method
- Here's the first technique lesson: everything must be properly chilled before you begin. Take two tall glasses and place them in your freezer for at least 10 minutes. While they're chilling, prepare your rim coating stations. Pour the chocolate syrup onto a small shallow plate. Spread the chocolate sprinkles onto another small plate, making sure you have enough coverage that you can fully coat a glass rim. This preparation step isn't just about looks—cold glasses keep your emulsified shake at the proper temperature longer, preventing separation once it's poured. When you're ready, remove one glass from the freezer. Dip the rim into the chocolate syrup first, coating it completely. The syrup acts as an adhesive, helping the sprinkles stick. Then immediately dip that syrup-coated rim into the sprinkles, rotating slowly to ensure full coverage. Repeat with the second glass. Set both aside or return them to the freezer while you blend.
- This step teaches you the most important emulsification lesson: ingredient order dramatically affects how well your shake comes together. Don't just dump everything in randomly. Start by adding the slightly softened vanilla ice cream to your blender first. Why? Because the ice cream will be the foundation and emulsifier for everything else. Add it in chunks rather than one big scoop—this helps the blender process it more evenly. Then add the crushed chocolate sandwich cookies directly on top of the ice cream. Next, pour the cream liqueur over the cookies and ice cream. Pouring the spirit over solid ingredients rather than liquid prevents it from splashing and helps it distribute evenly. Then add the vanilla vodka on top of that. Finally, pour the whole milk around the sides of the blender—this gives the blades something to grip and start the emulsification process.
- Start your blender on low speed. This is crucial—starting at high speed will overmix and cause the ice cream to melt too quickly, breaking your emulsion. Listen for the sound to change from chunky resistance to a smooth whir. This takes about 15-20 seconds. Once everything is beginning to combine, gradually increase to medium-high speed. You're not looking for a completely smooth blend yet—you want to blend for about 30-45 seconds total, just until the mixture is creamy and mostly smooth but still has some body to it. Over-blending causes the shake to separate and become too thin. The texture should pour easily but still feel luxurious and substantial on your tongue. If your shake seems too thick, add 1-2 tablespoons more milk and pulse briefly. If it seems too thin (separated), you likely over-blended—this is a learning moment for next time, and the shake will still taste delicious even if the texture isn't perfect.
- Remove your prepared glasses from the freezer and pour the shake directly into them. Speed matters here—emulsified drinks start to separate the moment they stop moving and begin to warm. Pour steadily and completely into both glasses. The shake should come nearly to the rim, looking thick and creamy rather than thin and liquidy. The chocolate-rimmed glasses add an elegant touch that makes this feel like a special treat, which it absolutely is.
- Break off a piece of the chilled cookies and cream chocolate bar and balance it on top of each shake, nestled into the thick shake itself. Serving immediately ensures your emulsified shake stays at its perfect texture—cold, creamy, and stable. The moment you pour it, the clock starts ticking on emulsion stability. Hand these to your lucky recipients right away and watch their faces light up. This is your moment to celebrate your new technique mastery. Enjoy responsibly!
Notes
FAQs
Can I make this shake without alcohol?
Absolutely! Replace the spirits with ½ cup additional milk or a splash of vanilla extract plus a tablespoon of chocolate syrup. The emulsification technique remains exactly the same—the ice cream still acts as your emulsifier. The shake will taste different (more straightforward vanilla), but the technique you’re learning applies regardless of whether spirits are involved. Many of my readers make non-alcoholic versions for family gatherings, and the technique mastery is identical.
What if my shake is too thick?
Thick shakes usually mean you haven’t blended long enough or haven’t added enough liquid. Add milk one tablespoon at a time and blend briefly after each addition until you reach your preferred consistency. Each tablespoon of milk makes a noticeable difference, so add gradually. This teaches you that liquid content directly affects pour-ability and mouthfeel—valuable knowledge for all creamy emulsified dishes.
Does the type of ice cream really matter for emulsification?
Yes, it does. Premium ice cream with higher fat content emulsifies more easily and reliably than budget ice cream with lots of air and additives. That said, any ice cream will work—it just might take slightly more blending or milk adjustment to reach the same texture. This is a practical lesson in how ingredient quality affects technique execution. Better ingredients make technique mastery easier to achieve.
Can I use different spirits than those listed?
You can use any spirits you love, but understand that different alcohols have different fat contents and emulsifying properties. Cream liqueurs (like Bailey’s) emulsify beautifully because of their fat content. Clear spirits like vodka or rum blend smoothly but don’t contribute to emulsification. So if you’re swapping spirits, maintain at least one cream-based liqueur and the ice cream will emulsify everything beautifully. This teaches you that different ingredients have different chemical properties that affect how they interact with each other.
How important is it that the ice cream is “slightly softened”?
It’s genuinely important, and here’s why: ice cream that’s rock-hard directly from the freezer takes forever to break down in the blender, causing over-blending and separation. Ice cream that’s melted too much is already beginning to separate before you even blend. That 5-10 minute sit at room temperature brings it to the sweet spot—soft enough to blend easily but still cold and structured. This teaches you that temperature control is critical in emulsification. The ice cream needs just the right consistency to effectively stabilize the mixture.
Common Mistakes to Avoid
- Using rock-hard frozen ice cream directly from the freezer: It won’t incorporate smoothly, and you’ll over-blend trying to break it down. Always soften slightly at room temperature first.
- Skipping the glass chilling step: Warm glasses will melt your shake and speed up emulsion breakdown. Always chill glasses for at least 10 minutes beforehand.
- Adding all the milk at once instead of gradually: Too much liquid too fast prevents the ice cream from emulsifying properly. Add milk slowly, blending between additions.
- Blending on high speed from the start: This creates too much friction and heat, melting the ice cream before it has a chance to properly emulsify. Always start on low and gradually increase speed.
More Recipes Using This Technique
- Frozen Bellini Recipe – uses the same emulsification principle with sparkling wine and frozen fruit
- Popular Pasta With Vodka Sauce Recipe – teaches emulsification with cream and spirits in a savory context
You did it! You’ve now mastered one of the most elegant cooking techniques in the culinary world. Emulsification is the foundation of everything from silky sauces to luxurious desserts to creamy cocktails. The boozy milkshake is just the beginning—you now understand how fat, liquid, and technique combine to create something greater than the sum of its parts.
Every time you blend a creamy drink, make a silky sauce, or create a smooth soup, you’ll remember this moment when the technique finally clicked. You’ll notice the little signals that tell you when emulsification is happening perfectly. You’ll feel confident adjusting recipes and trying variations because you understand the why underneath the what.
This is your culinary superpower now. Go forth and blend with confidence. Your friends and family have no idea what’s about to hit them. Happy Cooking!