This post contains affiliate links. As an Amazon Associate I earn from qualifying purchases.
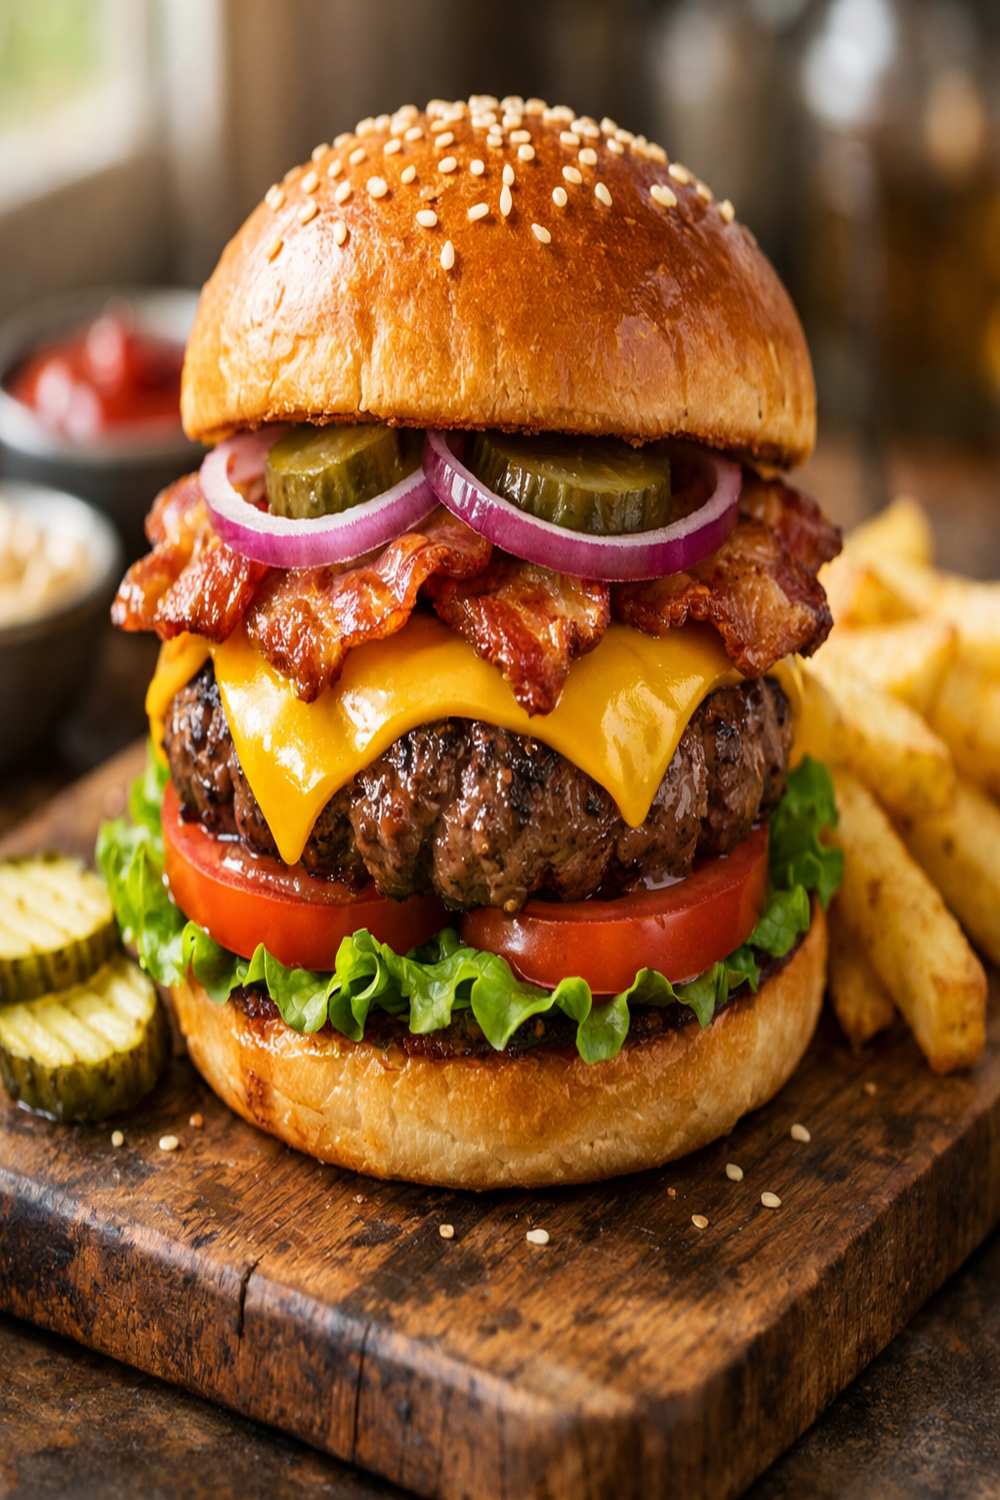
There’s nothing quite like that moment when you pull a perfectly cooked cheeseburger off the grill and watch your kids’ faces light up. I’ve been making these for my family in Chicago for years now, and I’ve learned that the secret isn’t fancy ingredients or complicated techniques. It’s understanding how ground beef behaves, respecting simple seasoning, and knowing the small tricks that separate a flat, rubbery burger from one that’s juicy, tender, and absolutely unforgettable. Let me share exactly how I make cheeseburgers that my family requests week after week, and how you can bring that same magic to your dinner table.
Why This Cheeseburger Recipe Works Every Single Time
I remember standing in my kitchen about ten years ago, frustrated because my homemade burgers never tasted as good as the ones from our favorite local diner. I was doing everything “right”—using quality beef, getting the right temperature. But something was missing. Then I discovered the small details that actually matter: the fat content in the meat, that crucial dent in the middle of each patty, and the timing of when you add salt.
As a registered dietitian, I’ve spent a decade helping families in our community find balance between nutrition and genuine satisfaction. This cheeseburger recipe represents exactly that philosophy. It’s not “diet food.” It’s real food made with intention, understanding, and a few professional tricks that make all the difference.
What makes these burgers different is that they stay juicy. They don’t shrink into tiny hockey pucks. And they actually taste like beef, not compressed sadness.
What Makes Ground Beef Perfect for Burgers?
Here’s what I wish someone had told me earlier: not all ground beef is created equal for burgers. The fat content matters tremendously. I always choose ground beef that’s at least 20% fat, which means 80/20 or even 75/25 ground beef. This fat is where the flavor lives, and it’s what keeps your patties tender and juicy during cooking.
When you’re selecting beef at the grocery store or butcher, look for bright red color and ask the butcher to grind it fresh if possible. If you’re buying pre-packaged, check that date closely. Fresh beef makes noticeably better burgers than beef that’s been sitting in the case for days.
Here’s a professional tip from my nutrition background: that fat isn’t your enemy. The fat in ground beef contains important fat-soluble vitamins and creates satiety. A juicy burger made with quality ingredients will actually keep you satisfied longer than a lean burger that tastes like cardboard and leaves you reaching for more food an hour later.
The Ingredients – Building Burger Perfection
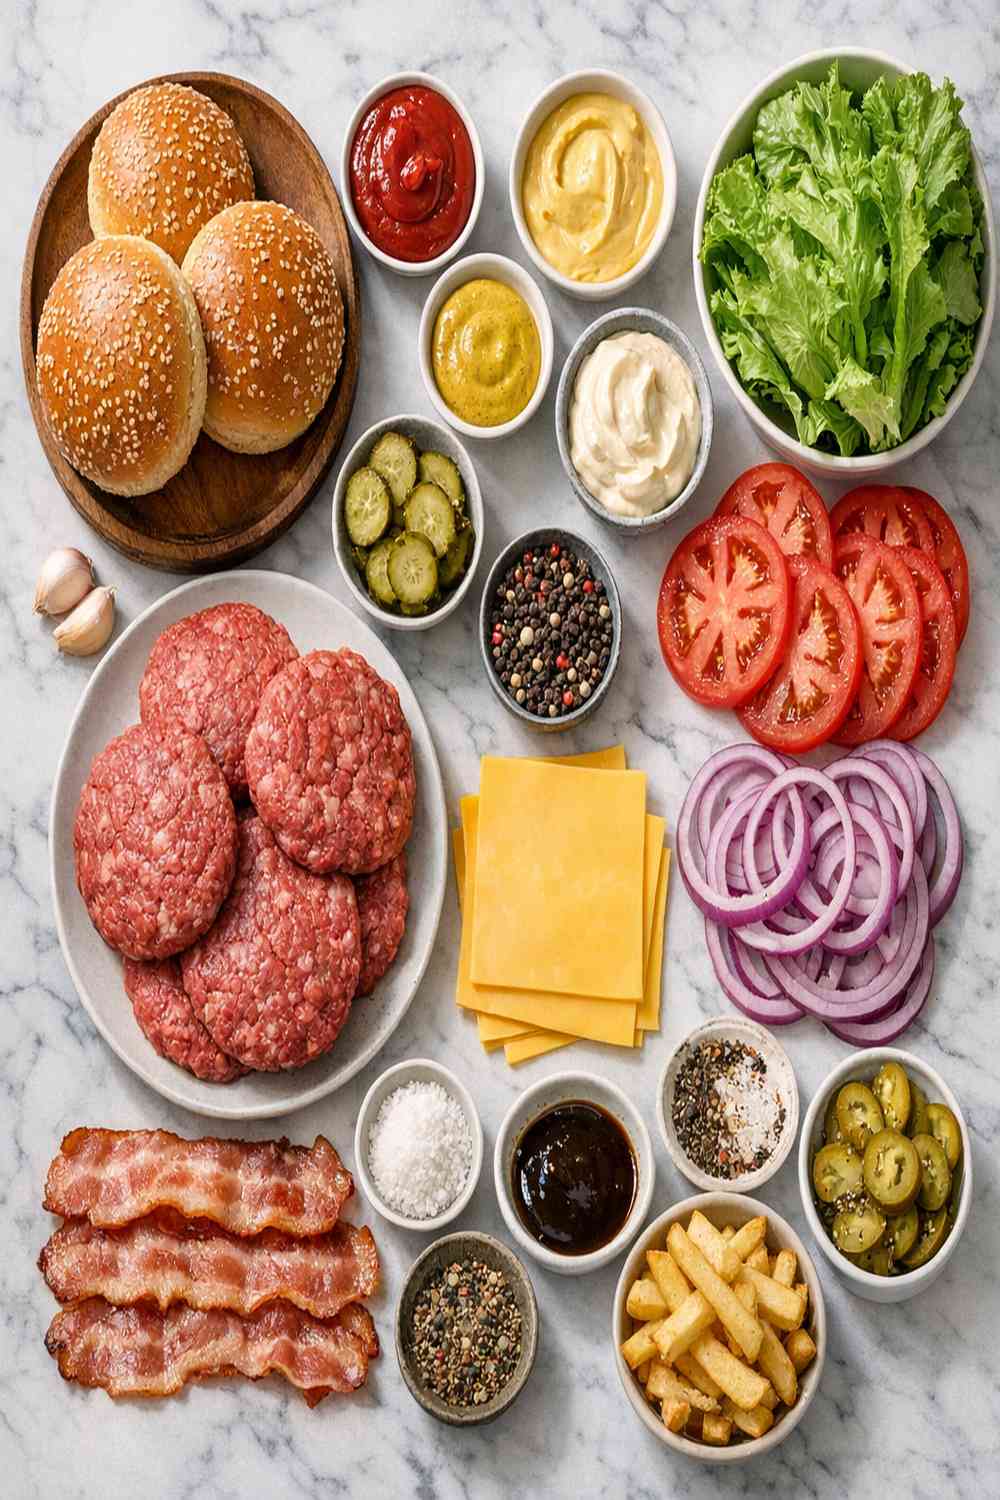
I’ve organized these ingredients by category so you can see exactly what you need to create four spectacular cheeseburgers. Each element plays a specific role, from the patty itself to the toppings and sauce that bring everything together.
For the Patties
- 1/8 teaspoon salt per burger (kosher salt has larger crystals and distributes more evenly)
- 1/8 teaspoon freshly cracked black pepper per burger (freshly ground makes a significant difference in flavor)
- 600 grams (1.2 pounds) ground beef with at least 20% fat content (preferably freshly ground from your butcher)
- 2-3 tablespoons canola oil (for cooking the patties at high heat)
For Assembly and Toppings
- 2 large tomatoes (sliced into thin rounds, about 1/4 inch thick)
- 8 leaves cos or romaine lettuce (torn to fit your bun, or shredded iceberg lettuce works fine)
- 4-8 slices American cheese or cheese of your choice (I use American for classic burgers, but cheddar and Swiss work beautifully too)
- 2 large gherkins or dill pickle spears (thinly sliced for that classic pickle flavor without large chunks)
- 1 red onion (finely sliced into thin rings for a pleasant bite without overpowering)
- 4 soft burger buns or rolls (approximately 4 inches wide, toasted until light golden)
For the Special Burger Sauce and Condiments
- 1 teaspoon paprika (creates that orangey-pink color and subtle smokiness)
- 2 tablespoons tomato chutney or ketchup (adds sweetness and slight tang)
- 3 tablespoons mayonnaise (the creamy base)
- 1 tablespoon yellow mustard (adds brightness and sharpness)
- Additional ketchup, mustard, and tomato chutney for serving
For Serving
- French fries or your favorite side (homemade or store-bought, heated until warm and crispy)
Make-Ahead Guide: Planning Your Burger Night
As a busy mom and dietitian, I’ve learned that planning ahead transforms dinner from stressful to smooth. You can prepare much of this recipe in advance without sacrificing quality.
Up to 2 days ahead: Make your special burger sauce by combining mayonnaise, tomato chutney, paprika, and mustard in a small container. Cover and refrigerate. The flavors actually improve as they sit together.
Up to 24 hours ahead: Slice your tomatoes and onions, and prepare your lettuce. Keep tomatoes in a single layer on paper towels (prevents them from getting soggy), store onions in an airtight container, and keep lettuce in a sealed bag with a paper towel to absorb excess moisture.
About 2 hours before serving: Divide your ground beef into portions and gently form them into balls. Don’t press them into patties yet—do that right before cooking. This prevents the meat from compacting too much and becoming dense.
30 minutes before serving: Preheat your grill to high heat. Take your beef balls out of the refrigerator so they come closer to room temperature, which helps them cook more evenly.
The Transformation: How to Make Perfect Cheeseburgers
This is where the magic happens. I’m going to walk you through each step exactly as I do it at home, with all my professional tips included.
Step 1: Form Your Patties With Purpose
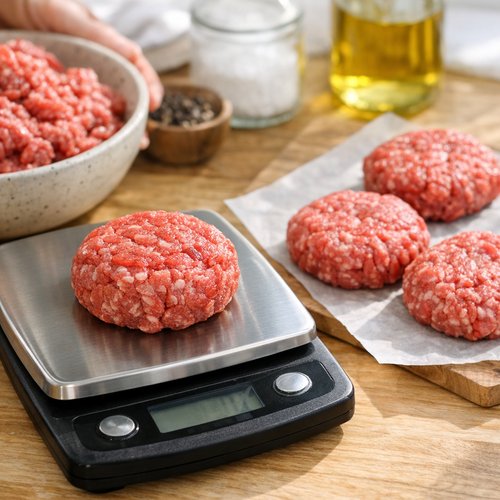
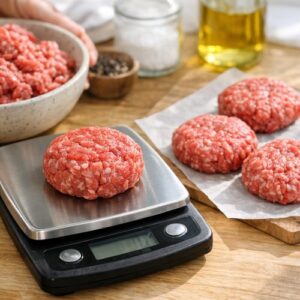
Take your ground beef and divide it into 4 equal portions. I use a kitchen scale for this—it takes the guesswork out and ensures even cooking. Each portion should weigh about 150 grams (5.3 ounces). Gently roll each portion into a smooth ball using light pressure from your hands. You’re not trying to compress the meat; you’re just bringing it together.
Now comes the part that changes everything: press each ball into a patty that’s slightly larger than your bun, approximately 4.7 inches wide and about 0.4 inches thick. The patty will shrink as it cooks, so making it slightly larger ensures it doesn’t end up smaller than your bun. Handle the meat as little as possible—excessive handling makes the burgers tough and dense.
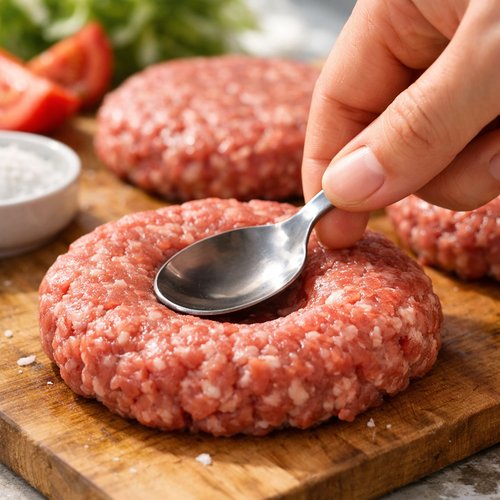
Step 2: Create the Signature Dent
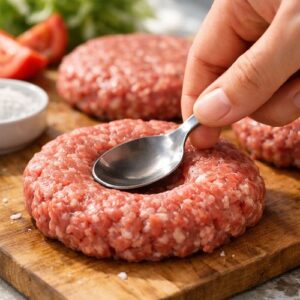
Here’s the professional technique that stops your patties from doming in the middle: using your thumb or the back of a spoon, gently press a small dent into the center of each patty. This shallow indentation (about the size of a quarter) compensates for how the meat naturally contracts during cooking. Without this dent, your burger puffs up in the middle and becomes thick and unevenly cooked.
Place your patties on a plate and refrigerate them while you prepare everything else. Cold patties hold their shape better on the grill.
Step 3: Season at the Right Moment
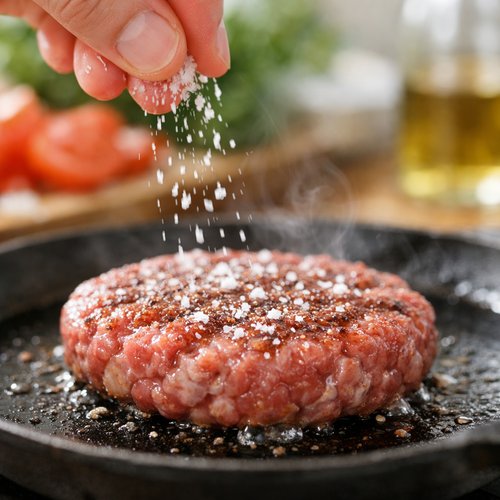
This is critical for burger success: do not salt your beef before forming it. Salt draws moisture out of the meat and breaks down the proteins, which makes your burgers tough and compressed. Instead, season just before cooking.
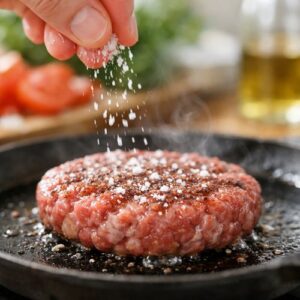
Take your chilled patties from the refrigerator. Sprinkle one side of each patty with half of your salt and pepper (1/16 teaspoon salt and 1/16 teaspoon pepper per patty). Flip each patty and sprinkle the other side with the remaining seasoning. Press gently so it adheres.
Step 4: Toast Your Buns
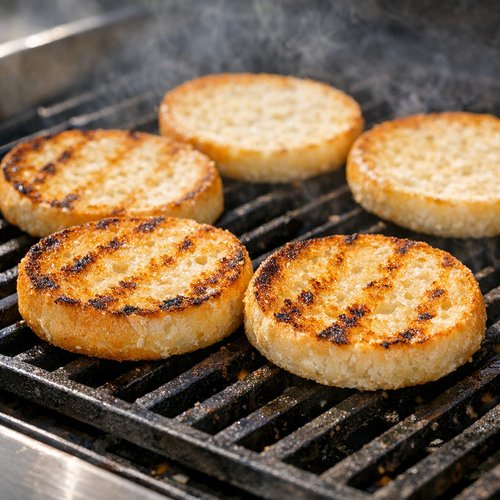
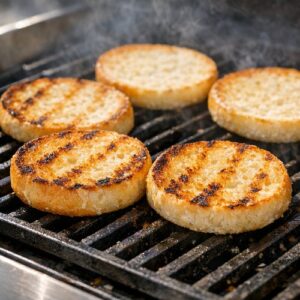
While your patties are chilling, preheat your grill to high heat. Once it’s hot, place your burger buns cut-side up on the grill grates. Toast for 3-5 minutes until they’re light golden and slightly crispy. This step is not optional—toasted buns prevent your burger from getting soggy and add tremendous flavor. If using a traditional oven, place buns cut-side up on a sheet pan and broil for 2-3 minutes.
Set your toasted buns aside on a clean plate.
Step 5: Cook Your Patties to Juicy Perfection
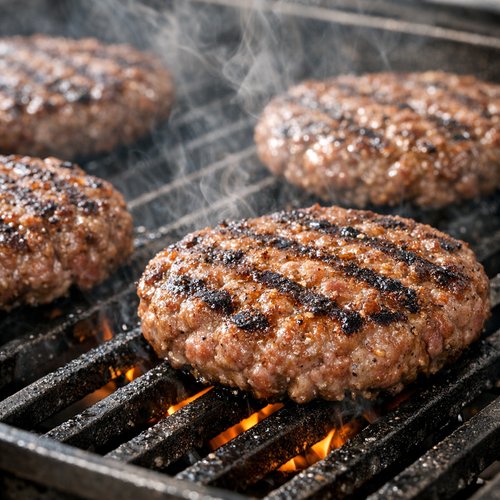
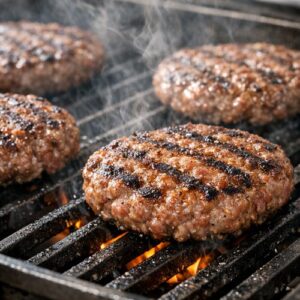
Brush your hot grill grates lightly with canola oil to prevent sticking. Place your seasoned patties directly on the grill. Do not press them down with your spatula—this is the number one mistake people make, and it squeezes out all the juices.
Let them cook undisturbed for about 3-4 minutes until they develop a beautiful brown crust. Flip carefully and cook the other side for another 3-4 minutes for medium doneness. The internal temperature should reach 160°F (71°C) for food safety. If you like your burgers less done, pull them at 155°F, but I recommend hitting that 160°F mark for peace of mind, especially when feeding families.
Step 6: Add the Cheese
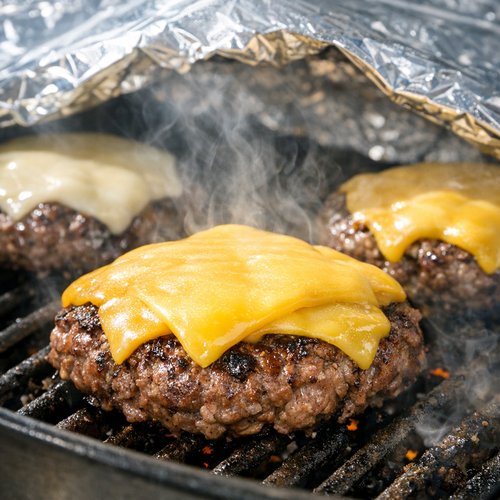
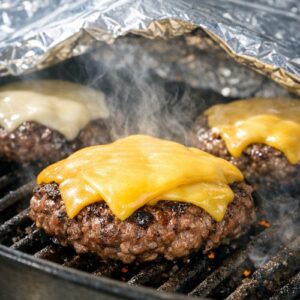
In the last minute of cooking, place 1-2 slices of cheese on top of each patty. Cover your grill or tent with foil to help the cheese melt. If you’re making double cheeseburgers (which my family loves), use 2 slices per burger. The residual heat will melt it beautifully.
Step 7: Assemble With Care
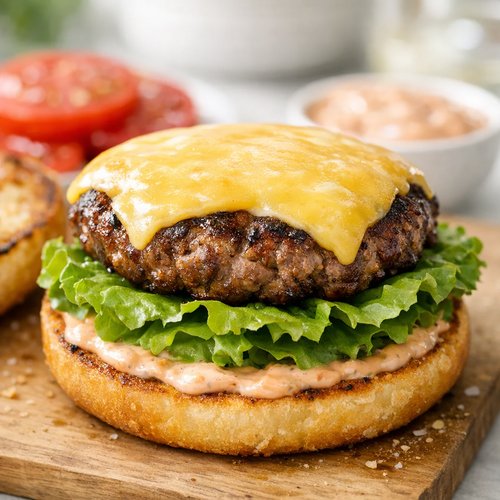
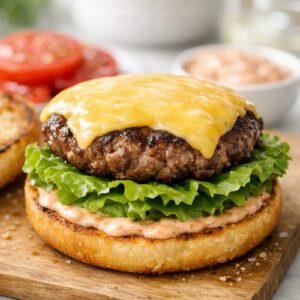
Take your toasted bun and spread a generous spoonful of your special burger sauce on the bottom half. Layer 2 lettuce leaves, then a patty with melted cheese, then a slice or two of tomato, followed by a small handful of onion rings and a few slices of pickle.
Top with the other half of the bun. Serve immediately with ketchup, mustard, and additional condiments on the side so everyone can customize their burger.
The Special Burger Sauce Recipe
This creamy, slightly tangy sauce is what takes a burger from good to memorable. Mix together 3 tablespoons mayonnaise, 2 tablespoons tomato chutney, 1 tablespoon yellow mustard, and 1 teaspoon paprika. The paprika gives it that signature pinkish-orange color and subtle smokiness. You can make this hours ahead and keep it in the refrigerator.
How to Adapt Based on What You Have
- If you don’t have American cheese – use sharp cheddar (more flavor), Swiss (milder and nutty), or even Monterey Jack. Each brings something different to the table.
- If you prefer your burgers cooked differently – aim for 150-155°F internal temperature for medium-rare (still safe if using ground beef from a reputable source), or 160°F+ for well-done. Use an instant-read thermometer for accuracy.
- If you don’t have access to kosher salt – use regular table salt but use slightly less, as it’s denser and saltier by volume.
- If grill space is limited – cook your burgers in a cast iron skillet on the stovetop over medium-high heat. You’ll get a beautiful crust and the same juicy result.
- If you can’t find quality ground beef – ask your butcher to grind beef chuck for you, or buy whole beef chuck and have them grind it fresh.
- If your lettuce or tomatoes are wilted – soak lettuce in ice water for 10 minutes to crisp it up, and choose the firmest tomato slices available.
Common Mistakes to Avoid
After a decade of helping families in my practice and at home, I’ve seen these mistakes derail even the best burger intentions.
Mistake #1: Using lean ground beef. I know it seems healthier, but for burgers it backfires. 90/10 or 85/15 ground beef creates dry, tough burgers that fall apart. That fat content creates flavor and juiciness. Stick with 80/20 or 75/25 for best results.
Mistake #2: Over-handling the meat. Each time you mix or press the ground beef, you’re breaking down the protein structure and creating a dense, tough patty. Handle the meat as little as possible. Mix gently, form gently, and don’t press down while cooking.
Mistake #3: Cooking burgers at the wrong temperature. Too low and they cook through without developing a crust. Too high and the outside burns before the inside cooks. High heat (around 400-450°F on a grill) is your sweet spot.
Mistake #4: Adding toppings before assembling. I layer everything fresh onto each bun right before serving. This prevents soggy lettuce and keeps everything at the right temperature.
Expert’s Nutritional Tip: Understanding Ground Beef Quality
As a dietitian, I want to be transparent about the nutrition in this recipe. A single burger made with this recipe contains approximately 300-350 calories and about 20-25 grams of protein. The fat content—which people often fear—is actually what makes this meal satisfying. Research shows that meals with appropriate fat content create better satiety signals, meaning you feel fuller longer and are less likely to overeat.
The key is using quality beef from animals raised with proper nutrition. Grass-fed beef contains higher levels of omega-3 fatty acids and conjugated linoleic acid (CLA) compared to grain-fed beef. If you have access to grass-fed ground beef at your local farmers market or butcher, it’s absolutely worth the slightly higher cost. Your burger will taste noticeably richer, and you’ll get superior nutritional content.
Seasonal Variations: Adapting Your Cheeseburger
Summer Burgers: Add crispy bacon, fresh lettuce, and juicy heirloom tomatoes. Top with a fried egg for Sunday brunch burgers. Serve with cold refreshing drinks like Shirley Temples for the kids.
Fall Burgers: Top with sautéed mushrooms and caramelized onions. Add a slice of aged cheddar and a tiny drizzle of balsamic reduction for sophistication.
Winter Burgers: Go gourmet with caramelized onions, crispy bacon, and Swiss cheese. Add a dollop of horseradish mayo for warmth and depth.
Spring Burgers: Keep it fresh with crisp lettuce, paper-thin red onion, and fresh tomato. Add a leaf of fresh basil and a thin slice of fresh mozzarella for lightness.
Zero Waste: Using Every Last Bit
As someone committed to feeding my family with intention, I think about how to use everything that comes through my kitchen door.
Lettuce stems and outer leaves that you might otherwise discard? Chop them and add to a salad or soup. Tomato slices that break during slicing? Dice them and make tomato relish or add to pasta sauce. Leftover special burger sauce? Use it as a condiment for sandwiches, a dipping sauce for fried foods, or a spread for wraps all week long. Your burger buns won’t toast perfectly evenly—those slightly too-dark pieces make fantastic breadcrumbs when pulsed in a food processor.
If you have leftover cooked burgers (though in my house, this rarely happens), you can crumble them into Cincinnati chili or use them as a base for meatloaf the next day.
Can I Store Cheeseburgers?
Since cheeseburgers are best enjoyed fresh and hot, I rarely make them in advance. However, here’s what I do when we have leftovers (which is unusual in my house, but it happens):
Cooked assembled burgers: Store in an airtight container in the refrigerator for up to 2 days. Reheat gently in a 300°F oven for about 10 minutes. The bun won’t be as fresh, but the patty will warm through nicely.
Cooked patties only: Refrigerate for up to 3 days in an airtight container, separated by parchment paper so they don’t stick together. Reheat on a skillet over medium heat for 2-3 minutes per side until warmed through. Then assemble fresh burgers with fresh toppings.
Raw patties: You can make patties ahead and refrigerate them for up to 24 hours, or freeze them for up to 3 months. Separate with parchment paper, wrap tightly, and label with the date. Cook from frozen, adding 2-3 minutes to your cooking time.
Special burger sauce: This keeps beautifully in the refrigerator for up to 1 week, covered in an airtight container.
What to Serve With Your Cheeseburgers?
The magic of a cheeseburger is that it pairs beautifully with sides that either complement its richness or provide contrast. Here’s what my family reaches for:
- Crispy French fries or oven-baked fries – The classic pairing. Make them homemade and you’ll never go back to frozen.
- Fresh garden salad with vinaigrette – The acidity cuts through the richness of the burger and cheese beautifully.
- my favorite salad – The lime and cotija cheese add brightness and prevent the meal from feeling heavy.
- Coleslaw with a tangy dressing – Crunchy and refreshing. Make it ahead and you’ve got less to do at dinner time.
- Grilled vegetables like zucchini or bell peppers – Light and healthy alongside the hearty burger.
- Baked sweet potato fries – A slightly healthier take that my kids actually prefer to regular fries.
- Simple cucumber and tomato salad – Refreshing and takes literally five minutes to assemble.
Nutrition Information
Per burger (with 1-2 slices cheese, standard toppings, and bun):
- Calories: 520-580
- Protein: 28-32 grams
- Total Fat: 28-32 grams
- Saturated Fat: 12-14 grams
- Carbohydrates: 38-42 grams
- Fiber: 1-2 grams
- Sodium: 850-950 mg
These numbers are based on USDA nutrition database standards and my calculations using standard ingredients. The protein content makes this a satisfying meal that provides sustained energy. If you’re watching sodium intake, use less salt on your patties and choose a lower-sodium cheese option.

Cheeseburger Recipe
Ingredients
Method
- Take your ground beef and divide it into 4 equal portions. I use a kitchen scale for this—it takes the guesswork out and ensures even cooking. Each portion should weigh about 150 grams (5.3 ounces). Gently roll each portion into a smooth ball using light pressure from your hands. You're not trying to compress the meat; you're just bringing it together. Now comes the part that changes everything: press each ball into a patty that's slightly larger than your bun, approximately 4.7 inches wide and about 0.4 inches thick. The patty will shrink as it cooks, so making it slightly larger ensures it doesn't end up smaller than your bun. Handle the meat as little as possible—excessive handling makes the burgers tough and dense.
- Here's the professional technique that stops your patties from doming in the middle: using your thumb or the back of a spoon, gently press a small dent into the center of each patty. This shallow indentation (about the size of a quarter) compensates for how the meat naturally contracts during cooking. Without this dent, your burger puffs up in the middle and becomes thick and unevenly cooked. Place your patties on a plate and refrigerate them while you prepare everything else. Cold patties hold their shape better on the grill.
- This is critical for burger success: do not salt your beef before forming it. Salt draws moisture out of the meat and breaks down the proteins, which makes your burgers tough and compressed. Instead, season just before cooking. Take your chilled patties from the refrigerator. Sprinkle one side of each patty with half of your salt and pepper (1/16 teaspoon salt and 1/16 teaspoon pepper per patty). Flip each patty and sprinkle the other side with the remaining seasoning. Press gently so it adheres.
- While your patties are chilling, preheat your grill to high heat. Once it's hot, place your burger buns cut-side up on the grill grates. Toast for 3-5 minutes until they're light golden and slightly crispy. This step is not optional—toasted buns prevent your burger from getting soggy and add tremendous flavor. If using a traditional oven, place buns cut-side up on a sheet pan and broil for 2-3 minutes. Set your toasted buns aside on a clean plate.
- Brush your hot grill grates lightly with canola oil to prevent sticking. Place your seasoned patties directly on the grill. Do not press them down with your spatula—this is the number one mistake people make, and it squeezes out all the juices. Let them cook undisturbed for about 3-4 minutes until they develop a beautiful brown crust. Flip carefully and cook the other side for another 3-4 minutes for medium doneness. The internal temperature should reach 160°F (71°C) for food safety. If you like your burgers less done, pull them at 155°F, but I recommend hitting that 160°F mark for peace of mind, especially when feeding families.
- In the last minute of cooking, place 1-2 slices of cheese on top of each patty. Cover your grill or tent with foil to help the cheese melt. If you're making double cheeseburgers (which my family loves), use 2 slices per burger. The residual heat will melt it beautifully.
- Take your toasted bun and spread a generous spoonful of your special burger sauce on the bottom half. Layer 2 lettuce leaves, then a patty with melted cheese, then a slice or two of tomato, followed by a small handful of onion rings and a few slices of pickle. Top with the other half of the bun. Serve immediately with ketchup, mustard, and additional condiments on the side so everyone can customize their burger.
FAQs
Can I use 93/7 ground beef to make these burgers healthier?
You can, but I won’t recommend it. While 93/7 ground beef is leaner, it produces burgers that are significantly drier and tougher. The fat isn’t the enemy here—the flavor and texture it provides is essential. If you’re concerned about fat intake, enjoy one burger instead of two, or balance your meal with plenty of vegetables. Quality over quantity is my philosophy in nutrition.
What’s the best way to tell when my burger is cooked to the right doneness?
Use an instant-read meat thermometer inserted horizontally into the center of the patty without touching the grill. For food safety with ground beef, aim for 160°F (71°C) internal temperature. If you prefer medium or medium-rare, check at 155°F, but understand this carries slightly higher food safety risk. I personally recommend the 160°F mark, especially when cooking for families and children.
Why does my burger shrink so much during cooking?
Shrinkage happens because heat causes the protein fibers to contract. Three things minimize it: using meat with adequate fat content (at least 20%), creating that dent in the middle of the patty to compensate for the contraction, and not pressing down on the burger while it cooks. Even with all three strategies, expect some shrinkage—it’s natural.
Can I cook these burgers in my oven?
Yes, though you won’t get the same beautiful crust. Preheat your oven to 400°F (200°C). Place patties on a lined baking sheet and bake for 12-15 minutes until the internal temperature reaches 160°F. You can broil the top for 1-2 minutes at the end to brown them slightly, but watch carefully so they don’t burn.
How far ahead can I make my special burger sauce?
Make it up to 3 days ahead. The flavors actually meld and improve as it sits. Store it in an airtight container in the refrigerator. It’s also perfect for making ahead on Sunday for the week—use it on sandwiches, with fries, or as a condiment for other meals.
More Leftover Transformation Recipes
- Smashed Cheeseburger Recipe – A thinner, crispier take on the classic using the same high-quality beef
- Pizza Bread Recipe – Use leftover cheeseburger patties crumbled into pizza sauce for a fun twist
- Best Mac and Cheese Recipe – A comforting side that pairs perfectly with burger night
- this weekend breakfast – For the morning after burger night, a fun breakfast for your family
Final Thoughts: The Joy of Simple, Done Well
There’s something deeply satisfying about making something so universally loved, and making it perfectly. This cheeseburger recipe represents exactly what I believe about feeding families: use quality ingredients, understand the science behind what you’re doing, and respect the process.
My kids have grown up eating these burgers. What started as my frustrated quest to recreate our favorite diner burger has become a family tradition. Now they can form the patties themselves (though they still let me handle the cooking). It’s become not just a meal, but a moment we share together.
The beauty of this recipe is its simplicity. You’re not fighting against complicated instructions or obscure ingredients. You’re working with straightforward components and proven techniques that guarantee results. That’s exactly what busy families need—recipes that deliver excellence without drama.
Whether this is your first time making homemade cheeseburgers or your hundredth, I hope this guide gives you confidence and new techniques to elevate your burger game. Happy Cooking!