This post contains affiliate links. As an Amazon Associate I earn from qualifying purchases.
This honey butter carrots recipe doesn’t just taste incredible—it stops people in their tracks. The moment those golden, caramelized carrots hit the table with their glossy glaze catching the light, everyone notices. I’ve watched countless families transform their weeknight dinners with this one simple dish, and I’m thrilled to share exactly how you can too.
As a registered dietitian working with families across Chicago for over a decade, I’ve learned that the most nourishing meals are the ones people actually eat. This recipe proves that wholesome food doesn’t require complicated techniques or hours in the kitchen. In fact, most of my clients tell me this becomes their go-to side dish within the first week of trying it.
The Most Beautiful Honey Butter Carrots Recipe You’ll Ever Make (And It’s Easier Than It Looks)
I remember the exact moment this dish changed everything for our family dinner routine. My oldest daughter had been picking at her vegetables for months, and I was running out of creative ideas. One Tuesday evening, I tossed together these simple ingredients on a whim—and she asked for seconds before I’d even sat down. But here’s what really stuck with me: my husband noticed the carrots first. The way they gleamed with that amber glaze, arranged in careful diagonal slices, made the entire plate look restaurant-quality.
That’s when I realized something important. Kids eat with their eyes first. When vegetables look beautiful, when they’re presented with care, they suddenly seem exciting instead of like an obligation. These honey butter carrots proved that lesson perfectly. Now, eight years later, I’ve made this recipe hundreds of times for families at different life stages, and the response is always the same: “How did you make carrots look this good?”
The Visual Elements That Make This Dish Stunning
Understanding what makes this dish visually captivating helps you replicate that magic every single time. It’s not about fancy plating techniques or special equipment. It’s about recognizing how simple ingredients create something that naturally stops conversations at the dinner table.
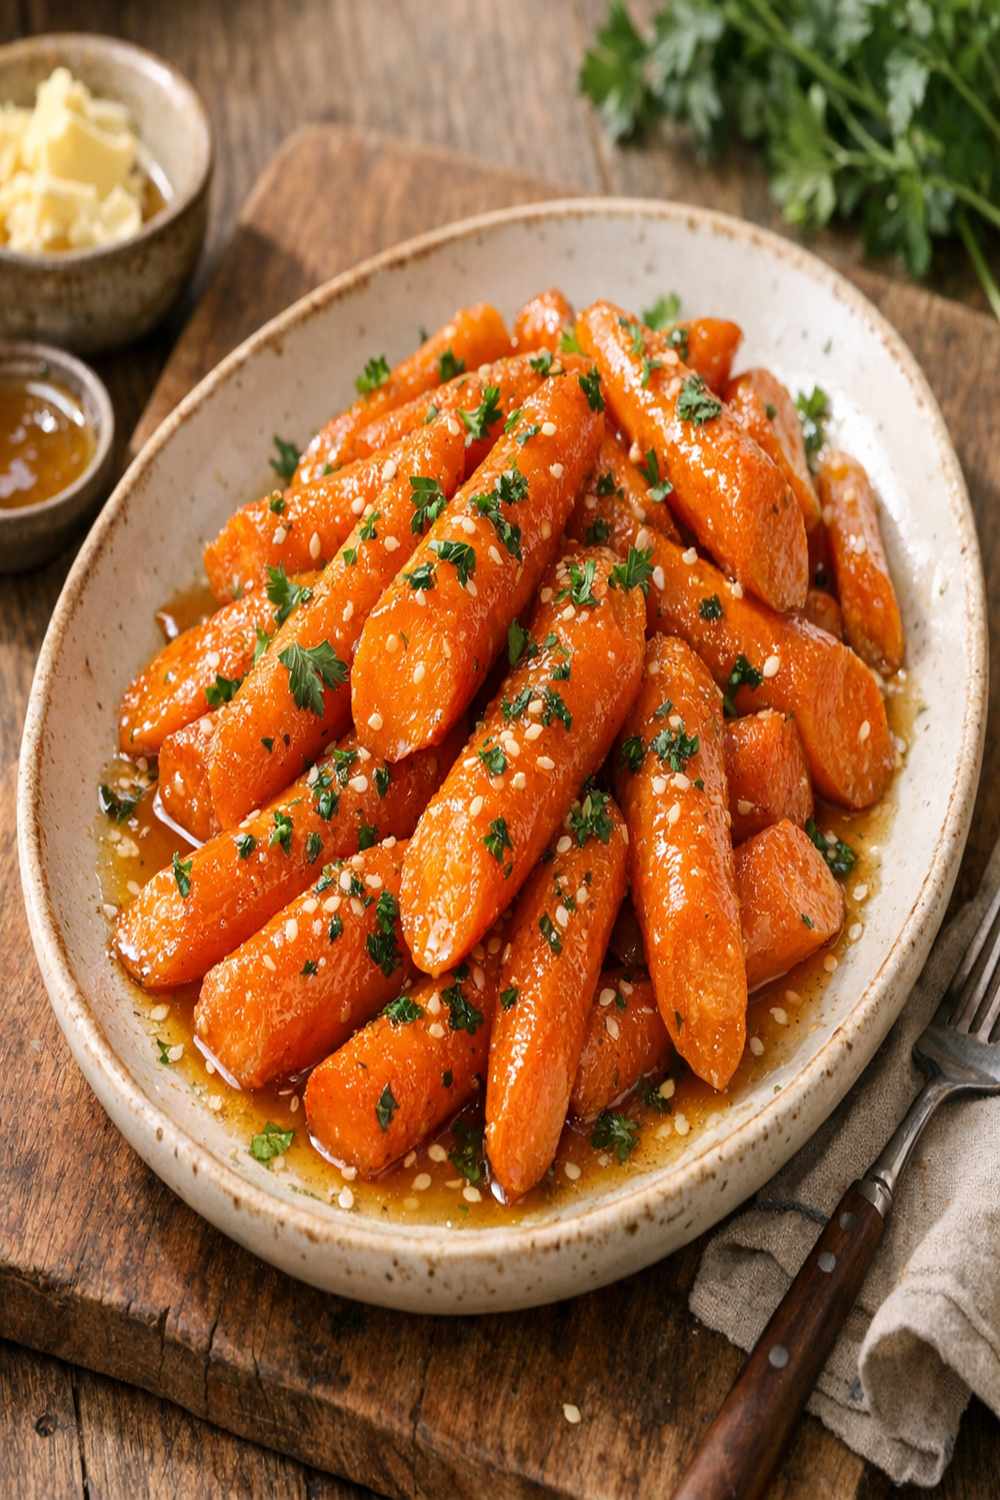
- Deep amber and burnt-orange tones—The honey caramelizes in the pan, creating rich, glossy color that looks more impressive than any food dye could achieve. Those color variations signal to your brain that something delicious is happening.
- Glossy, jewel-like finish—The butter creates that signature shine that catches light and photographs beautifully. This texture contrast against the natural matte of the raw carrot interior is what makes people lean in for a closer look.
- Diagonal cuts that create height and movement—Slicing carrots on an angle instead of straight cuts instantly elevates the presentation. Those angled pieces arrange naturally with visual interest, making the dish feel intentional and restaurant-worthy.
Choosing Ingredients for Maximum Visual Impact
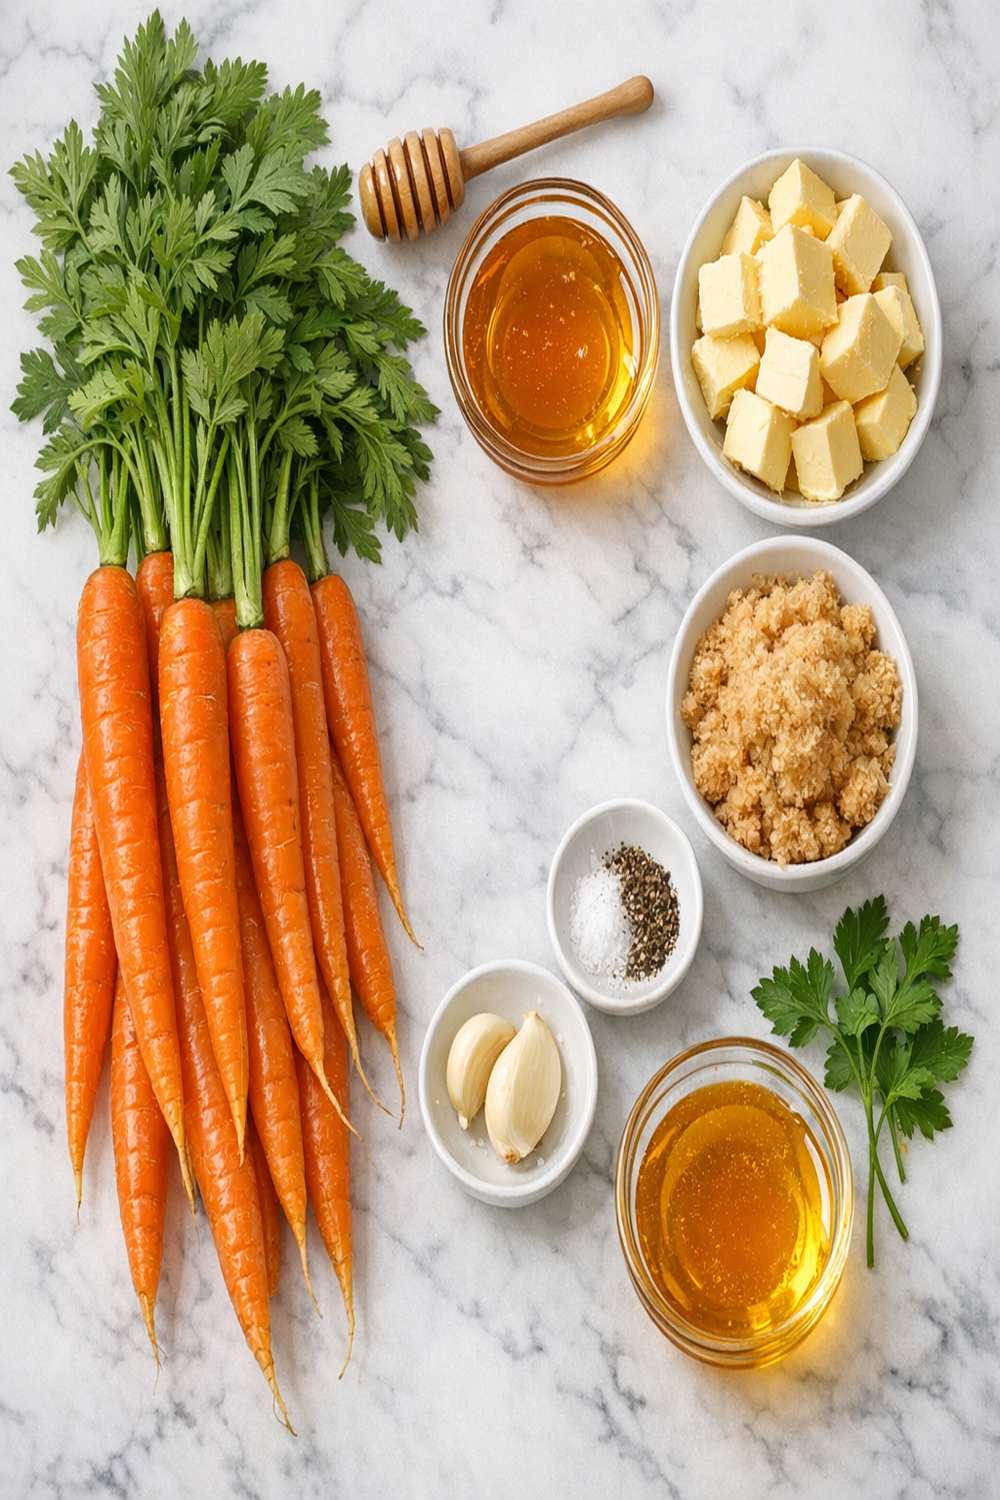
Every ingredient in this recipe earns its place by contributing to both flavor and visual appeal. I’ve deliberately selected items that work together to create that stunning presentation while keeping the ingredient list short enough for busy weeknights. These are ingredients you likely already have in your kitchen, which means you can make this tonight.
- 1 pound fresh carrots, medium-sized (the ones that slice beautifully without being too thin or too thick)
- 1 teaspoon fine sea salt, plus more to taste (essential for balancing sweetness and bringing out natural carrot flavor)
- ¼ teaspoon black pepper, freshly ground (the visual specks add sophistication to the final presentation)
- 1 fresh lemon (for zest, which adds brightness and prevents the dish from feeling one-dimensional)
- 3 to 4 tablespoons raw honey (darker varieties create deeper caramel notes than lighter honeys)
- 4 tablespoons unsalted butter (the golden color matters—it contributes to that gorgeous amber tone)
Recipe yield: This recipe serves 4 to 6 people as a side dish, making it perfect for family dinners or bringing to potlucks.
How to Make Picture-Perfect Honey Butter Carrots Recipe
I’m going to walk you through each step with the mindset that we’re creating edible art. You’re not just cooking—you’re building something that tastes as good as it looks. Pay attention to the moments that affect your final presentation, and I’ve highlighted those specifically so you know where they matter most.
Step 1: Prepare Your Carrots for Maximum Visual Impact
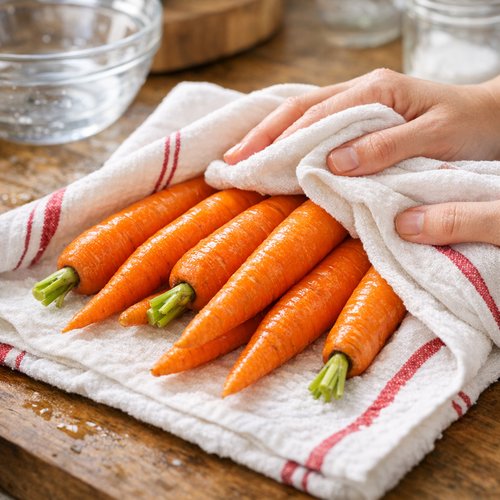
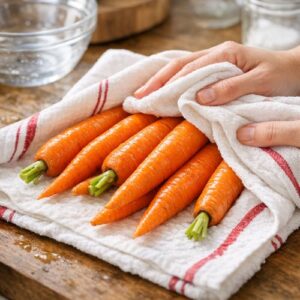
Rinse your carrots under cool water and pat them completely dry with a clean kitchen towel. Moisture is the enemy of beautiful caramelization, so this step genuinely matters. Using a sharp vegetable peeler, remove the thin outer layer—you want to expose that bright orange interior while keeping the carrots whole.
Now comes the moment that transforms this from ordinary to impressive: slice each carrot on a diagonal at roughly 45-degree angle, aiming for pieces about ¼-inch thick. This diagonal cut does three things simultaneously. First, it increases the surface area for caramelization, which means more of that gorgeous golden-brown color. Second, the angled shape naturally creates visual height and movement on the plate. Third, it signals to your family that you’ve put thought into presentation, which somehow makes vegetables taste better.
Step 2: Create Your Cooking Base
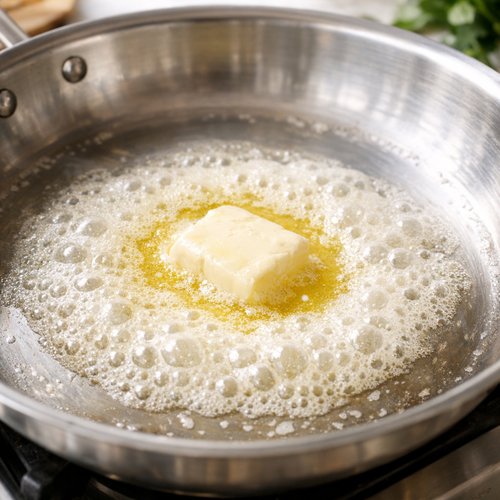
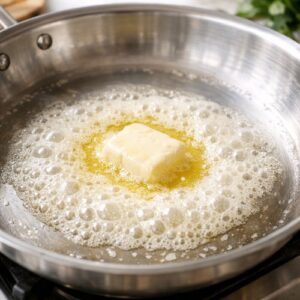
Place a large skillet over medium-high heat and add your butter. Watch closely as it melts—you want it foaming gently, not browning. Once the foam subsides and you see that golden liquid, you’re ready for the next step. This moment matters because you’re creating the perfect temperature for caramelization without burning.
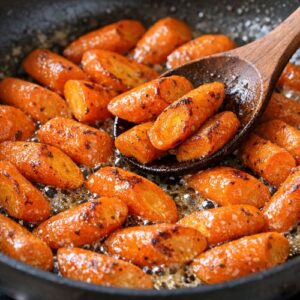
Immediately add all your prepared carrot slices to the pan. You want them in a single layer if possible, though some overlap is fine. Resist the urge to stir immediately—let them sit undisturbed for 2 to 3 minutes. This contact time with the hot pan is what creates those gorgeous caramelized edges that make people ask for the recipe.
Step 3: Build the Glaze
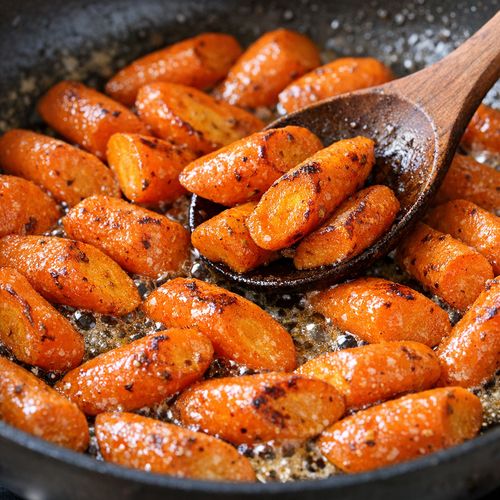
After those first few minutes, give the carrots a gentle stir. They should have some golden-brown color developing on the edges—exactly what you want. Continue cooking for another 3 to 4 minutes, stirring occasionally, until the carrots are beginning to soften. Now pour in your honey, distributing it evenly across the pan.
The honey will immediately start creating that amber glaze as it combines with the butter and carrot juices. Keep stirring gently to coat every piece. The kitchen will smell absolutely incredible at this point—that sweet, buttery, slightly caramelized aroma is the sign that everything’s working perfectly. This is the moment I often have family members wandering into the kitchen asking what smells so good.
Step 4: Season with Intention
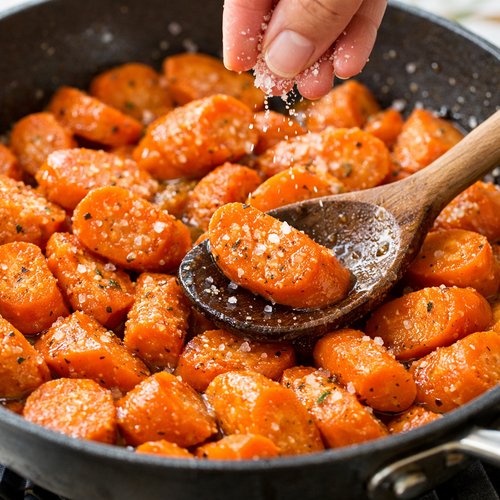
Sprinkle your salt over the carrots and stir to distribute evenly. Taste a piece—this is crucial for getting the seasoning right. You want to taste the carrot’s natural sweetness balanced with salt and honey. The salt prevents the dish from tasting one-dimensional. If it needs more, add another pinch and taste again. Remember that you can always add more salt, but you can’t remove it.
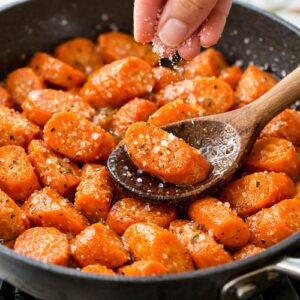
Grind fresh black pepper over the top—you’ll see those little specks settle onto the carrots, and they add visual sophistication. Continue cooking for 2 to 3 more minutes until the carrots are fork-tender but still holding their shape. You’re aiming for that sweet spot where they’re soft enough to bite through easily but firm enough to maintain their beautiful diagonal shape on the plate.
Step 5: The Finishing Touch That Elevates Everything
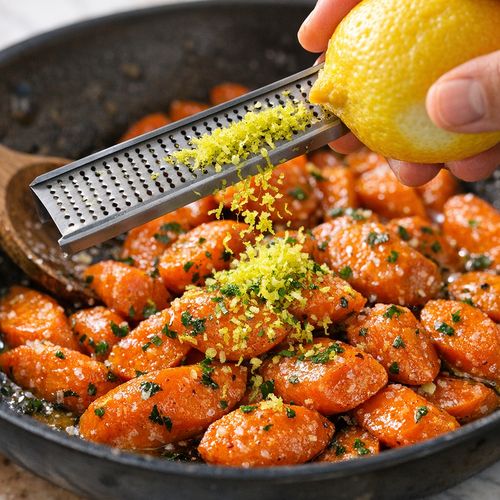
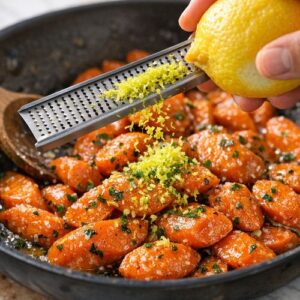
Remove the pan from heat and zest your lemon directly over the carrots, aiming for about 1 tablespoon of zest. This bright yellow-green color against the deep amber carrots is visually striking, but more importantly, that lemon zest adds brightness that balances the richness of the butter and honey. It prevents the dish from feeling heavy, and nutritionally, you’re adding vitamin C and antioxidants that support nutrient absorption.
Give everything one final gentle stir to distribute the zest. If any liquid remains in the pan (called the pan sauce), that’s liquid gold—it contains all the concentrated flavor. Leave it there for plating. The carrots should look glossy, golden, and absolutely beautiful.
The Plating Masterclass
This is where restaurant-quality presentation happens, and I promise it’s simpler than you might think. The goal is creating a dish that looks intentional and inviting, which encourages people to actually eat their vegetables.
- Arrange carrots in a slight lean—Rather than piling them flat, tilt the diagonal slices so they lean slightly to one side. This creates height and visual interest. Overlap them just slightly, showing off those beautiful caramelized edges. This technique works for everything from weeknight dinners to company meals.
- Pour the pan sauce strategically—Use a small spoon to drizzle that golden honey-butter sauce around the carrots rather than drowning them. This keeps the presentation clean while ensuring every bite has that glossy coating. The sauce pooling around the vegetables photographs beautifully and signals richness.
- Garnish with fresh zest at the last moment—Wait until just before serving to add more lemon zest (or a tiny pinch of fresh thyme if you have it). This prevents the zest from absorbing into the glaze and maintains that bright color contrast.
Photography Tips for This Dish
Whether you’re capturing this for Instagram or simply wanting a nice photo for your family recipe collection, these tips make all the difference.
- Natural light from the side is your best friend—That glossy glaze absolutely needs light to shine. Position your dish near a window with soft, indirect light hitting it from the side. This creates that jewel-like quality that makes people stop scrolling and pay attention.
- Shoot straight-on or from a 45-degree angle—These angles showcase the height of those diagonal slices and let the glaze catch light. The depth becomes visible, and the dish suddenly looks three-dimensional rather than flat.
- Include context with complementary colors—Place the carrots on a neutral plate or wooden surface with a protein nearby (think roasted chicken or the Best Meatloaf Crock Pot Recipe). That context tells a story about the complete meal while making the carrots look even more vibrant by contrast.
Seasonal Color Variations
One of my favorite things about this recipe is how easily it adapts throughout the year. The core technique stays identical, but you can shift the visual palette and flavor profile by changing garnishes and small ingredient variations.
Spring version: Add fresh mint leaves as garnish and include a tiny pinch of ground cardamom with the honey. The mint’s green creates beautiful color contrast against the amber carrots, and cardamom adds subtle warmth. This feels lighter and brighter, perfect for spring menus.
Summer version: Use orange zest instead of lemon for a warmer, sunnier appearance. Add a small pinch of white pepper instead of black pepper—it’s visually subtle but creates a fresher flavor profile. Consider serving on white or cream-colored plates to maximize the glow of the glaze.
Fall version: This is where you embrace the deepest colors. Use darker honey varieties (buckwheat or chestnut honey), and garnish with crushed candied ginger or a sprinkle of toasted sesame seeds. The copper and bronze tones feel absolutely seasonal. Add a tiny pinch of cinnamon or nutmeg to the glaze for that autumn warmth.
Winter version: Keep the presentation clean and simple. Use classic lemon zest but add fresh thyme for herbaceous notes. The bright yellow-green zest against deep amber feels festive and aligned with winter holiday tables. These carrots pair beautifully with rich, warm mains during colder months.
Can I Store Honey Butter Carrots Recipe?
Yes! This is actually one of my favorite make-ahead side dishes because it reheats beautifully and actually develops deeper flavor as it sits. Let me break down storage by timeframe so you know exactly what to expect.
Refrigerator storage (3 to 4 days): Let the carrots cool completely, then transfer to an airtight container. The glaze will firm up slightly as it cools—this is normal and actually helps with presentation when you reheat. To reheat, place in a skillet over medium-low heat with a splash of water, stirring gently until warmed through and the glaze loosens up again. This takes about 5 to 7 minutes.
Make-ahead tip for entertaining: I often prepare these carrots up through Step 4 the morning of dinner, then store them in the refrigerator. About 15 minutes before serving, I reheat gently in the skillet, add the lemon zest at the last moment, and plate. This cuts down on last-minute cooking stress while ensuring everything tastes perfectly fresh.
Freezer storage (up to 2 months): These do freeze well, though the texture becomes slightly softer. I recommend freezing in a shallow container so reheating is easier. Thaw in the refrigerator overnight, then reheat gently. Honestly, for this recipe, I prefer refrigerator storage because the texture stays perfect and reheating is so quick anyway.
Important note about presentation: If you’re reheating for guests, reheat without the lemon zest, then add fresh zest just before serving. This keeps that bright color pop vibrant rather than letting it dull into the glaze.
Expert’s Nutritional Tip
Here’s something I share with every family in my practice: the color you see in these carrots is directly connected to their nutritional powerhouse status. That deep orange tells you these carrots are absolutely loaded with beta-carotene, which your body converts to vitamin A. Vitamin A supports eye health, immune function, and skin health—exactly what growing kids need.
What makes this recipe particularly smart nutritionally is the combination of fat (butter) with the beta-carotene. Beta-carotene is fat-soluble, meaning your body absorbs it much more effectively when paired with dietary fat. That’s not a license to load up on butter, but it’s why the butter in this recipe isn’t just about taste—it’s actually enhancing nutrient absorption. The honey adds a small amount of trace minerals, and the lemon zest boosts vitamin C, which further supports nutrient uptake.
According to USDA nutritional data, one serving (approximately ¾ cup) contains roughly 95 calories, with minimal protein but excellent micronutrient density. That’s a vegetable dish that actually contributes meaningfully to daily nutrient intake while tasting like something people choose to eat rather than something they tolerate.
Make-Ahead Guide for Busy Families
As a mother and dietitian juggling school runs and work, I’ve built my entire cooking philosophy around making life easier. This recipe is one of my favorite make-ahead dishes because you can break it into strategic steps.
Option 1: Prep the morning of, cook at dinner time—Wash and peel your carrots in the morning, then slice them diagonally. Store in a container with a damp paper towel to prevent them from drying out. At dinnertime, you literally just need to follow Steps 2-5. Total active cooking time: 12 minutes.
Option 2: Full preparation the day before—Make these carrots completely through Step 5 the night before. Cool them fully, then refrigerate. The next day, reheat gently in the same skillet over medium-low heat for 5 to 7 minutes, stirring occasionally. The carrots will soften very slightly and the flavors will actually deepen—something that happens as the honey and butter meld overnight. Add fresh lemon zest at the last moment for brightness.
Option 3: Batch cooking for the week—On Sunday, I often make a double or triple batch of these carrots. They reheat so beautifully that Wednesday-night me is incredibly grateful to Sunday-night me. Store in individual containers and grab one whenever you need an impressive side dish. This works perfectly on nights when you’re serving something like Best Mac And Cheese Recipe, adding vegetable nutrition to a comfort food meal.
Freezer note for meal prep: While I prefer fresh or refrigerated for the best texture, these do freeze well in a flat container. Thaw overnight in the refrigerator, reheat, and serve. Plan these for family meals rather than entertaining, as the texture is slightly softer after freezing.
Nutrition Information
Per serving (½ cup, based on 6 servings total):
- Calories: 95
- Total Fat: 7g
- Saturated Fat: 4g
- Cholesterol: 20mg
- Sodium: 280mg
- Total Carbohydrates: 9g
- Dietary Fiber: 2g
- Sugars: 6g
- Protein: 1g
- Vitamin A: 184% of Daily Value
- Vitamin C: 12% of Daily Value
- Calcium: 3% of Daily Value
- Iron: 2% of Daily Value
According to USDA data, carrots are among the most nutrient-dense vegetables available. The standout stat here is vitamin A content—that deep orange color means you’re getting substantial amounts of this essential nutrient in a genuinely delicious form. That’s the kind of win every parent wants: nutrition that tastes like dessert but counts as vegetables.
Common Mistakes to Avoid
After teaching families this recipe for years, I’ve noticed certain patterns that prevent people from getting perfect results. Let me save you some trial and error.
Mistake 1: Cutting carrots too thin—When carrots are sliced thinner than ¼-inch, they soften too quickly and lose their beautiful shape during cooking. They also don’t caramelize properly because there’s less surface area to develop that gorgeous color. Aim for ¼-inch thickness, and yes, it matters. Thicker carrots stay firmer and more visually impressive.
Mistake 2: Stirring too early—Resist the urge to stir immediately after adding carrots to the hot pan. That first few minutes of undisturbed contact is when caramelization happens. I see people constantly turning and stirring, which prevents that beautiful color development. Be patient for the first 2 to 3 minutes, then stir gently.
Mistake 3: Using low-quality honey—The honey is 30% of this recipe’s flavor profile and 100% of its caramel color. Ultra-processed, thin honey doesn’t caramelize the same way raw or minimally processed honey does. Spend the extra dollar on better honey—your taste buds will thank you, and visually, the glaze will be deeper and more gorgeous.
Mistake 4: Skipping the lemon zest or adding it too early—The lemon zest does two things: it adds brightness that prevents one-dimensional sweetness, and it adds visual contrast. When people skip this step, the dish tastes flat. When they add zest too early, it soaks into the glaze and loses that bright pop. Always, always zest at the very last moment.
What to Serve Alongside for a Complete Visual Spread
These honey butter carrots are stunning on their own, but they’re even more impressive when you’re thinking about the complete plate presentation. I’ve found certain dishes create visual harmony when served together, making your entire dinner look restaurant-quality.
Protein options that complement perfectly: Roasted chicken with crispy skin creates color contrast—the golden-brown protein against the amber carrots. The Best Meatloaf Crock Pot Recipe is another beautiful pairing because the rich brown of the meatloaf creates depth. If you’re doing seafood, simply prepared salmon with lemon brings out the complementary citrus notes from the carrot zest.
Grain options that add height and texture: Quinoa or wild rice adds visual interest through texture variation. The neutral tones of grains keep the focus on the gorgeous carrots rather than competing for attention. Pizza Bread Recipe works wonderfully for more casual family meals, adding textural contrast and carbs.
Additional vegetable options: Sautéed spinach or kale creates deep green contrast that makes the orange carrots pop even more. Brussels sprouts roasted until crispy add another texture element. Honestly, these carrots work with nearly any vegetable because their bright color complements almost everything.
Complete meal idea: I frequently serve these carrots with herb-roasted chicken breast and quinoa, all arranged on a large wooden board for family-style serving. The color distribution across that board is naturally balanced—warm golds from the carrots, white and pale yellow from the quinoa, golden from the chicken skin, and green from fresh herbs. Everyone wants to photograph it before eating.

Honey Butter Carrots Recipe
Ingredients
Method
- Rinse your carrots under cool water and pat them completely dry with a clean kitchen towel. Moisture is the enemy of beautiful caramelization, so this step genuinely matters. Using a sharp vegetable peeler, remove the thin outer layer—you want to expose that bright orange interior while keeping the carrots whole. Now comes the moment that transforms this from ordinary to impressive: slice each carrot on a diagonal at roughly 45-degree angle, aiming for pieces about ¼-inch thick. This diagonal cut does three things simultaneously. First, it increases the surface area for caramelization, which means more of that gorgeous golden-brown color. Second, the angled shape naturally creates visual height and movement on the plate. Third, it signals to your family that you've put thought into presentation, which somehow makes vegetables taste better.
- Place a large skillet over medium-high heat and add your butter. Watch closely as it melts—you want it foaming gently, not browning. Once the foam subsides and you see that golden liquid, you're ready for the next step. This moment matters because you're creating the perfect temperature for caramelization without burning. Immediately add all your prepared carrot slices to the pan. You want them in a single layer if possible, though some overlap is fine. Resist the urge to stir immediately—let them sit undisturbed for 2 to 3 minutes. This contact time with the hot pan is what creates those gorgeous caramelized edges that make people ask for the recipe.
- After those first few minutes, give the carrots a gentle stir. They should have some golden-brown color developing on the edges—exactly what you want. Continue cooking for another 3 to 4 minutes, stirring occasionally, until the carrots are beginning to soften. Now pour in your honey, distributing it evenly across the pan. The honey will immediately start creating that amber glaze as it combines with the butter and carrot juices. Keep stirring gently to coat every piece. The kitchen will smell absolutely incredible at this point—that sweet, buttery, slightly caramelized aroma is the sign that everything's working perfectly. This is the moment I often have family members wandering into the kitchen asking what smells so good.
- Sprinkle your salt over the carrots and stir to distribute evenly. Taste a piece—this is crucial for getting the seasoning right. You want to taste the carrot's natural sweetness balanced with salt and honey. The salt prevents the dish from tasting one-dimensional. If it needs more, add another pinch and taste again. Remember that you can always add more salt, but you can't remove it. Grind fresh black pepper over the top—you'll see those little specks settle onto the carrots, and they add visual sophistication. Continue cooking for 2 to 3 more minutes until the carrots are fork-tender but still holding their shape. You're aiming for that sweet spot where they're soft enough to bite through easily but firm enough to maintain their beautiful diagonal shape on the plate.
- Remove the pan from heat and zest your lemon directly over the carrots, aiming for about 1 tablespoon of zest. This bright yellow-green color against the deep amber carrots is visually striking, but more importantly, that lemon zest adds brightness that balances the richness of the butter and honey. It prevents the dish from feeling heavy, and nutritionally, you're adding vitamin C and antioxidants that support nutrient absorption. Give everything one final gentle stir to distribute the zest. If any liquid remains in the pan (called the pan sauce), that's liquid gold—it contains all the concentrated flavor. Leave it there for plating. The carrots should look glossy, golden, and absolutely beautiful.
Notes
FAQs
Can I use baby carrots instead of regular carrots?
Technically yes, but I don’t recommend it for the best results. Baby carrots don’t slice at that perfect diagonal angle, and they tend to soften unevenly. They’re also often waxed to maintain moisture, which can interfere with caramelization. If you only have baby carrots available, halve them lengthwise and proceed with the recipe—you’ll still get good flavor, just less dramatic presentation.
What if I don’t have honey? Can I use another sweetener?
Honey creates specific caramel notes that maple syrup or agave don’t quite replicate. That said, maple syrup works as a substitute and adds beautiful autumn notes—use the same amount. Brown sugar also works but creates a different texture since it’s granulated. Whatever sweetener you choose, taste as you go because sweetness levels vary widely. Skip artificial sweeteners entirely—they don’t caramelize properly and will affect the entire flavor profile.
Why do my carrots look pale instead of golden?
This usually means the pan temperature was too low. Make sure your butter is foaming when you add the carrots, and don’t skip that initial 2-3 minute rest period. The carrots need direct contact with a hot surface to develop that color. Also check your honey quality—pale honey doesn’t caramelize the same way. If it happens once, adjust temperature next time and you’ll see the difference immediately.
Can I add other vegetables to this recipe?
Parsnips work beautifully sliced the same way—they add creamy sweetness. Small whole pearl onions are stunning mixed in. Brussels sprouts halved and cooked separately, then tossed together at the end, create textural variety. However, avoid adding high-water vegetables like zucchini or summer squash—they release water that dilutes the glaze. Keep it to root vegetables for best results.
How do I store leftovers if they’re getting watery?
Excess liquid usually means the carrots are releasing moisture as they cool. Store them in a shallow container rather than a deep one—this reduces moisture absorption. When reheating, strain off excess liquid before placing the pan on the stove, then add back just enough to create that beautiful glaze again. The carrots themselves should stay perfect; it’s just about managing the liquid.
More Visually Stunning Recipes
- Frozen Bellini Recipe—A show-stopping dessert that photographs beautifully and impresses guests effortlessly
- my go-to banana bread—Golden-brown comfort food that fills your home with incredible aroma
- this cozy soup—A rustic, hearty dish that’s as beautiful as it is nourishing
- Bacon Smokies Recipe—Crowd-pleasing appetizers with caramelized, glossy appeal
There’s something magical about feeding both eyes and souls simultaneously. That’s what these honey butter carrots do. They’re proof that simple ingredients, thoughtful technique, and genuine care create meals that matter. Your family will taste that care in every bite, and they’ll remember it long after the meal ends.
Start with these carrots this week. Watch how people react when they see them on the table. Notice how your kids suddenly become interested in vegetables. Experience the joy of knowing you’ve created something beautiful and nourishing with your own hands. That’s what cooking is really about—love made visible on a plate.
Happy Cooking!