This post contains affiliate links. As an Amazon Associate I earn from qualifying purchases.
This golden garlic butter rice is my secret weapon on nights when dinner needs to come together fast. It pairs beautifully with everything from Best Sloppy Joes Recipe to roasted chicken, and honestly, it turns ordinary weeknight meals into something that feels a little more special. My kids actually ask for seconds, which tells you everything you need to know about how good this tastes.
How a Busy Mom Discovered the Magic of Garlic Butter Rice
I’ll never forget the Tuesday night when my oldest came home with a surprise school project due the next morning, my youngest had soccer practice, and I had exactly thirty minutes to get dinner on the table. I opened my pantry, grabbed rice, butter, and garlic—ingredients I always keep stocked—and created this recipe out of pure necessity.
My husband took one bite and said, “This is restaurant-quality. How did you do this?” The truth? I didn’t overcomplicate it. I simply infused plain rice with golden, crispy garlic and rich butter, then let it rest so every grain absorbed all that delicious flavor. That night, I realized that simple doesn’t have to mean boring, and that sometimes the best solutions come when you’re pressed for time.
Over the past decade working with families, I’ve learned that the meals that stick around are the ones that work with your real life, not against it. This recipe has become a staple in hundreds of households I’ve worked with, and I’m thrilled to share exactly how to make it.
What is Garlic Butter Rice?
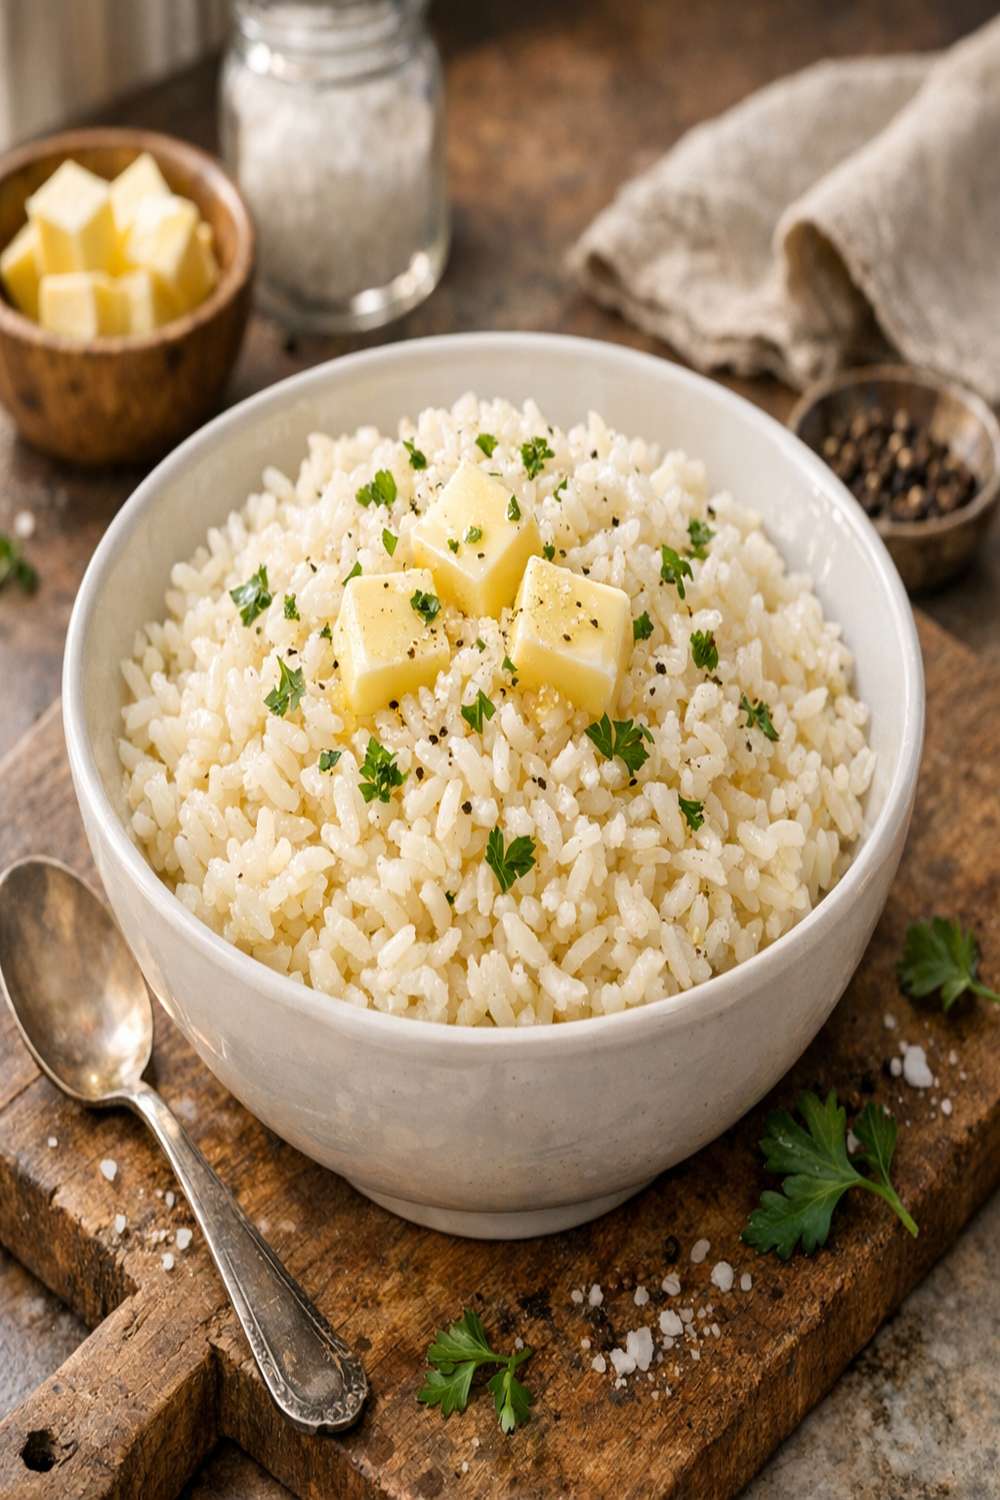
Garlic butter rice is a simple yet elegant side dish that transforms basic white rice into something special. The technique involves toasting garlic in oil until it becomes crispy and golden, then using that infused oil along with rich butter to coat each grain of rice before cooking it in chicken broth.
This cooking method dates back to traditional Asian rice preparations, where the key is respecting the rice itself. Rather than boiling it plain, we’re building flavor into every element. The crispy garlic pieces become a garnish that adds texture and intense flavor, while the butter creates a luxurious mouthfeel that makes people think you spent hours in the kitchen.
What makes this recipe so special is that it’s neither complicated nor time-consuming. It’s just smart technique applied to humble ingredients. After ten years of helping families eat better, I’ve found that this approach—respecting simple ingredients and cooking them well—is exactly what busy parents need.
Why You’ll Love This Garlic Butter Rice Recipe
- Ready in under 30 minutes – From pantry to table, including resting time. Perfect for hectic weeknights when you’re juggling multiple schedules.
- Kid-approved and family-tested – The garlic is gentle enough that even picky eaters enjoy it, especially once they taste those crispy garlic pieces.
- Works with literally everything – Serve it alongside roasted vegetables, grilled chicken, fish, or even with a simple sauce. It’s the ultimate supporting player.
- Minimal ingredients and cleanup – Just one saucepan and ingredients you probably already have in your kitchen right now.
- Professional-quality results – This tastes like something from a restaurant, which means your family feels celebrated even on busy nights.
- Makes excellent leftovers – Reheat it the next day for a quick lunch side or even as a base for fried rice with eggs and vegetables.
The Ingredients
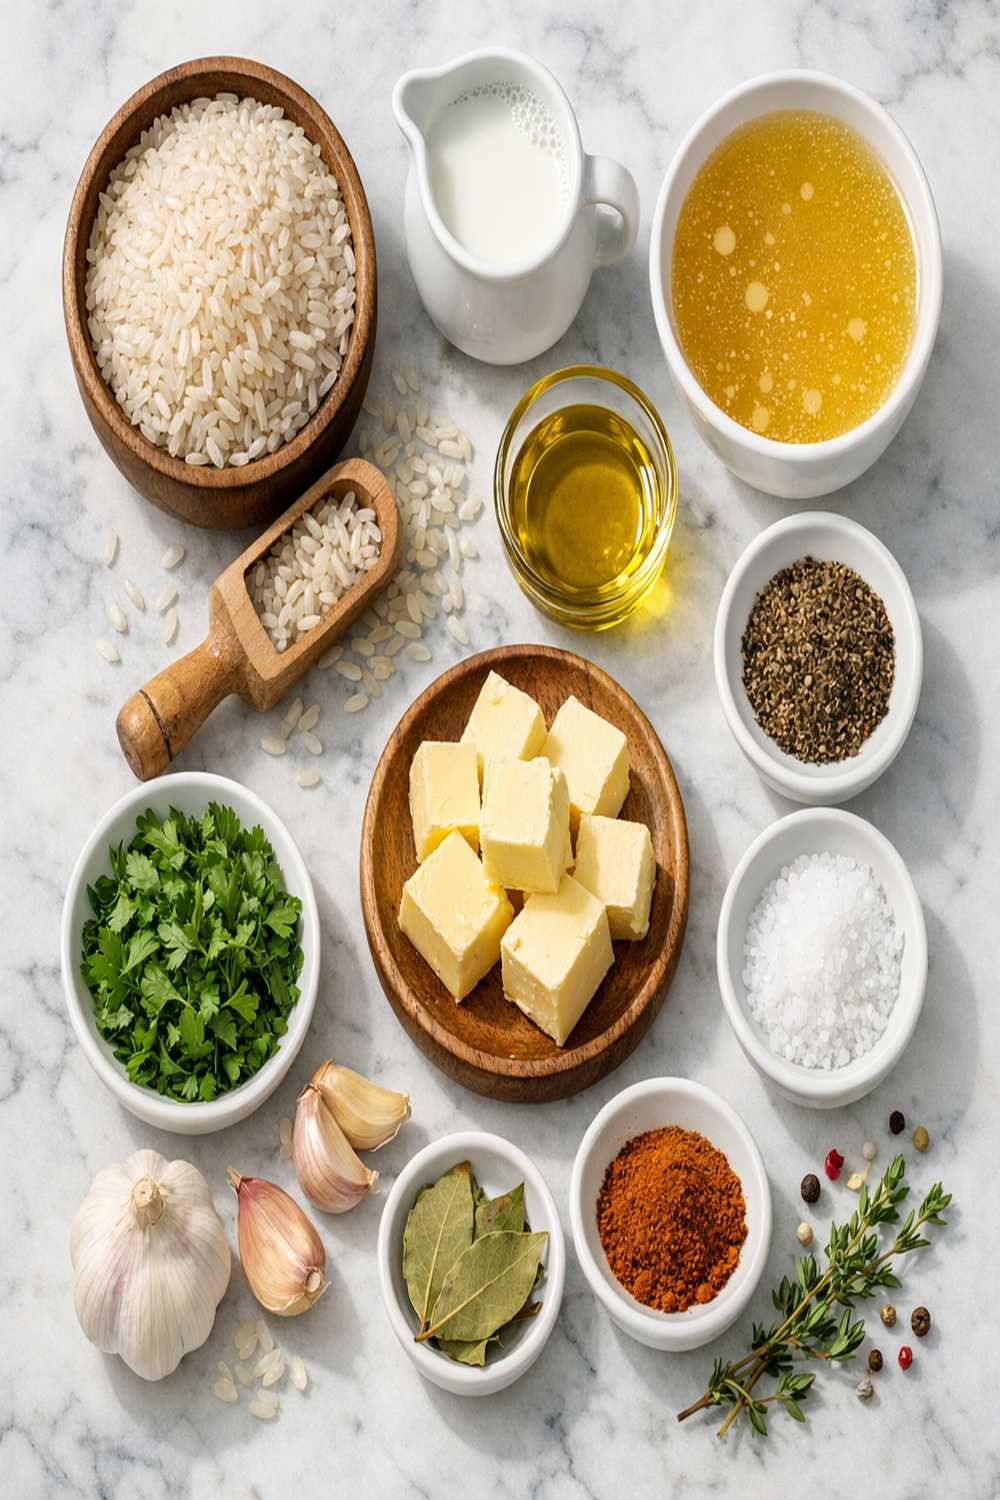
I love that this recipe uses ingredients that are probably already in your kitchen. There’s no hunting for specialty items or last-minute grocery runs. Everything here is pantry-friendly, affordable, and designed to give you maximum flavor with minimum fuss. I’ve arranged these by when you’ll use them in the cooking process, which makes it easy to stay organized as you go.
- 3 tablespoons neutral-flavored oil (vegetable, canola, or grapeseed work perfectly for toasting garlic)
- 2 ½ teaspoons minced garlic (for the second garlic layer that gives depth)
- 2 ½ cups chicken broth (low-sodium allows you to control salt yourself)
- 2 tablespoons fresh parsley (optional, but beautiful when garnishing)
- 1 ½ cups long-grain white rice (jasmine or basmati both work wonderfully)
- Sea salt and white ground pepper (to taste, for seasoning after cooking)
- 8 to 10 garlic cloves (very finely sliced so they crisp evenly)
- ½ cup sliced green onions (scallions add bright, fresh flavor at the end)
- ½ teaspoon garlic powder (optional, but adds another layer of garlic flavor)
- 4 tablespoons unsalted or salted butter (divided between cooking and finishing)
This recipe makes 4-5 servings as a side dish, or 3 generous servings if serving as a lighter main course with vegetables.
How to Make Garlic Butter Rice?
I’m going to walk you through this step by step. What I love about this method is that once you understand the technique, you can make it without thinking about it—it becomes muscle memory. Read through everything once before you start, gather your ingredients, and then follow along. You’ve got this.
Step 1: Toast Your Garlic Until Golden and Crispy
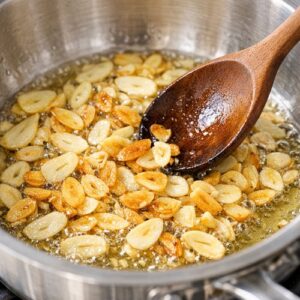
Pour your neutral oil into a large saucepan and set the heat to medium. Add your finely sliced garlic cloves, stirring constantly with a wooden spoon or heat-resistant spatula. This is not a step to ignore—constant movement is essential because garlic goes from golden to burnt in seconds.
Watch the color carefully. You’re looking for a light golden color with just a hint of amber. This should take about 3 to 4 minutes depending on your stove. The moment it starts to smell absolutely amazing and the garlic pieces look golden, immediately remove them with a slotted spoon and transfer to a paper towel-lined plate. The residual heat will continue cooking them slightly, so don’t wait for them to look perfectly brown in the pan—they’ll get there on the paper towel.
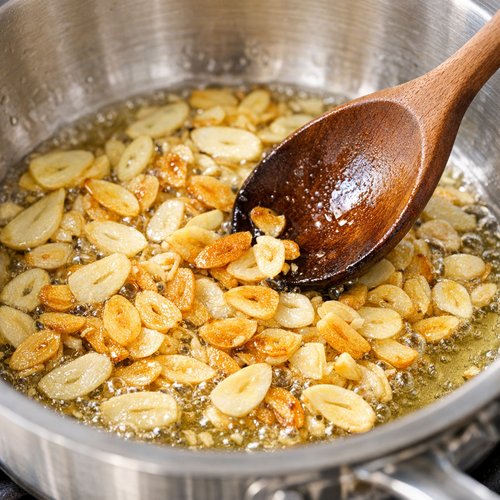
This crispy garlic is liquid gold in your kitchen. These pieces become the flavor foundation and a beautiful garnish. Once they cool completely, they’ll be perfectly crunchy.
Step 2: Create Your Garlic-Butter Base
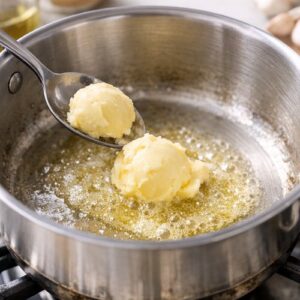
Pour off most of the oil from the saucepan, leaving just a light coating at the bottom. Return the saucepan to medium heat and add 2 tablespoons of butter. Once the butter melts and foams slightly (you’ll see it bubble gently), add your minced garlic immediately.
Stir constantly for about 1 ½ minutes, until the minced garlic turns a light golden color and the entire mixture smells intensely garlicky and warm. This second garlic layer is crucial because minced garlic infuses differently than sliced garlic. It creates a subtle, complex flavor throughout the rice rather than just a crispy garnish.
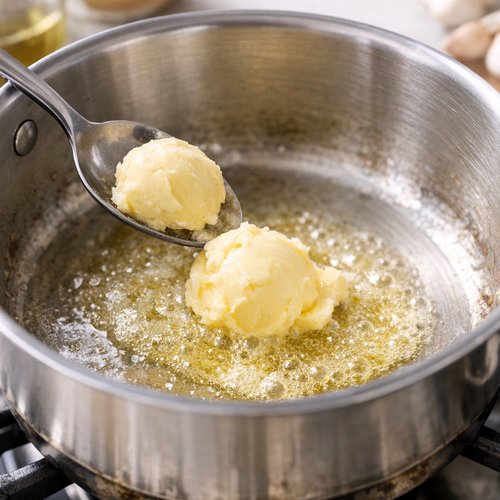
The moment you see that light golden color, you’re ready to move forward. This is where most of your rice flavor comes from, so don’t skip this step or rush it.
Step 3: Toast and Coat Your Rice
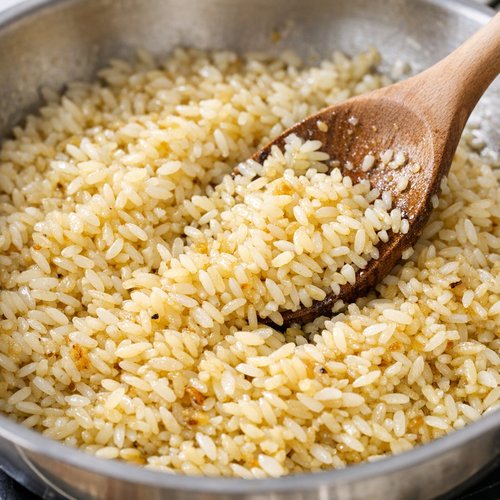
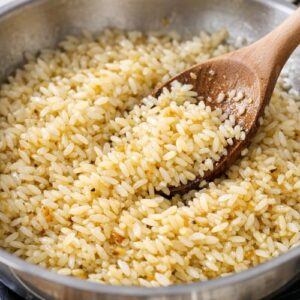
Add your rice to the garlic-butter mixture and stir well, making sure every grain gets coated in that beautiful golden oil and butter. This step is called “toasting” the rice, and it’s what prevents it from becoming mushy. Stir constantly for about 2 minutes until the rice looks slightly translucent at the edges and smells toasted and nutty.
You’ll notice the rice changes appearance—the grains become more separated and the mixture smells like you’re about to make something delicious. That’s exactly what should happen.
Step 4: Add Broth and Begin Cooking
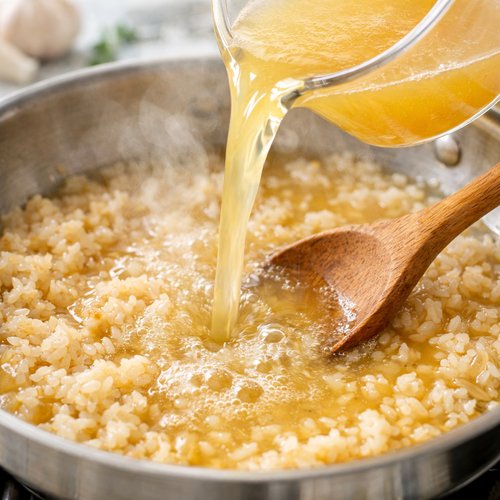
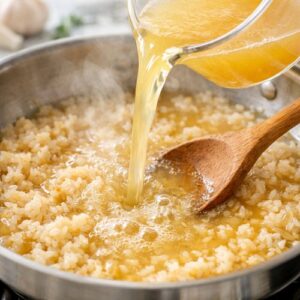
Pour in your chicken broth carefully—it will bubble and steam slightly as it hits the hot pan, which is completely normal. Stir once to combine, then place a lid on your saucepan. The lid is important because it traps steam and helps cook the rice evenly.
Bring the mixture to a boil over medium heat, watching until you see steam escaping and hearing small bubbling sounds. The moment it reaches a boil, immediately turn your heat down to medium-low. This lower temperature prevents the rice from cooking too fast on the bottom while staying dry on top.
Step 5: Cook Low and Slow Until Liquid Absorbs
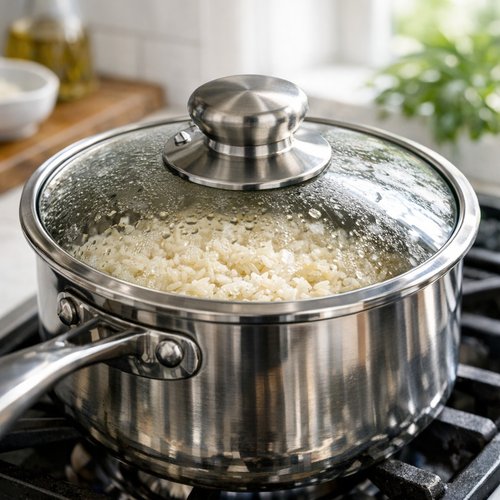
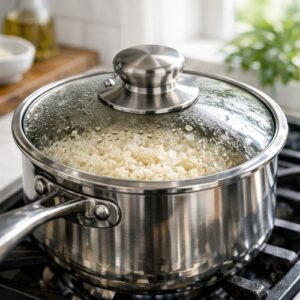
Keep the lid on your saucepan and let the rice cook undisturbed for 12 to 15 minutes. Resist the urge to lift the lid and stir—I know it’s tempting, but that releases the steam that’s cooking your rice perfectly.
After about 12 minutes, tilt the saucepan gently to check if the liquid has been absorbed. If you see any broth pooling at the bottom, give it another minute or two. The rice is done when all the liquid is gone and the grains look fluffy and separate.
Step 6: Rest Your Rice (Don’t Skip This!)
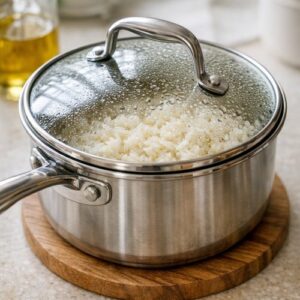
Remove the saucepan from heat but leave the lid on. Let it rest for exactly 10 minutes. I know this seems like wasted time, but this resting period is when the magic happens. The residual steam continues to gently cook the rice, and the grains become fluffy rather than clumpy.
Use this time to set your table, finish another dish, or take a breath. When you come back, your rice will be perfectly cooked.
Step 7: Fluff, Finish, and Serve
After resting, remove the lid and fluff the rice gently with a fork, breaking up any clumps and loosening the grains. Transfer to a serving bowl, then stir through the remaining 2 tablespoons of butter so it melts into the warm rice.
Top with your sliced green onions and those gorgeous crispy garlic pieces you made in Step 1. Finish with a pinch of sea salt and white pepper to taste. If you’re using the optional garlic powder and parsley, now’s the time to add them for an extra-special presentation.
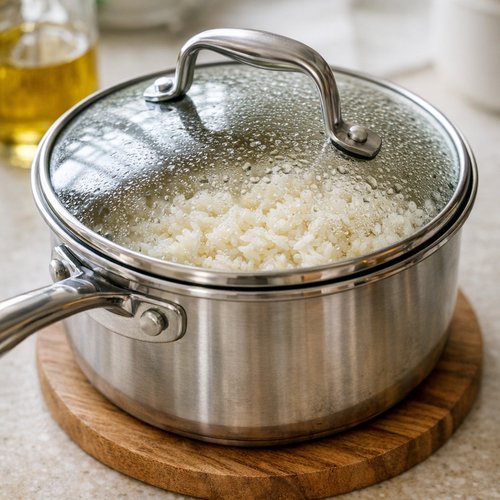
Serve immediately while everything is warm and the butter is still melting into each grain.
Expert’s Nutritional Tip
As a registered dietitian, I want to share why this recipe works so well nutritionally. The white rice provides easily digestible carbohydrates that give your body quick energy, making it perfect for active families. The butter adds fat-soluble vitamins that help your body absorb nutrients, and the garlic provides allicin, a compound with anti-inflammatory properties.
The key to making this truly nourishing? Serve it alongside protein and vegetables. The complete meal—rice plus a protein source plus vegetables—creates the nutritional balance your family needs. This is why it pairs so beautifully with everything from roasted chicken to fish or even plant-based proteins. The rice acts as the foundation that makes every other component on the plate taste better while providing sustained energy.
Tips and Tricks
- Make your garlic-slicing life easier – Keep a garlic mincer or microplane in your kitchen drawer. Finely sliced garlic is easier than you think if you use the right tool. I use a sharp knife with a rocking motion, which takes about 30 seconds.
- Brown butter instead of regular butter – For an extra-fancy version, melt your butter slowly until it turns golden brown before adding the minced garlic. This adds a nutty flavor that elevates the whole dish. Just watch carefully so it doesn’t burn.
- Use room-temperature broth – If possible, warm your chicken broth on the stove before adding it. This helps the rice cook more evenly. Cold broth from the refrigerator works fine too, but it might add 2-3 minutes to your cooking time.
- Don’t skip the paper towel step – After removing the crispy garlic, laying it on paper towels allows excess oil to drain, making it even crispier. This is the difference between soggy garlic and spectacular garlic.
- Taste before serving – Rice absorbs salt differently depending on your broth, so always taste and season to your preference. Start with a small pinch of salt and work up from there.
- Keep rice warm – If you finish this before your main dish is ready, place a clean kitchen towel over the serving bowl to keep it warm without drying it out.
Common Mistakes to Avoid
- Burning your garlic – This is the number-one mistake I see. Garlic burns fast, and burnt garlic tastes bitter and harsh. Keep the heat at medium (not high) and stir constantly. If it smells acrid rather than sweet, start over with fresh garlic.
- Lifting the lid too many times – Every time you lift the lid during cooking, you release steam that’s cooking your rice. Resist the urge to peek! Wait until minute 12 to check, and only lift the lid briefly.
- Using broth that’s too salty – If your broth is very high in sodium, your finished rice might be too salty to enjoy. Always taste before adding more salt. Low-sodium broth gives you control over the final seasoning.
- Skipping the resting period – Parents often want to skip this step to save time, but those 10 minutes make the difference between mushy rice and fluffy rice. It’s worth the wait.
Make-Ahead Guide
This recipe is best served fresh, but I’ve developed strategies for busy families who need flexibility. Here’s what I recommend based on ten years of helping families meal-prep:
Make the rice earlier in the day: Prepare through Step 5 (the cooking stage) and let it cool completely. Store in an airtight container in the refrigerator for up to 3 days. When you’re ready to serve, reheat gently on the stovetop with a splash of water or broth over medium-low heat, stirring occasionally. This takes about 5-7 minutes. Add the butter, green onions, and crispy garlic right before serving.
Prepare crispy garlic in advance: Make the crispy garlic pieces (Step 1) up to 2 days ahead and store in an airtight container at room temperature. This saves you time on busy nights since the crispiest, most time-sensitive part is already done.
Freeze for later: Cooled rice freezes beautifully for up to 2 months in a freezer-safe container. Thaw overnight in the refrigerator, then reheat gently with a bit of water or broth. The texture remains perfect.
Seasonal Variations
Spring Version: Use fresh spring garlic if you can find it (it’s milder and sweeter than regular garlic). Add fresh herbs like tarragon or chives along with the green onions. Serve alongside asparagus and lemon-herb chicken.
Summer Version: Toast the garlic and infuse the rice as usual, then finish with fresh basil instead of just parsley, and add a squeeze of fresh lemon juice. Serve cold as a rice salad with grilled vegetables and fresh herbs.
Fall Version: Brown your butter to make it nutty, and add a tiny pinch of sage or thyme when you toast the garlic. Serve alongside roasted root vegetables and roasted chicken for a cozy autumn meal.
Winter Version: Add a small pinch of white pepper and use garlic powder along with fresh garlic for deeper flavor. Finish with a sprinkle of crispy sage leaves instead of parsley. Serve alongside hearty stews or braised meats.
Can I Store Garlic Butter Rice?
Yes, and it stores beautifully! Transfer leftover rice to an airtight container and refrigerate for up to 3 days. The flavor actually deepens as it sits, making the garlic even more pronounced.
To reheat, place rice in a saucepan over medium-low heat and add a splash of water or broth (about 2-3 tablespoons per cup of rice). Stir occasionally until heated through, about 5 to 7 minutes. The rice will regain its fluffy texture. Avoid the microwave if possible, as it can make rice dry, though it works in a pinch if you cover the rice and heat in 1-minute intervals, stirring between each interval.
For freezing, let rice cool completely, transfer to a freezer-safe container, and freeze for up to 2 months. Thaw overnight in the refrigerator before reheating using the stovetop method above.
The crispy garlic garnish is best added fresh right before serving, as it loses its crispness when stored with the rice. If you’ve already mixed it in, the rice will still taste delicious—the garlic just becomes softer.
Nutrition Information
According to USDA nutrition data, each serving (approximately ¾ cup) contains roughly 280 calories, 11g of total fat, 40g of carbohydrates, 1g of dietary fiber, and 4g of protein. The fat comes primarily from butter and oil, while carbohydrates come from the white rice. This provides quick, sustained energy—perfect for active families.
White rice is naturally gluten-free and easily digestible, making it appropriate for most families and dietary needs. The butter provides fat-soluble vitamins A, D, E, and K, which are essential for bone health, immune function, and nutrient absorption. The garlic adds minimal calories while providing anti-inflammatory compounds and flavor without excess sodium.
To boost the nutritional profile, serve this rice alongside protein (chicken, fish, tofu, or legumes) and vegetables (roasted broccoli, steamed green beans, sautéed spinach, or roasted carrots). This creates a complete, balanced meal that satisfies and nourishes your family.
What Can I Serve With Garlic Butter Rice?
This rice is intentionally designed to be a supporting player on your plate, which means it pairs beautifully with almost everything. Here are my favorite combinations that I’ve tested with actual families:
- Roasted or grilled chicken – The richness of the butter complements tender, juicy chicken perfectly. Add a simple lemon sauce or keep it plain—the rice carries the meal.
- Pan-seared or baked fish – White fish (cod, halibut, tilapia) benefits from the buttery rice underneath. The garlic flavor is gentle enough not to overpower delicate fish.
- Beef or vegetable stir-fry – Serve this rice as your base for stir-fried vegetables, beef, or tofu. The butter flavor doesn’t compete with bold Asian sauces.
- Slow-cooked meats – Try it alongside Barbacoa Recipe Instant Pot or any braised meat. The fluffy rice soaks up those delicious pan juices.
- Roasted vegetables – Brussels sprouts, broccoli, asparagus, or root vegetables roasted until caramelized pair wonderfully. Add a simple protein on the side for a complete meal.
- Grilled shrimp – Quick-cooking and elegant, grilled shrimp with garlic butter rice feels restaurant-quality but takes just 20 minutes total.
- Bean-based dishes – Black beans, refried beans, or any cooked legume served alongside this rice creates a complete plant-based protein combination.
Substitutes
- Brown rice instead of white rice – Brown rice takes longer to cook (about 25-30 minutes) and requires slightly more broth (use 3 cups instead of 2 ½). The flavor is nuttier and the texture is chewier, which some families prefer for extra fiber and nutrients.
- Jasmine or basmati rice – Both aromatic rices work beautifully and cook in the same time as white rice. Jasmine rice is slightly stickier and more delicate-tasting, while basmati is fluffier and slightly more perfumed. Both are wonderful.
- Vegetable or low-sodium beef broth – Either works perfectly if you don’t have chicken broth on hand. Beef broth creates a richer, deeper flavor. Vegetable broth is lighter but still delicious.
- Ghee instead of butter – If you prefer, ghee (clarified butter) works beautifully and adds a slightly nutty flavor. Use the same amount.
- Olive oil instead of neutral oil – Extra-virgin olive oil changes the flavor profile slightly, making it more Mediterranean-leaning. Use good quality olive oil if you choose this option, and reduce to 2 tablespoons since olive oil is more flavorful than neutral oils.
- Shallots instead of garlic – For a milder, sweeter onion flavor, replace the garlic with finely sliced shallots. Use the same amounts. The cooking time is the same.
- Scallions or chives instead of green onions – Technically green onions and scallions are the same thing, but if you only have chives, they work too—just add them right at the end since they’re more delicate.

Butter Rice Recipe
Ingredients
Method
- Pour your neutral oil into a large saucepan and set the heat to medium. Add your finely sliced garlic cloves, stirring constantly with a wooden spoon or heat-resistant spatula. This is not a step to ignore—constant movement is essential because garlic goes from golden to burnt in seconds. Watch the color carefully. You're looking for a light golden color with just a hint of amber. This should take about 3 to 4 minutes depending on your stove. The moment it starts to smell absolutely amazing and the garlic pieces look golden, immediately remove them with a slotted spoon and transfer to a paper towel-lined plate. The residual heat will continue cooking them slightly, so don't wait for them to look perfectly brown in the pan—they'll get there on the paper towel. This crispy garlic is liquid gold in your kitchen. These pieces become the flavor foundation and a beautiful garnish. Once they cool completely, they'll be perfectly crunchy.
- Pour off most of the oil from the saucepan, leaving just a light coating at the bottom. Return the saucepan to medium heat and add 2 tablespoons of butter. Once the butter melts and foams slightly (you'll see it bubble gently), add your minced garlic immediately. Stir constantly for about 1 ½ minutes, until the minced garlic turns a light golden color and the entire mixture smells intensely garlicky and warm. This second garlic layer is crucial because minced garlic infuses differently than sliced garlic. It creates a subtle, complex flavor throughout the rice rather than just a crispy garnish. The moment you see that light golden color, you're ready to move forward. This is where most of your rice flavor comes from, so don't skip this step or rush it.
- Add your rice to the garlic-butter mixture and stir well, making sure every grain gets coated in that beautiful golden oil and butter. This step is called "toasting" the rice, and it's what prevents it from becoming mushy. Stir constantly for about 2 minutes until the rice looks slightly translucent at the edges and smells toasted and nutty. You'll notice the rice changes appearance—the grains become more separated and the mixture smells like you're about to make something delicious. That's exactly what should happen.
- Pour in your chicken broth carefully—it will bubble and steam slightly as it hits the hot pan, which is completely normal. Stir once to combine, then place a lid on your saucepan. The lid is important because it traps steam and helps cook the rice evenly. Bring the mixture to a boil over medium heat, watching until you see steam escaping and hearing small bubbling sounds. The moment it reaches a boil, immediately turn your heat down to medium-low. This lower temperature prevents the rice from cooking too fast on the bottom while staying dry on top.
- Keep the lid on your saucepan and let the rice cook undisturbed for 12 to 15 minutes. Resist the urge to lift the lid and stir—I know it's tempting, but that releases the steam that's cooking your rice perfectly. After about 12 minutes, tilt the saucepan gently to check if the liquid has been absorbed. If you see any broth pooling at the bottom, give it another minute or two. The rice is done when all the liquid is gone and the grains look fluffy and separate.
- Remove the saucepan from heat but leave the lid on. Let it rest for exactly 10 minutes. I know this seems like wasted time, but this resting period is when the magic happens. The residual steam continues to gently cook the rice, and the grains become fluffy rather than clumpy. Use this time to set your table, finish another dish, or take a breath. When you come back, your rice will be perfectly cooked.
- After resting, remove the lid and fluff the rice gently with a fork, breaking up any clumps and loosening the grains. Transfer to a serving bowl, then stir through the remaining 2 tablespoons of butter so it melts into the warm rice. Top with your sliced green onions and those gorgeous crispy garlic pieces you made in Step 1. Finish with a pinch of sea salt and white pepper to taste. If you're using the optional garlic powder and parsley, now's the time to add them for an extra-special presentation. Serve immediately while everything is warm and the butter is still melting into each grain.
Notes
FAQs
Why is my rice mushy instead of fluffy?
Mushy rice usually means too much liquid or cooking for too long. Make sure you’re measuring your broth accurately (use a liquid measuring cup for liquids), and don’t cook past 15 minutes. The resting period helps, but it doesn’t fix rice that’s been overcooked. Starting fresh takes just 20 minutes, so it’s worth remaking if you’re learning this technique. Also, make sure you’re using long-grain white rice—short-grain rice is naturally stickier and will seem mushier even when cooked perfectly.
Can I make this in a rice cooker?
Yes, absolutely! Follow Steps 1-3 to make your garlic-butter mixture in a saucepan, then transfer the coated rice to your rice cooker. Add the broth and cook on the regular setting. The timing depends on your rice cooker model, but most will finish in about 15 minutes. Skip the stovetop cooking and resting period—your rice cooker does that work for you. The crispy garlic garnish is even more important when using a rice cooker, since it adds the texture that the stovetop method naturally creates.
Is this recipe appropriate for babies starting solids?
Yes, with modifications. For babies 6-8 months old starting on solids, plain white rice prepared this way (without excess salt) is perfect. Cook the rice with low-sodium broth or water, skip the added salt in the seasoning step, and skip the crispy garlic garnish since those pieces are choking hazards. The butter is fine in small amounts. For older toddlers (12+ months) who can handle slightly more texture, the whole recipe works beautifully—just watch sodium content if you’re concerned about salt intake.
What’s the difference between this method and regular boiled rice?
The key difference is flavor development. Boiled rice is cooked in lots of water that’s drained away, taking flavor with it. This method toasts the rice in oil and butter first, then cooks it in broth rather than plain water. Every step builds flavor into the grain itself. Additionally, the garlic infusion—both the crispy pieces and the minced garlic cooked in butter—creates a depth that plain boiled rice simply can’t achieve. It’s the difference between functional and delicious, and the method takes barely more time.
Can I use instant or minute rice instead?
Technically yes, but I don’t recommend it. Instant rice is pre-cooked and then dried, which affects texture. It tends to become mushy very quickly when cooked with liquid again. If you absolutely must use instant rice, reduce cooking time to 5-7 minutes maximum and use slightly less broth. The result won’t be quite as good, but it will still taste better than plain instant rice. For best results, use regular long-grain white rice—it’s inexpensive, cooks in the same time, and creates much better texture.
More Recipes You’ll Love
- Cincinnati Chili Recipe – A hearty, flavor-packed chili that’s perfect served over rice, especially this garlic butter version
- Best Mac And Cheese Recipe – Another comforting, butter-forward dish that uses similar cooking techniques to build creaminess
- Pizza Bread Recipe – A quick, cheesy side that pairs beautifully with Asian-inspired meals served over this rice
Final Thoughts
This garlic butter rice has been in my kitchen rotation for over a decade, and it keeps showing up for good reason. It’s the kind of side dish that makes your family dinner feel more intentional, more restaurant-quality, more special—without adding stress to your evening.
The beauty of this recipe is that it works within your real life. It doesn’t require fancy ingredients or complicated techniques. It just requires attention and a little patience, which—let’s be honest—is sometimes the hardest ingredient to find in a busy household. But I promise you, those fifteen minutes of cooking and ten minutes of resting will reward you with rice so good that your family notices the difference.
Start with this recipe exactly as written. Once you’ve made it a few times and understand how it works, you’ll find yourself adapting it for the seasons, for different proteins, for the specific tastes of your family. That’s when cooking becomes less of a task and more of a joy.
Happy Cooking!
META DESCRIPTION: Learn how to make restaurant-quality garlic butter rice at home in just 30 minutes. Simple ingredients, foolproof technique, perfect every time.