This post contains affiliate links. As an Amazon Associate I earn from qualifying purchases.
The classic cheesy baked broccoli dish is absolutely delicious—but let’s be honest, most versions are loaded with heavy cream, butter, and full-fat cheese that weighs you down. I needed something that kept all that gooey, crispy goodness my kids actually wanted to eat, while cutting the unnecessary fat and calories. After years of working with families in Chicago juggling packed schedules, I’ve learned that the best healthy recipes aren’t the ones that feel like punishment. They’re the ones your kids ask for seconds of. That’s exactly what this recipe delivers. Paired with hearty mains like my Best Mac and Cheese Recipe or Best Meatloaf Crock Pot Recipe, this broccoli becomes the side dish that actually disappears from the plate.
Healthy Cheesy Baked Broccoli Recipe That Tastes Better Than the Original
I’ll never forget the Tuesday night when my youngest pushed away a bowl of traditional creamed broccoli casserole. I’d spent time on it, and she wouldn’t touch it. That’s when I realized: healthy doesn’t mean boring, and it doesn’t mean sacrificing the flavors kids love. I started experimenting with roasting the broccoli first to deepen its natural sweetness, then topping it with a lighter cheese-and-panko mixture that gets crispy instead of soggy. The result? A dish that’s lower in saturated fat, higher in fiber, and actually gets eaten. As a registered dietitian, I know the numbers matter—but as a mom, I know that a recipe only works if it actually makes it to the dinner table.
What Changed and Why It’s Better
When you compare this healthy version to traditional creamy broccoli casseroles, the differences are significant. A typical heavy version runs 280-320 calories per serving with 18-22 grams of fat, mostly saturated. My version delivers the same satisfaction at 145-160 calories with just 8-9 grams of total fat and only 2.5 grams of saturated fat. You’re not eating less—you’re eating smarter.
- Full-fat cheddar and heavy cream -> Reduced-fat cheddar (2% milk-based) with a light olive oil coating: You keep the cheese flavor that makes this dish crave-worthy, but cut saturated fat by more than half. The olive oil carries flavors beautifully and adds heart-healthy monounsaturated fats instead.
- Butter and breadcrumb topping -> Panko breadcrumbs with a spritz of cooking spray: This swap cuts another 3-4 grams of saturated fat per serving while actually creating a crispier texture. Panko is lighter and airier than regular breadcrumbs, so it browns faster and stays crunchy longer.
- Raw or boiled broccoli base -> Roasted broccoli first, then topped: Roasting caramelizes the natural sugars in broccoli, making it sweeter and more appealing to kids. You’re building flavor at the vegetable level, not masking it with cream sauce.
The Nutritional Wins in This Recipe
Every ingredient choice in this recipe serves a purpose beyond just tasting good. According to USDA nutrition data, one cup of raw broccoli contains 3.7 grams of dietary fiber and over 100 milligrams of vitamin C. That fiber keeps your family’s digestive system happy and promotes steady blood sugar levels—which means fewer energy crashes before dinner. The reduced-fat cheddar still delivers around 200 milligrams of calcium per ounce, essential for growing bones in kids and bone density in adults. The olive oil adds polyphenols and monounsaturated fats linked to heart health and reduced inflammation. This isn’t a side dish; it’s nourishment that tastes indulgent.
- Broccoli’s fiber and glucosinolates – Fresh broccoli florets contain compounds being researched for cancer-protective properties. The fiber (3.7g per cup) supports digestive health and feeds beneficial gut bacteria that strengthen immunity.
- Reduced-fat cheddar’s calcium and protein – One ounce provides 200mg calcium (20% of daily needs for kids) and 7 grams of protein, supporting bone development and muscle maintenance without excessive saturated fat.
- Olive oil’s monounsaturated fats – These fats support heart health and help your body absorb fat-soluble vitamins like A, D, E, and K from the broccoli itself, making nutrients more bioavailable.
The Ingredients—Every Swap Explained
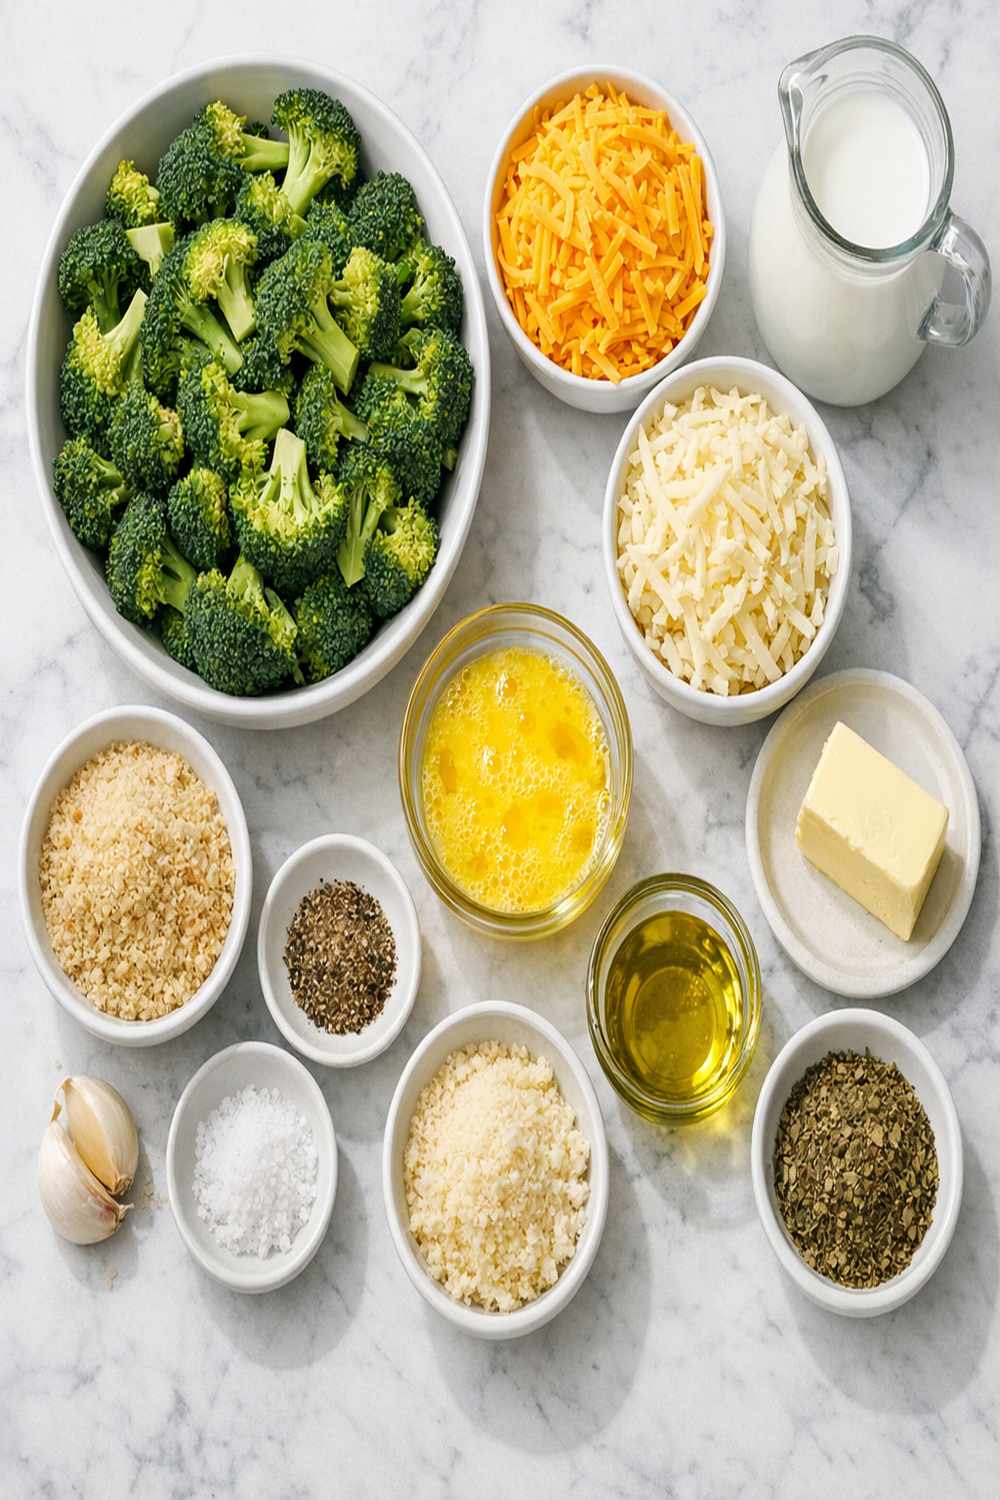
I’ve chosen each ingredient deliberately. Nothing here is a deprivation swap or a “health ingredient” that tastes like cardboard. Everything serves a real purpose: creating a dish that’s faster to make, easier on your body, and actually delicious enough that your family asks for seconds.
- ⅛ cup panko breadcrumbs (the larger flakes create a crispier texture than regular breadcrumbs and brown more evenly)
- 1 teaspoon garlic powder (optional but recommended—adds savory depth so kids taste “cheese” more than “vegetable”)
- 2 ounces reduced-fat cheddar cheese, finely shredded (I use 2% reduced fat varieties, which melt beautifully without the greasiness of full-fat)
- 12 ounces fresh broccoli florets (choose florets roughly the same size so they roast evenly and finish at the same time)
- ½ teaspoon black pepper (freshly ground pepper has more flavor than pre-ground, so your dish tastes cheesier even with less cheese)
- 1½ tablespoons extra virgin olive oil (the better quality oil you use, the better your final dish tastes—this is worth splurging on slightly)
- ½ teaspoon onion powder (optional but recommended—another layer of umami that tricks young palates into loving vegetables)
- Light vegetable oil cooking spray (this is just for a final crisp—one 1-second spritz makes a huge difference in texture without adding significant fat)
- ¼ teaspoon kosher salt (kosher salt has larger crystals than table salt, so a little goes further—you actually use less sodium this way)
Serves: 4 as a generous side dish, or 6 as a smaller vegetable serving
How to Make Healthy Cheesy Baked Broccoli Recipe Without Feeling Like You’re Missing Out
This recipe takes 15 minutes total from prep to table. I’ve timed it dozens of times with my own kids underfoot. The technique is simple because healthy cooking doesn’t need to be complicated—it needs to fit into real life. When you roast the broccoli first, you’re building flavor at the foundation. The panko-cheese topping then adds the indulgent texture everyone craves. It’s nourishment that feels like a treat.
Step 1: Heat Your Oven and Prep Your Pan
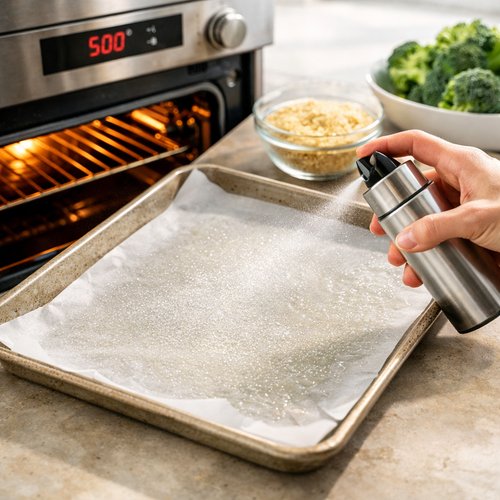
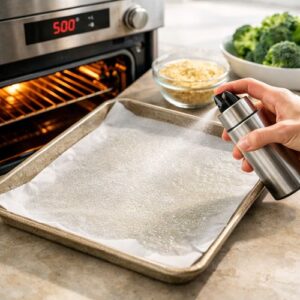
Turn your oven to 500°F. This high heat is intentional—it caramelizes the broccoli’s natural sugars quickly and creates that crispy panko topping without drying out the vegetable underneath. Line a large rimmed baking sheet with parchment paper or aluminum foil. Parchment paper is my preference because it’s easier to clean and there’s emerging research suggesting we should minimize aluminum exposure in cooking. Either way, the lining prevents sticking and makes cleanup—the part of cooking parents actually dread—take 30 seconds instead of 10 minutes.
Step 2: Coat Your Broccoli with Oil and Seasonings
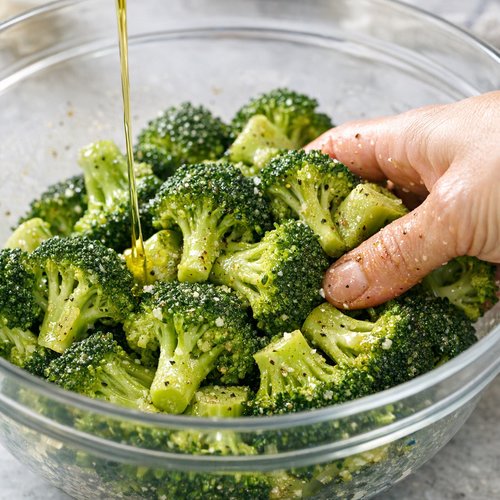
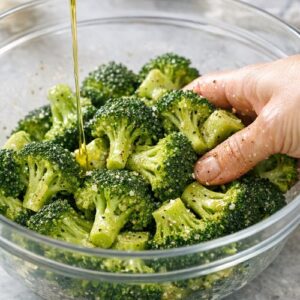
Place your broccoli florets in a large mixing bowl. Drizzle with the 1½ tablespoons of olive oil. Here’s the professional technique: use your hands to toss the broccoli, making sure every single floret gets coated with oil. This matters because oil carries flavor and helps browning happen evenly. If some florets are dry, they’ll steam instead of roast. Sprinkle the black pepper and kosher salt over the oiled broccoli, then toss again. At this stage, I like to add the optional garlic and onion powder—they bloom during roasting and create that savory flavor that makes kids think they’re eating something indulgent rather than a vegetable.
Step 3: Roast the Broccoli Alone First
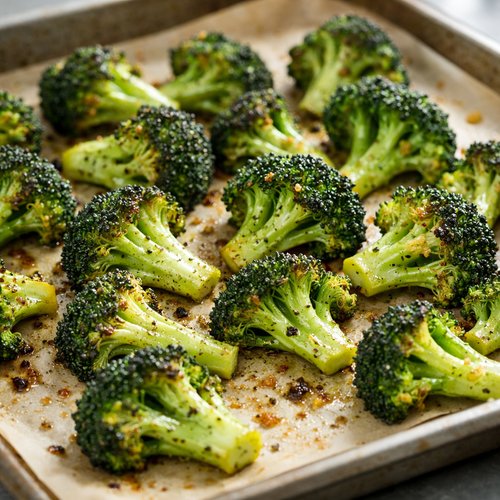
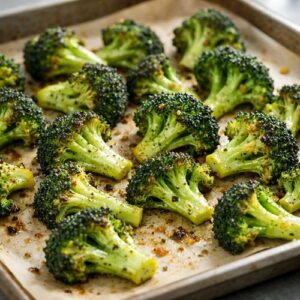
Spread the seasoned broccoli in a single layer on your prepared baking sheet. This first roasting stage is crucial—you’re not just cooking the broccoli, you’re building caramelization and deepening its natural sweetness. Bake for 8 minutes at 500°F. You’ll notice the florets turning golden at the edges and the kitchen smelling amazing. That aroma is the Maillard reaction—the chemical process that creates complex flavors and brown color. It’s why roasted broccoli tastes nothing like steamed broccoli.
Step 4: Make Your Cheese-Panko Topping
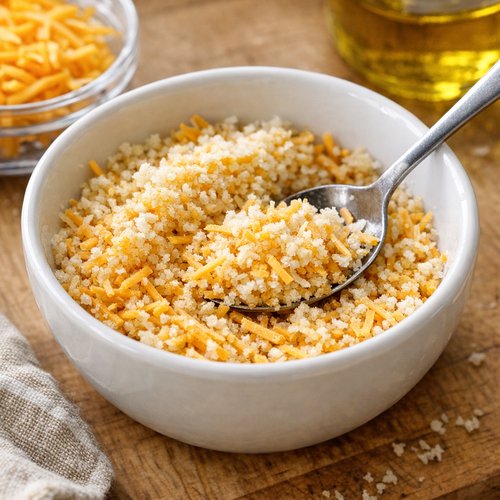
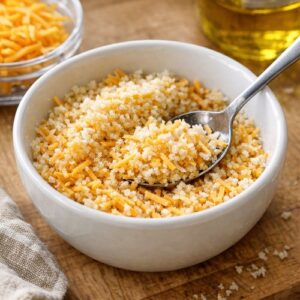
While your broccoli roasts those 8 minutes, grab a small bowl and combine the 2 ounces of finely shredded reduced-fat cheddar with the ⅛ cup panko breadcrumbs. Stir them together with a fork. The finer you shred your cheese, the more evenly it’ll distribute and melt. I use the microplane side of my grater rather than the large-hole side—it ensures the cheese melts completely into the panko instead of clumping. This mixture is your crispy, cheesy topping that makes this dish taste indulgent while keeping it light.
Step 5: Top and Final Bake
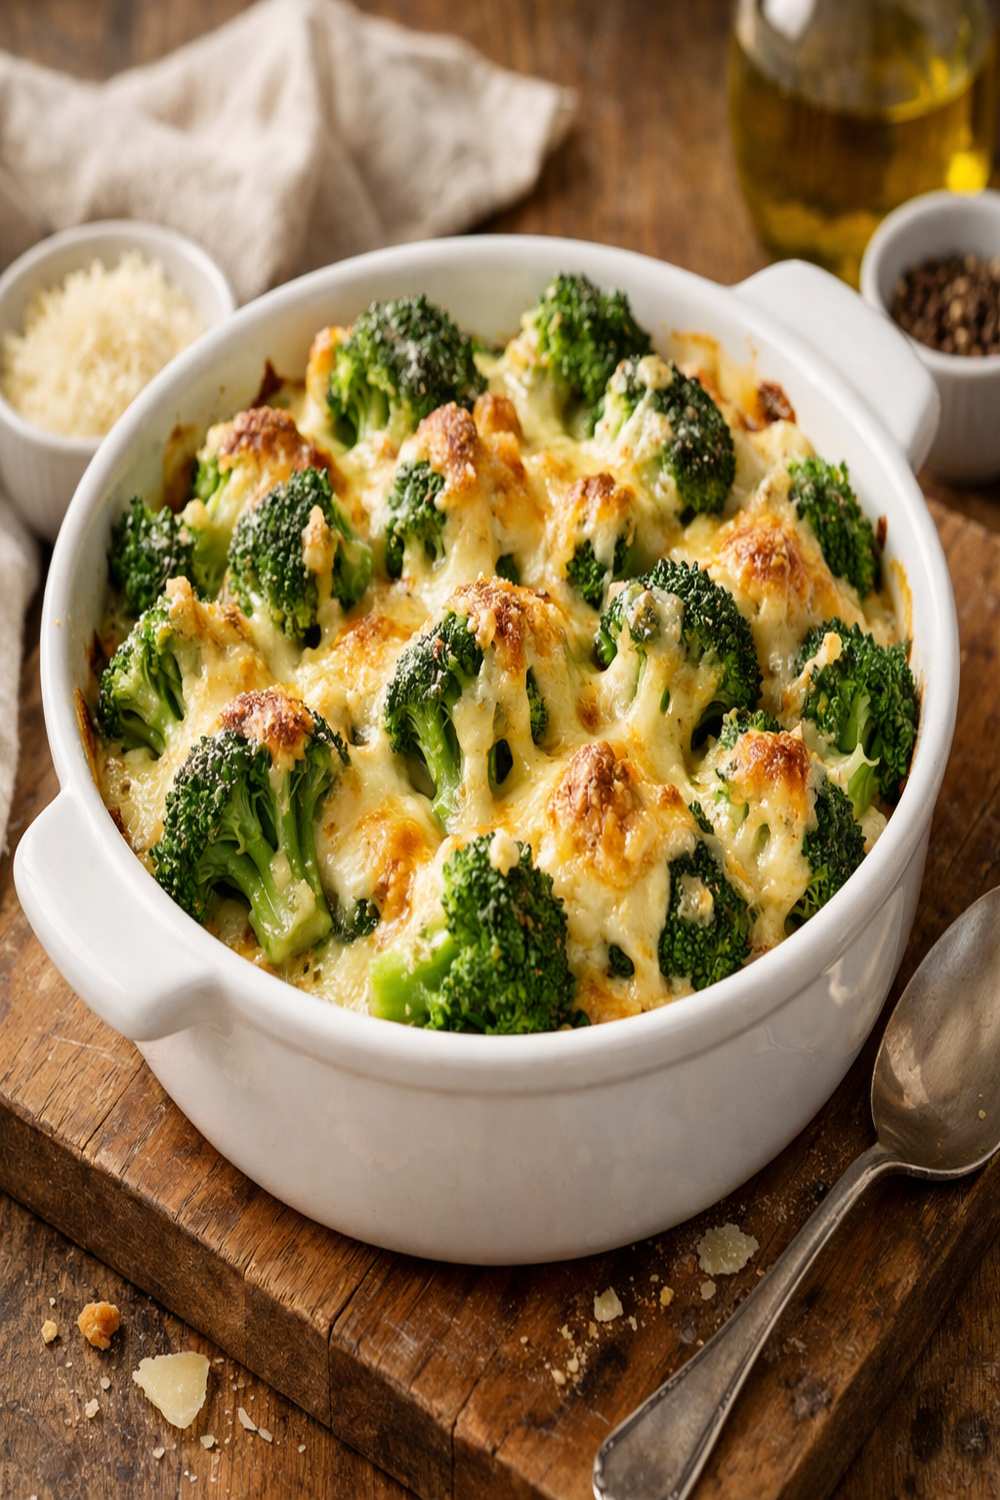
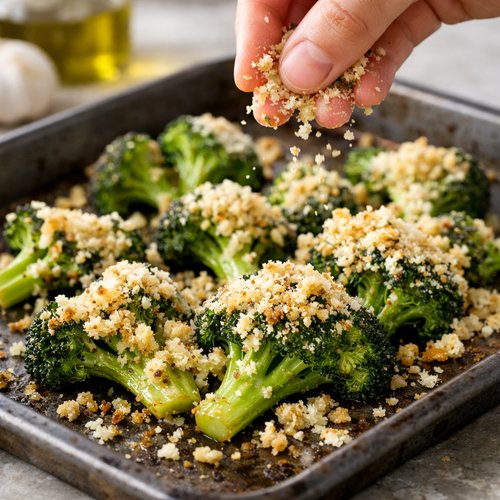
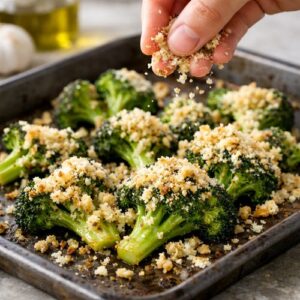
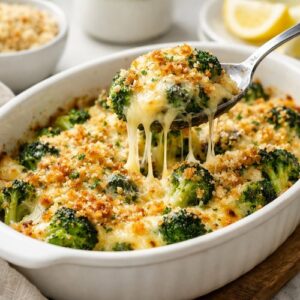
Remove the baking sheet from the oven. Sprinkle the cheese-panko mixture evenly over the roasted broccoli. Now comes the secret step: give it a quick 1-second spritz of vegetable oil cooking spray. This light coating helps the panko brown and crisp without adding much fat. Immediately return the baking sheet to the oven for 3-5 minutes. Watch it during this second bake—panko browns quickly, and you want it golden and crispy, not dark brown. The cheese will melt and the panko will turn golden, creating a crunchy layer that contrasts perfectly with the tender-roasted broccoli underneath.
Step 6: Serve Immediately
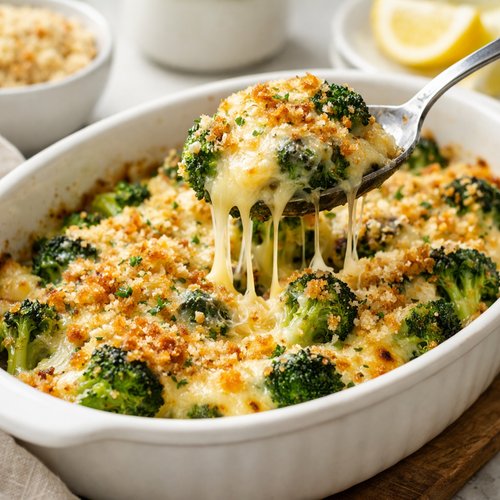
This dish is best served straight from the oven while the cheese is still melty and the panko is at peak crispiness. If you prefer serving from a casserole dish instead (which some families find easier for family-style dinners), transfer your roasted broccoli to an oven-safe casserole dish after step 3, top with the cheese-panko mixture, spritz lightly, and bake for 3-5 minutes. The timing remains the same. Make sure your casserole dish is rated for 500°F—most modern ceramic and glass dishes are, but vintage ones sometimes aren’t.
Expert’s Nutritional Tip: Why Roasting Changes Everything
After a decade of helping families improve their nutrition, I’ve learned that the cooking method matters as much as the ingredients. When you roast vegetables instead of boiling or steaming them, you’re doing more than just changing flavor—you’re changing nutrient bioavailability. Broccoli contains fat-soluble vitamins like K and A that your body absorbs better in the presence of fat. The olive oil in this recipe isn’t just for taste; it’s actively helping your family absorb more of the vegetable’s nutritional benefits. Additionally, roasting reduces the sulfur compounds that can taste bitter or unpleasant to kids, while concentrating the natural sweetness. This is why roasted broccoli converts broccoli-avoiders into broccoli-lovers.
How to Make It Even Healthier
- Add nutritional yeast – Mix 1 tablespoon of nutritional yeast into your cheese-panko topping. This adds a cheesy, umami flavor while boosting B vitamins and making the dish feel even more indulgent. It’s especially great if you’re aiming for higher nutrient density.
- Mix in ground flaxseed – Add 1 tablespoon of ground flaxseed to your panko mixture for an extra boost of omega-3 fatty acids and fiber. It blends invisibly and adds nutritional value without changing the taste.
- Use half Gruyère, half reduced-fat cheddar – Gruyère has a more complex flavor, so using half the amount of cheese with half being Gruyère actually tastes cheesier while reducing total cheese and fat further.
- Toast your panko first – Before mixing with cheese, lightly toast the panko in a dry skillet for 1-2 minutes. This develops its nutty flavor and means you can use slightly less cheese and still feel satisfied.
Dietary Modifications
For Gluten-Free Diets: Substitute regular panko with certified gluten-free panko breadcrumbs. The texture and cooking time remain identical. Brands like Udi’s and Schar make excellent versions that crisp beautifully. Everything else in this recipe is naturally gluten-free.
For Dairy-Free Diets: Replace the reduced-fat cheddar with a dairy-free cheese alternative. I’ve had success with brands that melt well (like Miyoko’s or Cashew-based cheeses). Use the same amount, but reduce cooking time slightly to 2-4 minutes in the second bake, as dairy-free cheeses sometimes brown faster. Alternatively, skip the cheese entirely and increase panko to ¼ cup, mixed with 1 tablespoon nutritional yeast and 2 teaspoons of extra virgin olive oil. Toast this mixture in a skillet first, then sprinkle on the roasted broccoli for a crispy, cheesy flavor without dairy.
For Keto Diets: This recipe is already naturally keto-friendly. Each serving contains only 6-8 grams of net carbs. The 12 ounces of broccoli provides the bulk of carbs, but they’re fiber-rich and won’t spike blood sugar. Serve as-is, or pair with a protein like Best Sloppy Joes Recipe made with ground beef to boost fat content.
For Low-Sodium Diets: Omit the kosher salt entirely and use salt-free seasoning blends instead. The garlic powder and onion powder provide plenty of flavor without sodium. Choose a salt-free breadcrumb option if available, or check your panko label for sodium content. This modification reduces sodium from roughly 210mg per serving to under 50mg without sacrificing flavor.
For Vegan Diets: Use the dairy-free modification above with nutritional yeast mixed into the panko topping. Everything else is already plant-based. This version actually gets more savory and deeply flavored than the dairy version.
Can I Store Cheesy Baked Broccoli Recipe?
This is where meal prep magic happens. I make triple batches on Sundays because this dish stores beautifully and reheats perfectly.
In the Refrigerator: Store cooled broccoli in an airtight container for up to 4 days. The panko topping will soften slightly, but the broccoli itself stays tender and flavorful. This is perfect for packed lunches.
To Reheat: I recommend reheating in a 375°F oven for 8-10 minutes until warmed through. This revives the crispiness better than the microwave, though microwaving for 60-90 seconds works fine for quick lunches. If the panko has gotten too soft, sprinkle a tiny bit of fresh panko on top before reheating and give it a light spray of cooking spray for renewed crispiness.
In the Freezer: You can freeze this dish unbaked (up to 2 months) or baked (up to 3 months). For unbaked: assemble everything except the final spray, wrap tightly in plastic wrap and foil, then bake from frozen at 500°F for 12-15 minutes. For pre-baked: cool completely, store in an airtight container, and reheat at 375°F for 12-15 minutes.
Make-Ahead Guide: I prep my broccoli and seasonings the night before in the mixing bowl, cover it, and refrigerate. The next day, I roast it and top it fresh. Alternatively, I roast the broccoli completely (all 11-13 minutes) the day before, refrigerate it, then add the panko topping fresh and bake for just 3-4 minutes before serving. This approach means you’re only using your oven once the day-of.
Common Mistakes to Avoid
Mistake 1: Skipping the First Roasting Stage – I see families try to speed this up by topping raw broccoli and baking it all at once. The result is steamed broccoli with a crispy top, not roasted broccoli. That 8-minute head start is where all the flavor happens. Don’t skip it.
Mistake 2: Not Coating Evenly with Oil – Dry florets steam instead of roast. Use your hands, not a fork or spoon. You need to feel the oil coating every piece. This takes 30 seconds and makes the difference between good and exceptional.
Mistake 3: Overspreading on the Pan – Crowding the baking sheet creates steam. If your florets are touching or stacked, you won’t get that beautiful caramelization. Use a large rimmed baking sheet, not a small one. If you’re doubling the recipe, use two pans.
Mistake 4: Forgetting the Final Cooking Spray – That 1-second spritz is what makes the panko crispy instead of just brown. It’s not added fat; it’s technique. Don’t skip it thinking you’re saving calories—it literally costs you one calorie and changes the entire texture.
Seasonal Variations
Spring/Summer Version: Add fresh herbs like chives or parsley mixed into the panko topping, or finish with a squeeze of fresh lemon juice right after coming out of the oven. The brightness complements the broccoli beautifully and feels lighter.
Fall/Winter Version: Mix smoked paprika (½ teaspoon) into the panko topping for a deeper, smokier flavor that pairs beautifully with autumn comfort foods. This works especially well paired with Baked Ziti Sausage Recipe.
Year-Round Variation with Other Vegetables: This technique works identically with cauliflower, brussels sprouts, or a mix of both. Cooking time remains 8 minutes roasting + 3-5 minutes topped, though very large brussels sprouts might need 10 minutes in the first stage.
Nutrition Information
Based on USDA nutrition database standards, here’s the breakdown per serving (assumes 4 servings):
- Calories: 145-160 (compared to 280-320 in traditional creamed versions)
- Total Fat: 8-9g (compared to 18-22g traditionally)
- Saturated Fat: 2.5g (compared to 10-12g traditionally)
- Protein: 7-8g
- Carbohydrates: 11-12g
- Dietary Fiber: 2.5-3g
- Vitamin C: 65mg (108% of daily value)
- Vitamin K: 92 micrograms (115% of daily value)
- Calcium: 180-200mg
- Sodium: 210mg
What does this mean in real terms? One serving provides over 100% of your daily vitamin C, supporting immune function and collagen production. The vitamin K content is exceptional—a single serving provides more than your body needs for proper blood clotting and bone metabolism. The 2.5-3 grams of fiber aids digestive health and promotes the growth of beneficial gut bacteria. You’re getting a meal component that’s genuinely nourishing, not just filling. The fact that it’s roughly half the calories and fat of traditional versions means you can serve larger portions guilt-free, which makes kids happier and you more likely to include vegetables at dinner.
What Can I Serve With Cheesy Baked Broccoli Recipe?
This broccoli is versatile enough to complement nearly any protein. I use it as my go-to side for weeknight chicken, beef, and fish. Here are my favorite pairings from a nutritional synergy perspective:
- Grilled chicken breast – The lean protein pairs beautifully with the crispy, cheesy broccoli. Together, you’re getting a complete amino acid profile plus exceptional micronutrients. The broccoli’s vitamin K supports bone health, essential when eating high-protein diets.
- Ground beef tacos or burgers – The richness of beef is balanced by the broccoli’s freshness and fiber content. The fiber aids digestion of the heavier protein.
- Baked salmon or white fish – The omega-3 fatty acids in fish work synergistically with the broccoli’s glucosinolates for maximum anti-inflammatory benefits. This is a powerhouse combination for heart and brain health.
- Turkey meatballs – Similar to chicken, turkey is lean and benefits from the nutrient density the broccoli provides. Kids often accept turkey more easily when it’s served with a familiar vegetable they actually like.
- Baked tofu or tempeh – For plant-based meals, the broccoli adds the calcium and vitamin K that plant-based proteins sometimes lack in quantity. Together, you’re creating a nutritionally complete meal.
- Pasta dishes – Toss this broccoli into Best Mac and Cheese Recipe for added vegetables, or serve alongside pasta with marinara sauce. The vegetables boost fiber and reduce the glycemic impact of the pasta.

Cheesy Baked Broccoli Recipe
Ingredients
Method
- Turn your oven to 500°F. This high heat is intentional—it caramelizes the broccoli's natural sugars quickly and creates that crispy panko topping without drying out the vegetable underneath. Line a large rimmed baking sheet with parchment paper or aluminum foil. Parchment paper is my preference because it's easier to clean and there's emerging research suggesting we should minimize aluminum exposure in cooking. Either way, the lining prevents sticking and makes cleanup—the part of cooking parents actually dread—take 30 seconds instead of 10 minutes.
- Place your broccoli florets in a large mixing bowl. Drizzle with the 1½ tablespoons of olive oil. Here's the professional technique: use your hands to toss the broccoli, making sure every single floret gets coated with oil. This matters because oil carries flavor and helps browning happen evenly. If some florets are dry, they'll steam instead of roast. Sprinkle the black pepper and kosher salt over the oiled broccoli, then toss again. At this stage, I like to add the optional garlic and onion powder—they bloom during roasting and create that savory flavor that makes kids think they're eating something indulgent rather than a vegetable.
- Spread the seasoned broccoli in a single layer on your prepared baking sheet. This first roasting stage is crucial—you're not just cooking the broccoli, you're building caramelization and deepening its natural sweetness. Bake for 8 minutes at 500°F. You'll notice the florets turning golden at the edges and the kitchen smelling amazing. That aroma is the Maillard reaction—the chemical process that creates complex flavors and brown color. It's why roasted broccoli tastes nothing like steamed broccoli.
- While your broccoli roasts those 8 minutes, grab a small bowl and combine the 2 ounces of finely shredded reduced-fat cheddar with the ⅛ cup panko breadcrumbs. Stir them together with a fork. The finer you shred your cheese, the more evenly it'll distribute and melt. I use the microplane side of my grater rather than the large-hole side—it ensures the cheese melts completely into the panko instead of clumping. This mixture is your crispy, cheesy topping that makes this dish taste indulgent while keeping it light.
- Remove the baking sheet from the oven. Sprinkle the cheese-panko mixture evenly over the roasted broccoli. Now comes the secret step: give it a quick 1-second spritz of vegetable oil cooking spray. This light coating helps the panko brown and crisp without adding much fat. Immediately return the baking sheet to the oven for 3-5 minutes. Watch it during this second bake—panko browns quickly, and you want it golden and crispy, not dark brown. The cheese will melt and the panko will turn golden, creating a crunchy layer that contrasts perfectly with the tender-roasted broccoli underneath.
- This dish is best served straight from the oven while the cheese is still melty and the panko is at peak crispiness. If you prefer serving from a casserole dish instead (which some families find easier for family-style dinners), transfer your roasted broccoli to an oven-safe casserole dish after step 3, top with the cheese-panko mixture, spritz lightly, and bake for 3-5 minutes. The timing remains the same. Make sure your casserole dish is rated for 500°F—most modern ceramic and glass dishes are, but vintage ones sometimes aren't.
FAQs
Can I make this recipe without the panko breadcrumb topping?
Absolutely. Simply roast the broccoli with the olive oil, salt, and pepper for the full 11-13 minutes (skip the 8-minute first stage and the 3-5 minute second stage). It won’t have that crispy texture, but it’s delicious as a simple roasted side. You’ll cut another 30-40 calories per serving. Some families prefer this version; others find the panko topping is what makes kids actually eat it. I’d suggest trying both and seeing which works for your family.
Is reduced-fat cheddar actually as good as full-fat?
I was skeptical too until I started testing. Reduced-fat cheddar has slightly more moisture and less concentrated flavor than full-fat, so you notice it less in creamy applications. But in a baked dish where the cheese gets melted and toasted, the flavor is actually more pronounced because you’re caramelizing the milk solids. The taste difference is honestly minimal, but the fat and calorie reduction is significant. That said, if you prefer full-fat and want to adjust, use 1.5 ounces full-fat cheddar instead of 2 ounces reduced-fat. The nutrition will be similar overall.
Can I prepare this dish completely ahead and bake it later?
Yes, but I recommend assembling it no more than 2-3 hours ahead. Assemble everything on your baking sheet, cover loosely with plastic wrap (so the plastic doesn’t stick to the panko), and refrigerate. When you’re ready to bake, give it just a light spray and bake for 3-5 minutes. The broccoli will have cooled slightly, so it might take a minute or two longer to heat through. Don’t let it sit more than 3-4 hours assembled because the moisture from the broccoli can soften the panko topping.
My kids won’t eat broccoli no matter what. Will this recipe change that?
Maybe, maybe not—and that’s okay. This recipe converts a lot of broccoli-skeptical kids, particularly because it hits two things kids love: melted cheese and crispy texture. But if your child has a genuine texture aversion or strong dislike, no recipe will solve that overnight. I’d suggest offering it alongside something your child does eat, and trying it again in a few months. Taste preferences genuinely change. In my practice, I’ve seen kids reject broccoli at age 5 and request it at age 8. The key is offering it without pressure. Make it available, eat it yourself with enthusiasm, and let them develop curiosity in their own time.
What if my oven runs hot or cold?
Most home ovens vary by 25-50 degrees from the dial temperature. If your oven runs hot, you might finish this recipe in 7 minutes roasting + 2-3 minutes topped instead of 8 + 3-5. If it runs cool, you might need 9 minutes + 5-6 minutes. The visual cue is more important than the time: you want the broccoli florets golden at the edges and the panko topping golden brown. I recommend baking at 475°F instead of 500°F if you have a notorious hot oven; the broccoli will take slightly longer but you’ll have better control and less risk of burning.
Can I double or triple this recipe?
Yes! Doubling is perfectly fine—just use two large baking sheets so the broccoli has space and doesn’t steam. Tripling works too, but you’ll need three pans or stagger your baking. Everything else remains the same: 8 minutes for the first roast, 3-5 minutes for the topped finish. I make triple batches every Sunday for meal prep, and the timing is consistent across larger quantities as long as you don’t crowd the pans.
More Healthy Recipes You’ll Love
- Cincinnati Chili Recipe – A protein-rich main dish that pairs perfectly with this broccoli side for a complete, nourishing meal
- Pizza Bread Recipe – A kid-approved carb that works beautifully alongside this vegetable for balanced plates
- Frozen Bellini Recipe – A refreshing, lighter dessert option to finish a meal centered around this nutrient-dense broccoli
There’s something deeply satisfying about watching your family actually request vegetables at dinner. That’s when you know you’ve cracked the code. This cheesy baked broccoli recipe isn’t about tricking kids into eating healthy (though it does that beautifully). It’s about understanding that nourishing food should taste like a treat, that healthy eating is pleasure, not punishment, and that the best recipe is the one your family actually wants to eat. After a decade of helping Chicago families navigate hectic schedules and picky eaters, I can tell you: this dish works. Your broccoli will disappear from the plate. Your kids might actually ask for seconds. And you’ll feel good about what they’re eating. That’s all any of us are really aiming for as parents, isn’t it?
Happy Cooking!